Create an external location
Introduction
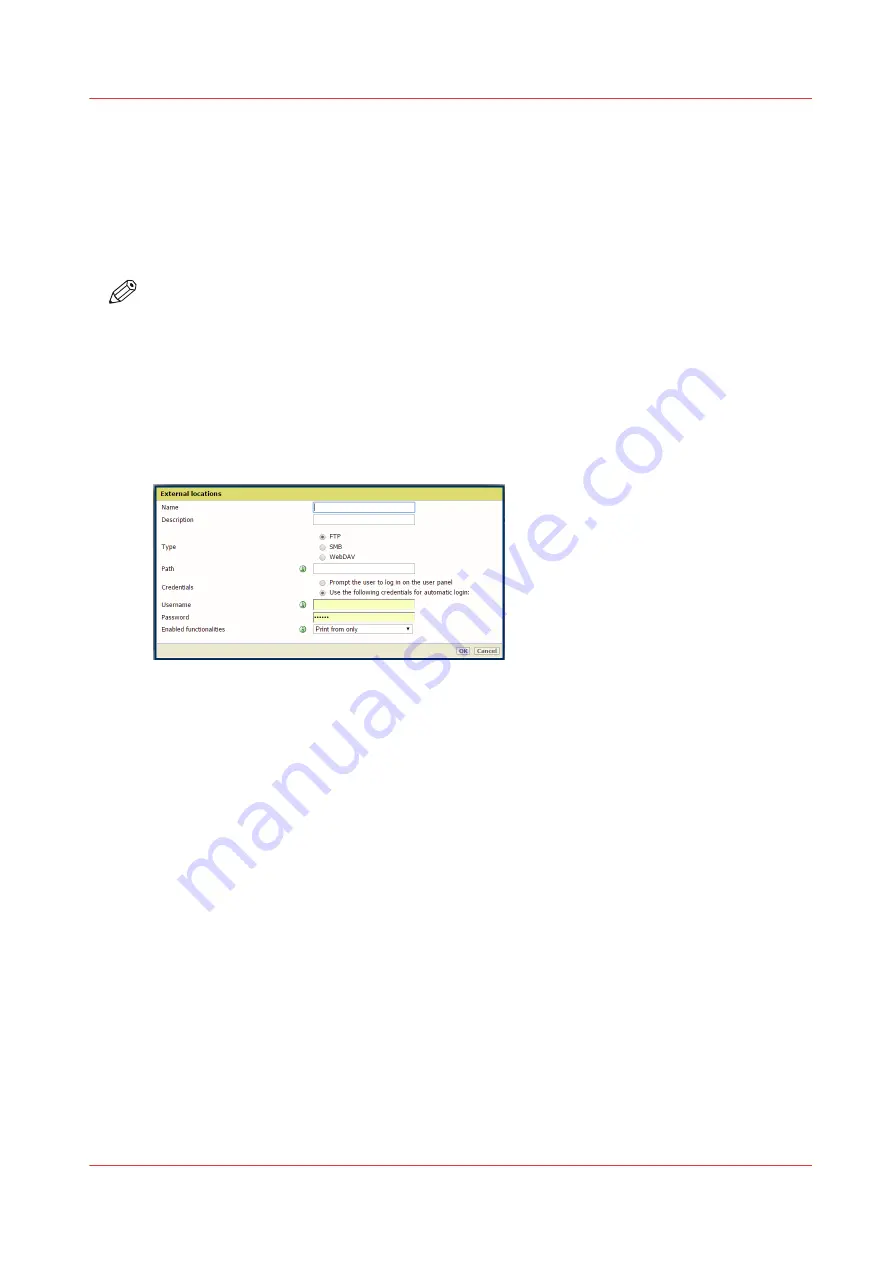
You can create your own FTP, SMB, WebDAV, external locations with Océ Express WebTools.
Before you begin
NOTE
• Make sure you enable [SMB] protocol.
• Make sure you enable [FTP] under the [Configuration] - [Connectivity] tab.
• Make sure the URL for [WebDAV] is not blocked.
• For this procedure, you need to log in as a System Administrator.
Procedure
1.
Select the [Configuration] - [External locations] tab.
2.
Click on [Create new] in the upper right-hand corner.
3.
Enter a [Name] recognizable for the user. This name appears on the user panel.
4.
Enter a [Description] of the settings used.
5.
Select the [Type] of the external location: [FTP], [SMB], or [WebDAV].
6.
Enter the [Path]. The folder path or URL to the external location.
• For [FTP], use the syntax: hostname[/path] (example: myhost/mydirectory/scantofile).
• For [SMB], use the syntax: \\hostname\sharename[\path] (example: \\myhost
\myshareddirectory\scantofile).
• For [WebDAV] locations, use the full HTTP URL (for example: http://example.webdav.org:8080/
repository/).
7.
Select under [Credentials] whether or not the user has to log in to access the external location.
• Select [Prompt the user to log in on the user panel] when you want the user to log in on the
user panel.
Login will appear when the user tries to access the external location on the user panel.
• Select [Use the following credentials for automatic login:] when you want to configure the
credentials here.
The user is not requested to log in on the user panel when he tries to access the external
location.
8.
If you have selected [Use the following credentials for automatic login:] fill in the username and
password.
• The [Username] gives access to the external location. The user must at least have read and
write permissions for the external location. For SMB destinations the format must be as
follows: Local user name: “IPaddress\username” or “hostname\username”. Domain user
name: “domain\username”.
• Enter the [Password] that belongs to the username.
Create an external location
Chapter 3 - Define your Workflow with Océ Express WebTools
111
Содержание Oce PlotWave 450
Страница 1: ...Operation guide Océ PlotWave 450 550 ...
Страница 4: ......
Страница 10: ...Contents 10 ...
Страница 11: ...Chapter 1 Introduction ...
Страница 16: ...Available documentation 16 Chapter 1 Introduction ...
Страница 17: ...Chapter 2 Get to Know the Printing System ...
Страница 43: ...Chapter 3 Define your Workflow with Océ Express WebTools ...
Страница 142: ...Connect your mobile device to Océ Mobile WebTools 142 Chapter 3 Define your Workflow with Océ Express WebTools ...
Страница 143: ...Chapter 4 Use the Printing System ...
Страница 214: ...Clear the system 214 Chapter 4 Use the Printing System ...
Страница 215: ...Chapter 5 Use the Folder ...
Страница 226: ...Adjust the side guides of the belt 226 Chapter 5 Use the Folder ...
Страница 227: ...Chapter 6 Maintain the Printing System ...
Страница 245: ...Media types Chapter 6 Maintain the Printing System 245 ...
Страница 267: ...Chapter 7 License Management ...
Страница 273: ...Chapter 8 Account Management ...
Страница 280: ...Workflow on the printer 280 Chapter 8 Account Management ...
Страница 281: ...Chapter 9 Solve Problems ...
Страница 308: ...Print the print density chart 308 Chapter 9 Solve Problems ...
Страница 309: ...Chapter 10 Support ...
Страница 317: ...Chapter 11 Contact ...
Страница 329: ......


