


*1: Replace the print head only after the print head deep cleaning is performed 2 times, and when the
problem persists.
*2: Only for disc label printing supported regions.
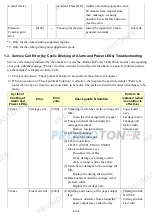
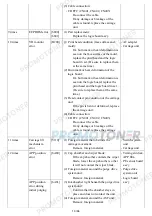
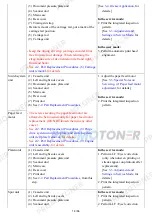
1-2. Operator Call Error (by Alarm LED Lit in Orange) Troubleshooting
Errors and warnings are displayed by the following ways:
1. Operator call errors are indicated by the Alarm LED lit in orange, and the error and its solution are
displayed on the LCD in text and by icon.
2. Messages during printing from a computer are displayed on the printer driver Status Monitor.
3. Error codes (the latest 10 error codes at the maximum) are printed in the "operator call/service call error
record" area in EEPROM information print
Buttons valid when an operator call error occurs:
1. ON button: To turn the machine off and on again.
2. OK button: To clear and recover from an error. In some operator call errors, the error will automatically
be cleared when the cause of the error is eliminated, and pressing the OK button may not be necessary.
3. Stop button: To cancel the job at error occurrence, and to clear the error.
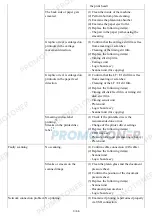
(2) Confirm the network connection.
(3) Replace the following item(s):
- Logic board ass'y
- Wireless LAN board ass'y
Error
Error
code
U
No.
Message on the
LCD
Solution
Parts that
are likely
to be
faulty
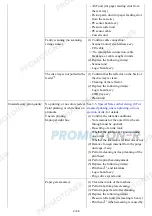
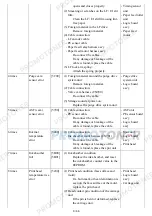
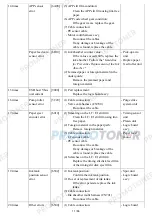
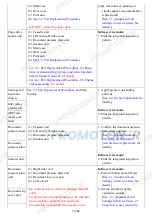
No paper in the
rear tray.
[1000]
---
Rear tray.
There is no paper.
Load paper and press
[OK].
Confirm that the rear tray is
selected as the paper source. Set
the paper in the rear tray, and
press the OK button.
If the error is not cleared, confirm
that no foreign material is inside
the paper feed slot.
- PE sensor
board
ass'y
- ASF unit
- Pressure
roller
unit
No disc tray
*1
.
[1001]
---
There is no disc tray.
Set the tray and press
[OK].
Set the disc tray, and press the OK
button.
If the error is not cleared, confirm
that the disc tray is not cracked or
damaged.
- CDR tray
ass'y
- Carriage
unit
No printable
disc
*1
.
[1002]
---
Printable disc is not
set. Place a disc on
the disc tray and press
[OK].
Set a printable disc in the disc
tray, and insert the disc tray in the
proper position. Then, press the
OK button.
If the error is not cleared, re-set
the printable disc in the tray, and
try again.
- CDR tray
ass'y
- Carriage
unit
No paper in the
[1003]
---
Cassette.
Confirm that the cassette is
- Pick-up
4 / 66
Содержание MG6110
Страница 24: ...5 Remove the main case no screws 20 66...
Страница 27: ...In reassembling attach the new protection sheet as it is over the remaining portions of the sheet 23 66...
Страница 36: ...3 Attach the cassette feed guide 4 Install the cassette feed roller unit 32 66...
Страница 44: ...4 Slowly lift the print unit to separate it from the bottom case 40 66...
Страница 58: ...54 66...
Страница 63: ...4 2 Integrated Inspection Pattern Print Print sample 59 66...
Страница 64: ...4 3 Ink Absorber Counter Value Print Print sample 4 VERIFICATION AFTER REPAIR 60 66...
Страница 68: ...64 66...