8
Responding to Messages
Error messages may appear on the
Display Screen
of the
Control Panel
during printer installation in some cases. If so, it may not indicate a problem with the printer, and the issue may
be easily resolved. Common messages and the causes are listed here with corrective actions. To respond to error messages other than listed below, refer to the
User's Guide
on the
User
Manuals CD-ROM
. For printer part name identification, refer to either the
User's Guide
.
Message
Cause
Corrective Action
Paper loaded askew. Straighten paper
and reload.
Paper has been loaded askew.
Remove the paper and reload it in the correct position.
(See Step 7, P.4.)
Printhead error.
The
Printhead
is not installed.
Reinstall the
Printhead
.
Ink tank: No XX ink loaded.
(Here, XX is an
ink color)
Turn off printer, wait, then turn on again.
Fastening tape or the
Belt Stopper
has not been removed
inside the
Top Cover
.
There is no
Ink Tank
of the indicated color in the printer.
ERROR Exxx-xxxx
(Here, x represents a
number)
Another kind of error has occurred.
Turn off the printer and wait at least three seconds before
restoring the power. If the message is still displayed after
this, write down the error code and message, turn off the
printer, and contact your Canon dealer for assistance.
Turn the printer off.
Open the
Top Cover
and remove the tape or
Belt
Stopper
. (See Step 4, P.3.)
Turn the printer on.
1.
2.
3.
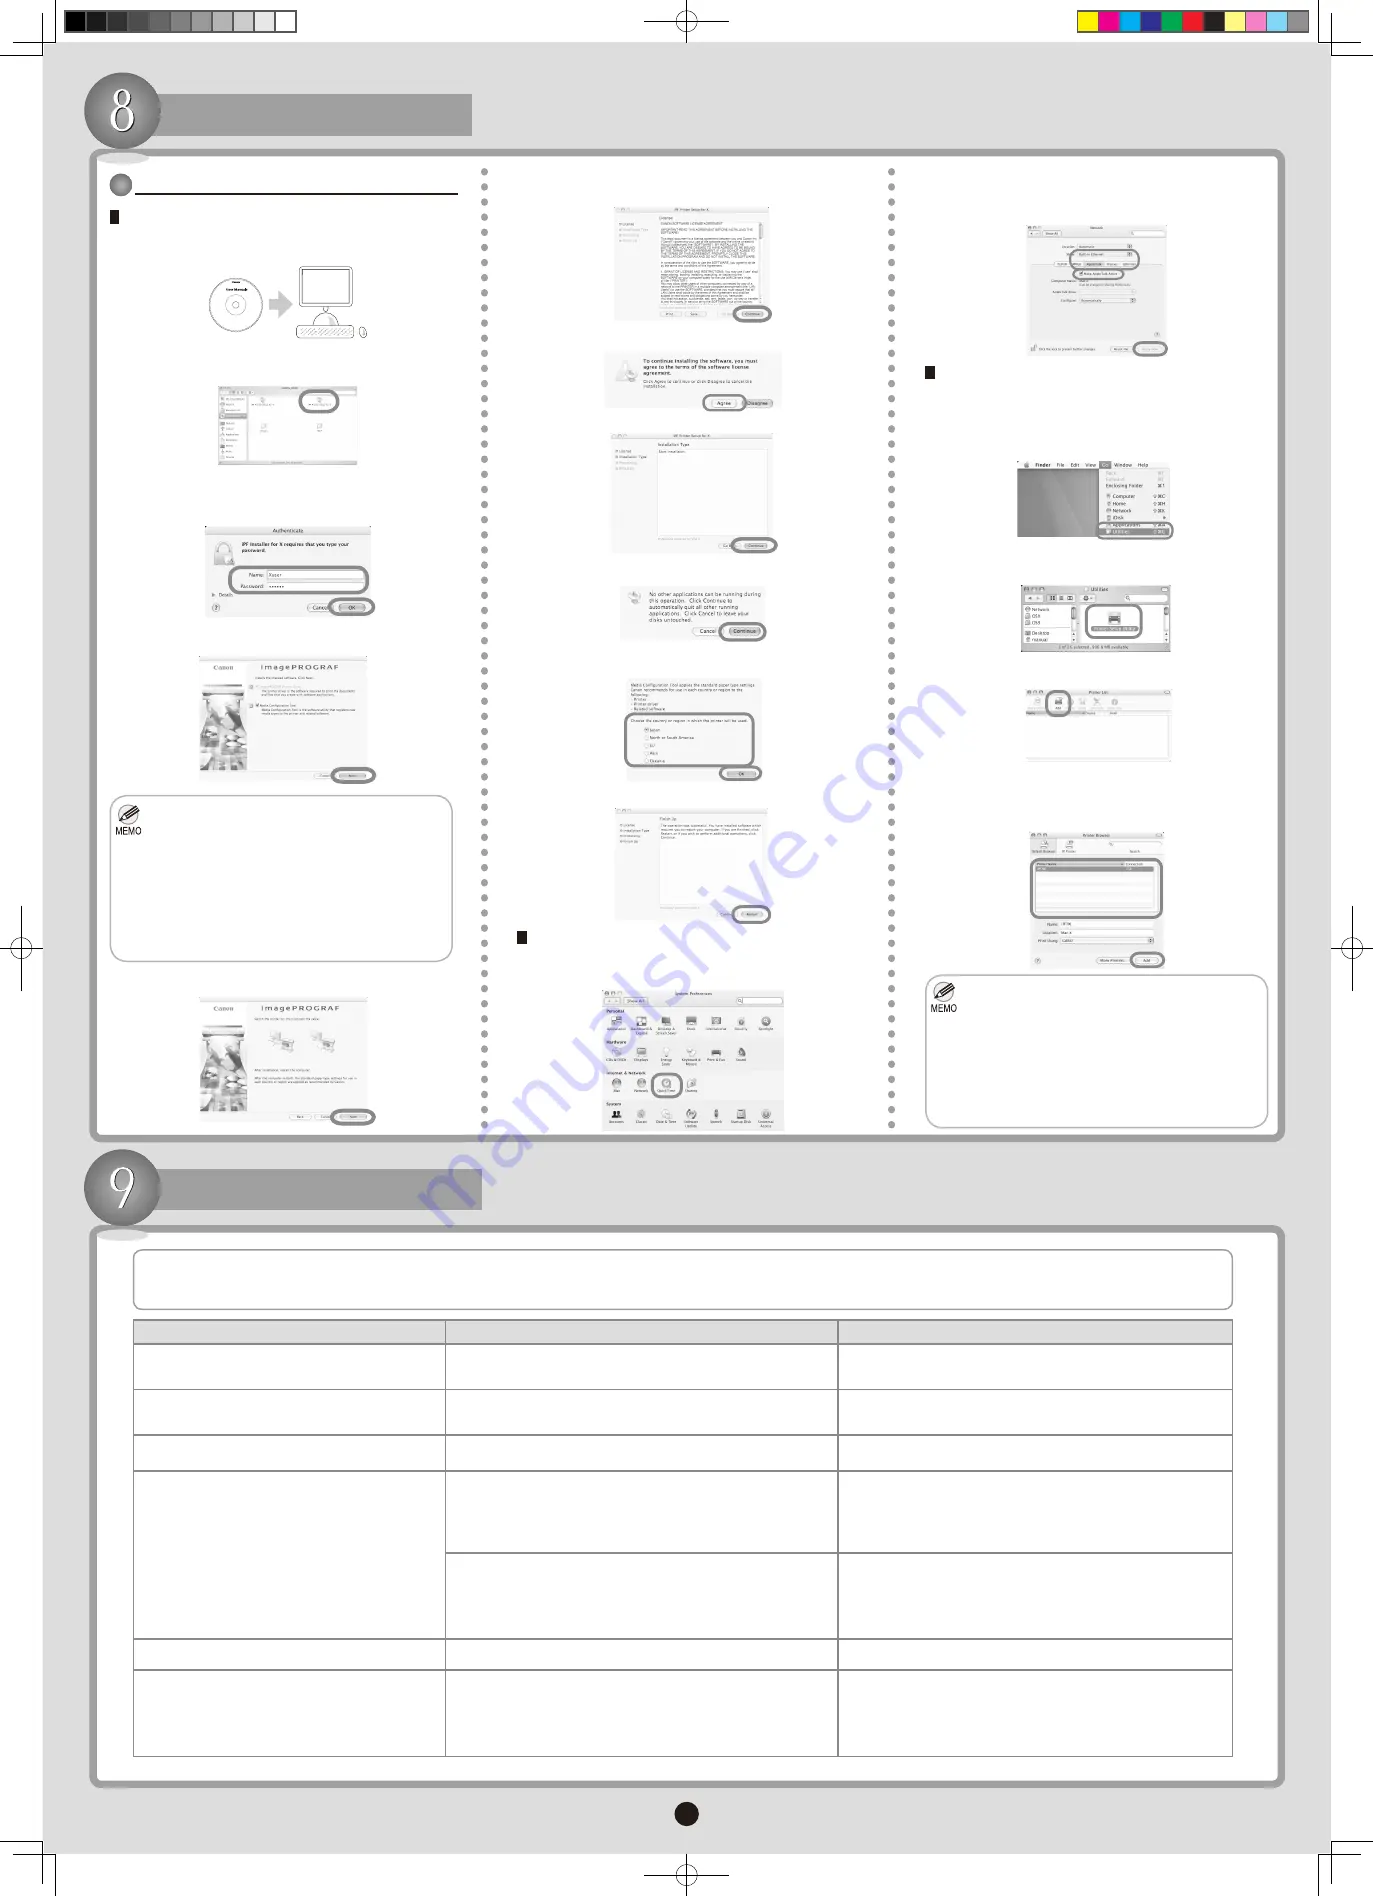
Configure the Computer (Mac OS X)
Install the printer driver
Insert the provided
User Software CD-ROM
in the
CD-ROM drive.
1.
On the desktop, double-click the CD-ROM icon >
Drivers
>
OSX
>
iPF Printer Setup for X
.
2.
After the
Authenticate
window is displayed, enter the
user name and password of a user with administrator
rights and click
OK
.
3.
Confirm the components for installation and click
Next
.
4.
After reading the software license agreement, click
Continue
.
6.
Click
Agree
.
7.
Click
Continue
.
8.
Exit other applications and click
Continue
.
9.
Set up networking functions (for AppleTalk connections)
In
System Preference
, click
Network
to display the
Network
window.
1.
In
Show
, choose
Built-in Ethernet
. Next, click
AppleTalk
, select
Make AppleTalk Active
, and click
Apply now
.
2.
If the printer name is not displayed in
Printer List
,
click
Add
.
4.
Select the printer (OS 10.4)
Make sure the printer is on.
1.
After the printer driver is installed and the computer
has restarted, choose
Utilities
(or
Applications
) in
the
Go
menu of
Finder
.
2.
Click
Print Setup Utility
(or
Print Center
) in the
Utilities
folder.
3.
Click
Default Browser
. In the list, select the printer
name and click
Add
.
5.
After installation is finished, click
Restart
.
11.
Install the Printer Driver
For FireWire or IP connections, click
More Printers
and choose the printer.
Load or reload the
Ink Tank
.
(See Step 6, P.4.)
No maint cartridge
The
Maintenance Cartridge
is not installed.
Install the
Maintenance Cartridge
.
There is a paper jam.
Turn the printer off.
Remove the jammed paper.
Reload the paper. (See Step 7, P.4.)
Turn the printer on.
1.
2.
3.
4.
Click
Next
.
5.
The
Media Configuration Tool
is software for
registering types of paper on the printer and in
related software. The
Media Guide
, installed
at the same time as the
Media Configuration
Tool
, provides information accessible from
your computer on supported paper, as well as
paper handling tips. If you select the check box,
after the printer driver is installed, the
Media
Configuration Tool
is started automatically if
paper information must be updated.
•
Select the zone to use
Media Configuration Tool
,
and then click
OK
.
10.
In Destination, choose
USB
if the printer is
connected via USB,
Canon FireWire (GARO)
if
connected via IEEE 1394 (FireWire), or
AppleTalk
or
Canon IP (GARO)
if connected via a network.
•
If you choose
Canon IP (GARO)
, enter the
printer's IP address.
•
If you will use
AppleTalk
,
Apple Talk
communication must be activated on the printer
as well.
•
000_AB7-5374-V1_J531QSG_E.indd 8
2006/05/26 13:41:18


