6
Install the Printer Driver
2.
3.
6.
5.
4.
•
7.
8.
9.
1.
2.
1.
•
3.
4.
5.
Use a USB cable that conforms to the USB 2.0
specification.
•
•
•
•
•
1.
2.
3.
•
4.
5.
•
•
6.
In the
Select Connection Environment
window,
click
Next
by the option
First Time Printer Use on
the Network
.
After the following screen is displayed, make sure
the cable is connected and the printer is on, and click
Next
. Follow the instructions on the screen.
Enter the IP address assigned to the printer in the
Manual IP Address
Setting
dialog box and click
Set
.
Follow the instructions on the screen.
Select
Manual Set
in the
Setting IP Address
dialog
box and click
Next
.
After the following dialog box is displayed, choose the
printer to use and press the
Enter
key.
Ask your network administrator for the IP
address, as needed.
The printer driver is now installed. If you selected
the
Media Configuration Tool
check box, follow the
instructions on the screen to install it.
In the
Finish
window, select
Restart my computer
now
and click
Finish
.
The printer driver settings take effect after the
computer restarts. If you selected the
PosterArtist
check box, follow the instructions on the screen to
install it.
If the printer has already been connected to the network
In the
Select Connection Environment
window,
click
Next
by the option
Using a Printer on the
Network
. Follow the instructions on the screen.
After the following dialog box is displayed, choose
the printer to use and press the
Enter
key. Follow the
instructions on the screen.
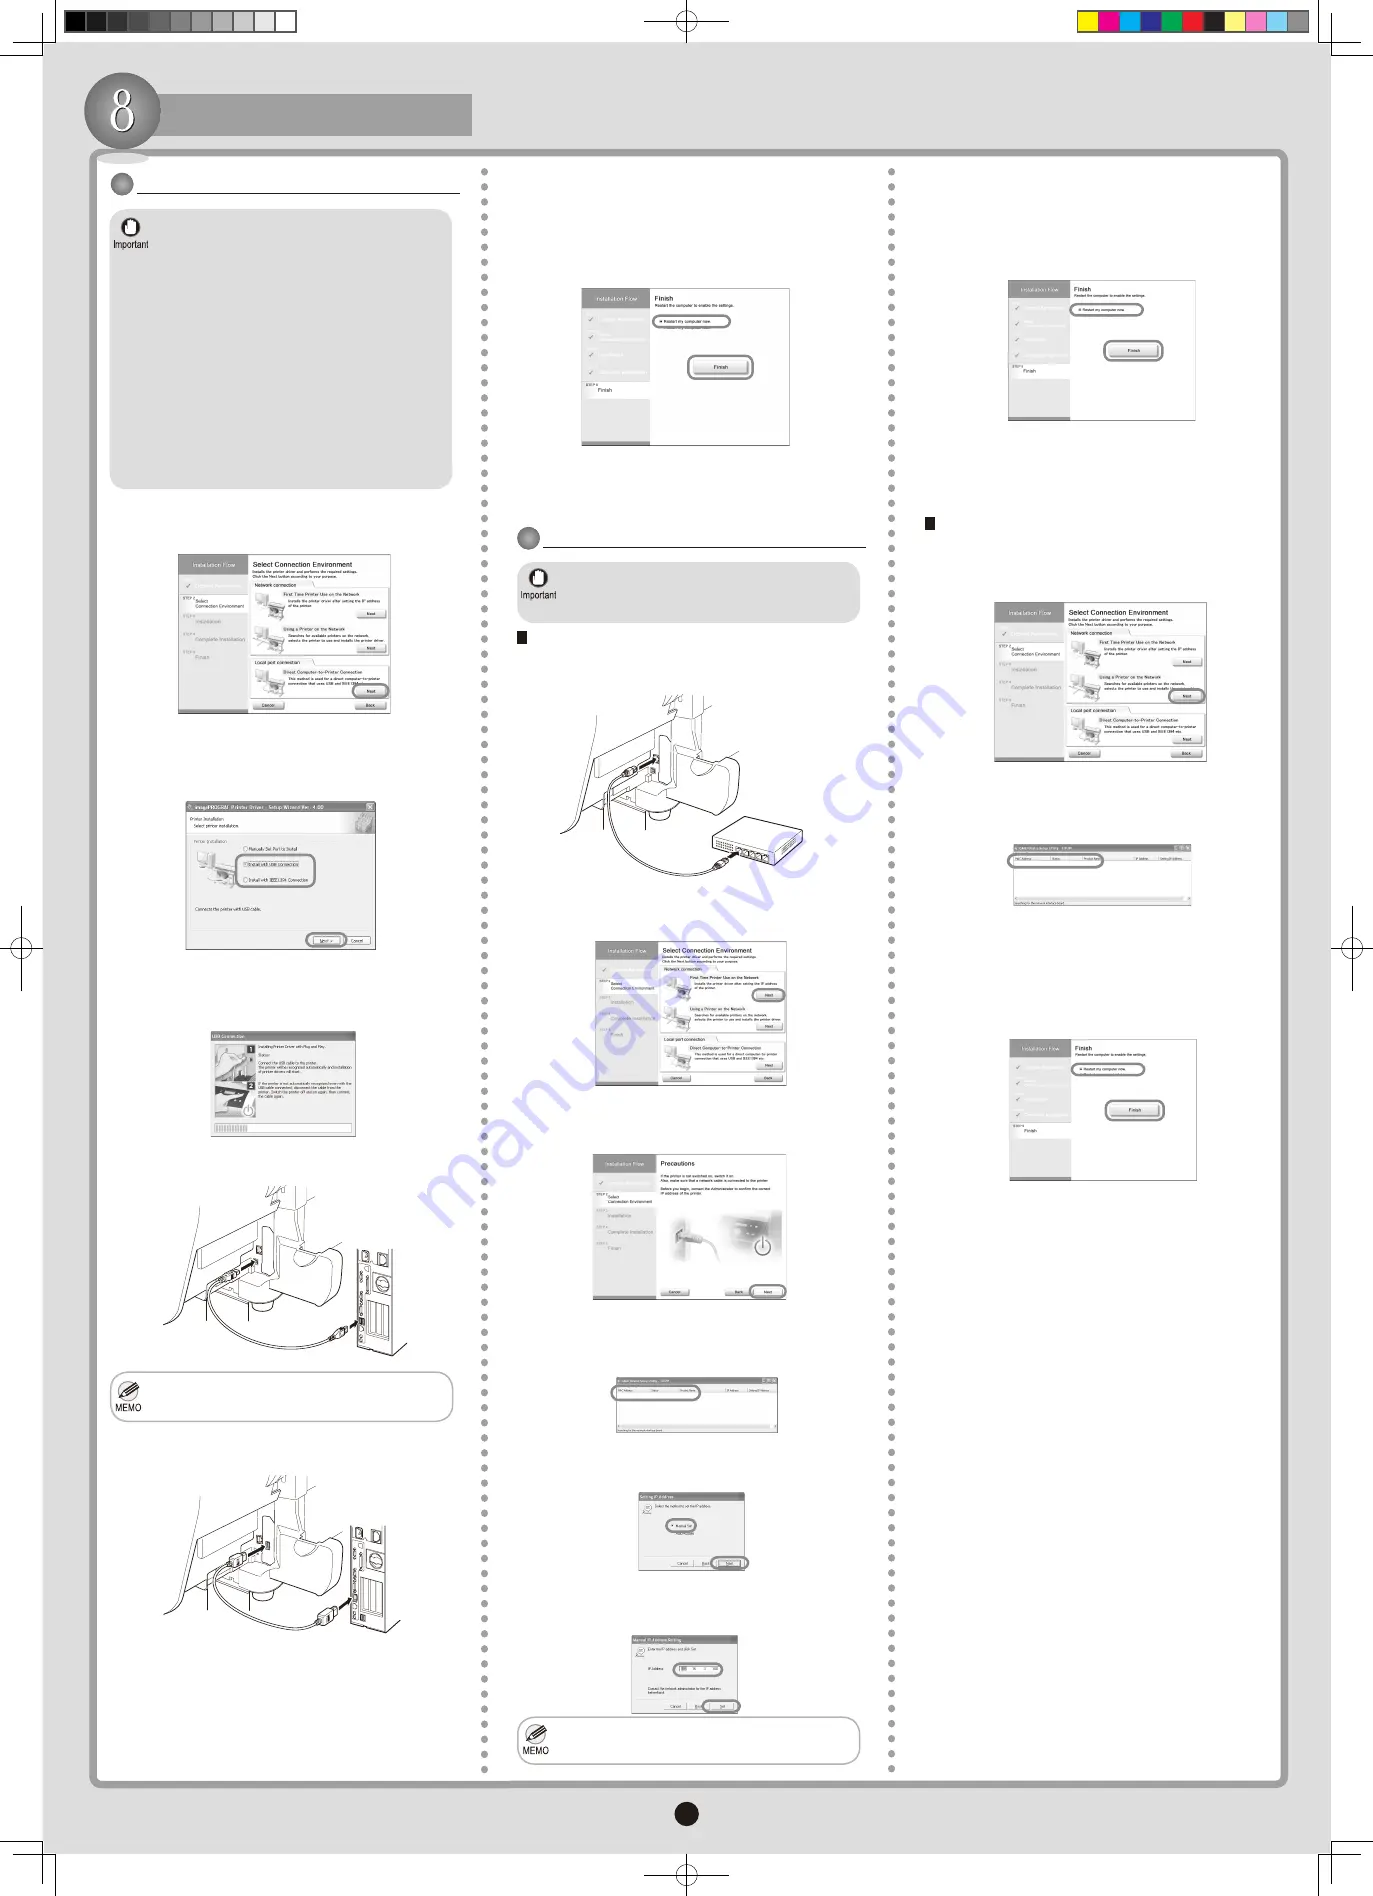
For TCP/IP Connections
When you first connect the printer to the network
Use the Ethernet cable to connect the LAN port on
the back of the printer to the hub port.
If the printer is on, the Link indicator is green
for 100Base-TX connections and amber for
10Base-T connections.
The printer driver is now installed. If you selected
the
Media Configuration Tool
check box, follow the
instructions on the screen to install it.
In the
Finish
window, select
Restart my computer
now
and click
Finish
.
The printer driver settings take effect after the
computer restarts. If you selected the
PosterArtist
check box, follow the instructions on the screen to
install it.
Use in USB 2.0 High Speed mode requires
Windows 2000/Windows XP/Windows Server
2003.
If you will connect an IEEE 1394 (FireWire)
cable, install an IEEE 1394 expansion board in
the printer beforehand. (For details, refer to the
documentation provided with the board.)
Use a six-pin IEEE 1394 cable that conforms to
the IEEE 1394 specification.
Connect the USB or IEEE 1394 cable to the
printer as instructed during installation of the
relevant printer driver. If you connect the USB
or IEEE 1394 cable before installing the printer
driver, the printer driver may not be installed
correctly.
In the
Select Connection Environment
window,
click
Next
by the option
Direct Computer-to-Printer
Connection
.
In the Select
Printer Installation
dialog box, select
Install with USB Connection
or
Install with
IEEE 1394 Connection
and click
Next
. Follow the
instructions on the screen.
When the following dialog box is displayed, use the
USB or IEEE 1394 cable to connect the printer to the
computer.
Be careful not to insert the USB cable into the
Ethernet port.
The printer driver is now installed. If you selected
the
Media Configuration Tool
check box, follow the
instructions on the screen to install it.
In the
Finish
window, select
Restart my computer
now
and click
Finish
.
To connect the USB cable:
To connect the IEEE 1394 (FireWire) cable:
The printer driver settings take effect after the
computer restarts. If you selected the
PosterArtist
check box, follow the instructions on the screen to
install it.
For USB or IEEE 1394 Connections
000_AB7-5374-V1_J531QSG_E.indd 6
2006/05/26 13:41:07


