Num‐
ber
Item
Function
3
[Unassign] button
Unassign media from the paper tray.
4
[Registration] button
Perform a media registration to position the image at the
exact position of the media.
5
Arrow buttons
When your configuration contains more paper modules
or an inserter than the [Trays] view can display in 1
screen, you can press the arrow buttons to change the
part of the machine displayed.
The paper tray information
The [Trays] view displays the following textual information for each paper tray.
• The media name, for example 'Normal paper'
• The media size, for example A4 or Letter
• The media weight, for example, 80 g/m² or 20 lb bond
• The media color
• The special characteristics of the media, for example [cyclic] or [punched]. In brackets,
additional information is given about these media, for example the cycle count or the number
of holes for punched media.
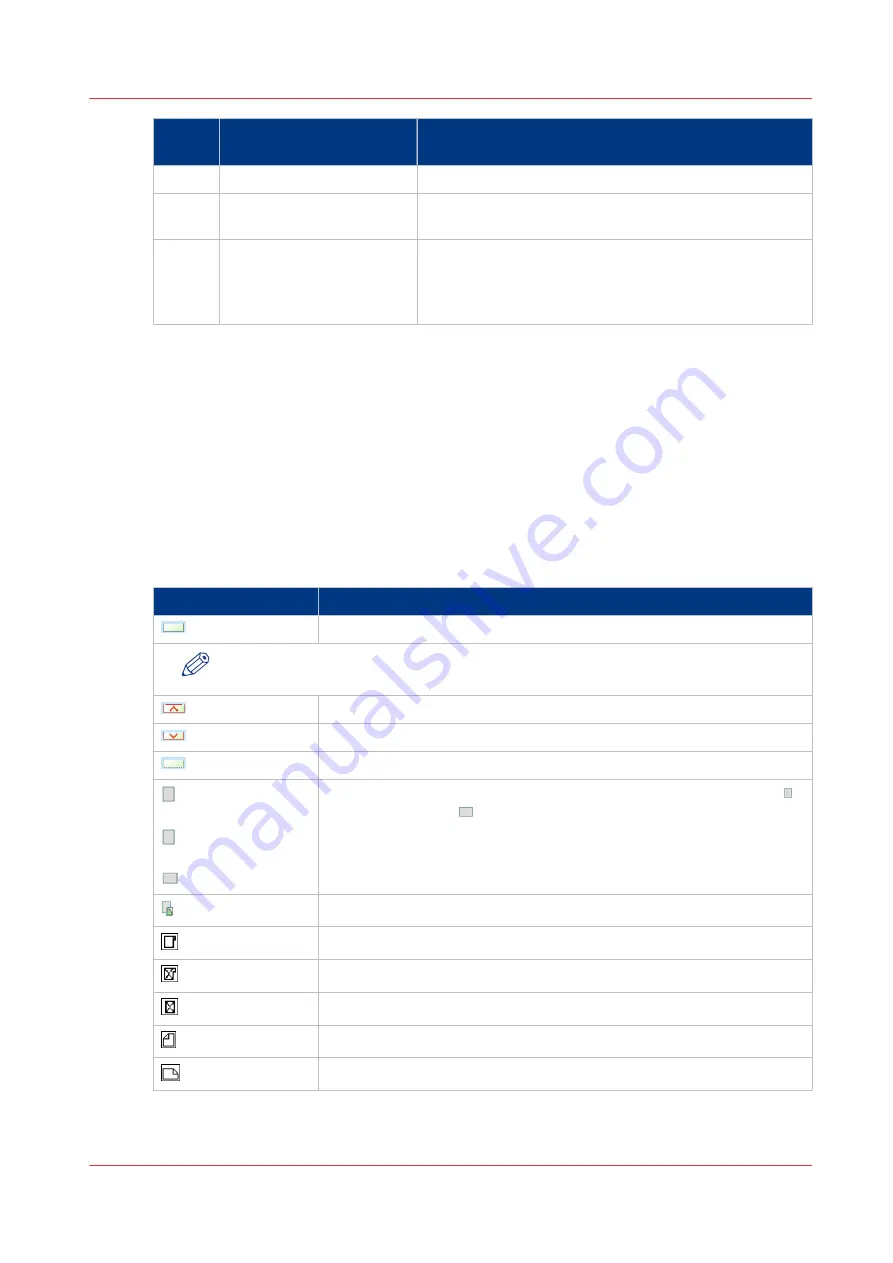
The [Trays] view displays the following icons for each paper tray.
The meaning of the icons
Icon
Description
The paper tray is empty
NOTE
Each line indicates the presence of about 100 sheets
The paper tray is too full. Please remove sheets from the stack
The plate inside the paper tray is down
The paper tray is open
or
or
The paper tray contains media that are fed over the long edge (LEF)
or short edge (SEF) . The small icons indicate A4/Letter or A4/Letter-
like media. The large icons indicate A3/Ledger or A3/Ledger-like media.
When you defined a color for a media, the icon can have that color
The paper tray is in use for one or more scheduled jobs
The paper tray contains tab sheets
The paper tray contains tab sheets that must be processed as inserts
The paper tray contains inserts
The paper tray contains media that are fed over the long edge (LEF)
The paper tray contains media that are fed over the short edge (SEF)
Description of the [Trays] view
Chapter 7 - Media handling
97
Содержание imagePRESS C7011VPS series
Страница 1: ...imagePRESS C7011VPS series C7010VPS series Operation guide ...
Страница 8: ...Contents 8 ...
Страница 9: ...Chapter 1 Preface ...
Страница 15: ...Chapter 2 Main parts ...
Страница 41: ...Chapter 3 Power information ...
Страница 47: ...Chapter 4 Operating concept ...
Страница 54: ... 20 The Add new media window Maintain the Media catalog 54 Chapter 4 Operating concept ...
Страница 57: ... 24 The Add color preset window Maintain the Color presets Chapter 4 Operating concept 57 ...
Страница 69: ...Chapter 5 Operator panel views ...
Страница 77: ...Chapter 6 Adapt printer settings to your needs ...
Страница 90: ...Access Settings Editor settings via the operator panel 90 Chapter 6 Adapt printer settings to your needs ...
Страница 91: ...Chapter 7 Media handling ...
Страница 155: ...Chapter 8 Carry out print jobs ...
Страница 225: ...Chapter 9 Carry out copy jobs ...
Страница 257: ...Chapter 10 Carry out scan jobs ...
Страница 286: ...Optimize the scan quality 286 Chapter 10 Carry out scan jobs ...
Страница 287: ...Chapter 11 Use the DocBox optional ...
Страница 310: ...Select and print multiple jobs from the DocBox 310 Chapter 11 Use the DocBox optional ...
Страница 311: ...Chapter 12 Accounting ...
Страница 322: ...Enter an account ID into the printer driver 322 Chapter 12 Accounting ...
Страница 323: ...Chapter 13 Add toner and staples ...
Страница 341: ...Chapter 14 Maintenance and print quality ...
Страница 361: ...Chapter 15 Specifications ...
Страница 375: ...Chapter 16 Third Party Software ...
Страница 382: ...Library for SDE Compiler 382 Chapter 16 Third Party Software ...


