


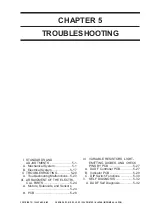


CHAPTER 5 TROUBLESHOOTING
5-8
COPYRIGHT © 1998 CANON INC. CANON DADF-A1 REV.0 DEC. 1998 PRINTED IN JAPAN (IMPRIME AU JAPON)
3
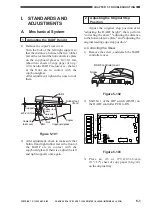
Adjusting the Sheet-to-Sheet
Distance for Reduced Page
Composition Mode
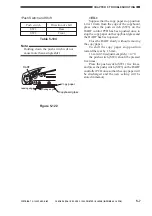
Be sure to perform "adjusting the DADF
height" and "adjusting the original stop
position" before adjusting the sheet-to-sheet
distance for reduced page composition mode.
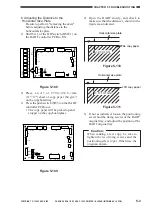
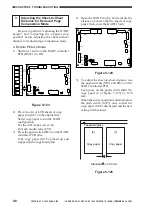
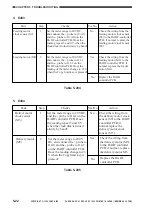
a. Bottom Pick-Up Mode
1) Shift bits 1 and 2 on the DADF controller
PCB (DSW1) to ON.
ON
12345678
LED1
LED2
SW1
TP1
J10
J15
J1
CB1
J2
J14
J12
J11
J7
J6
J13
J5
J9
J8
J3
6
1
B12
B1
2
1
1
3
1
2
1
3
1
2
13
1
14
2
A1
A12
1
1
1
1
9
10
1
4
2
2
8
1
7
1
DSW1
SW2
SW3
Figure 5-123
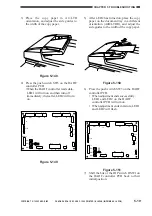
2) Place two A4 or LTR sheets of copy
paper (64 g/m
2
) on the original tray.
Select copy paper to suit the DADF
configuration.
For the A/B model, select A4.
For Inch model, select LTR.
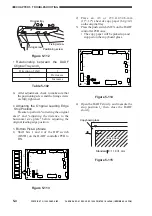
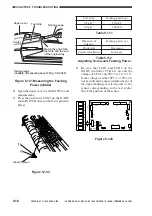
3) Press the push switch (SW3) on the DADF
controller PCB once.
•The copy paper will be picked up and
stopped on the copyboard glass.
4) Open the DADF slowly, and measure the
distance l
5
between the two sheets of copy
paper; then, close the DADF slowly.
Figure 5-124
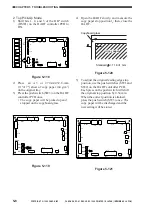
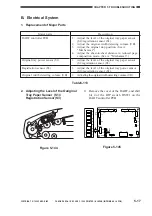
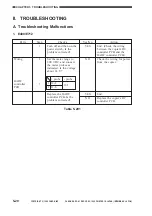
5) To adjust the sheet-to-sheet distance, use
the push switches (SW1 and SW2) on the
DADF controller PCB.
Each press on the push switch shifts the
copy paper (2 of Figure 5-125) by 0.34
mm.
When the correct position is attained, press
the push switch (SW3) once so that the
copy paper will be discharged and the new
setting will be stored.
Figure 5-125
Copyboard glass
[2]
[1]
Copy paper
Copy paper
Standard: = 0
±
3 mm
5
5
SW1
TP1
J10
J15
J1
CB1
J2
J14
J12
J11
J7
J6
J13
J5
J9
J8
J3
B12
B1
2
1
1
3
1
2
1
3
1
2
13
1
14
2
A1
A12
1
1
1
1
9
10
1
4
2
2
8
1
7
1
DSW1
SW2
SW3


