Clearing Paper Jams
8-10
8
T
roub
leshoo
ting
2
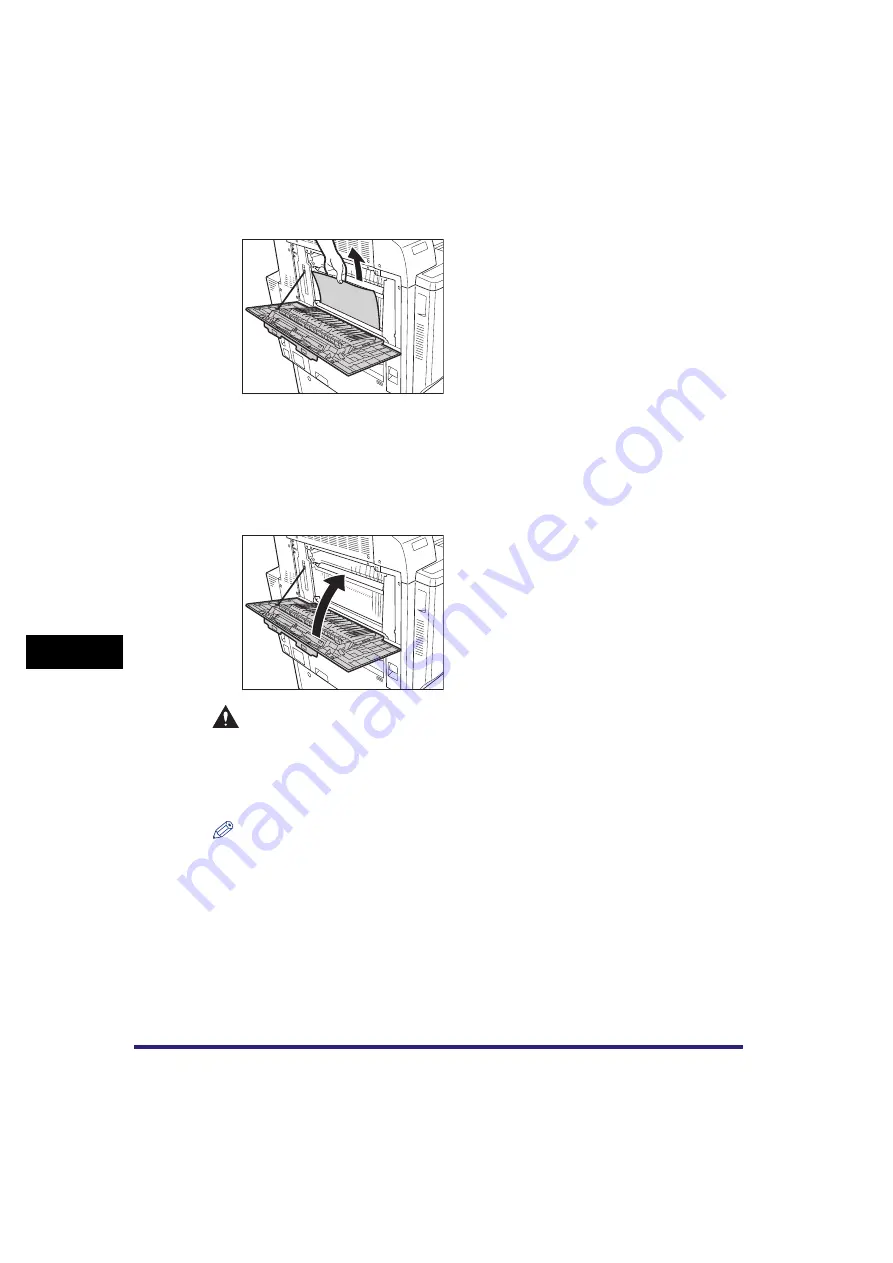
Remove any jammed paper.
3
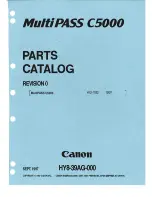
Close the upper left cover of the main unit.
If an optional finisher was moved away from the main unit, reconnect it to the main unit. For
more information, see "Finisher-X1," on p. 3-18, or "Finisher-W1/Saddle Finisher-W2/Puncher
Unit-AG1," on p. 3-22.
If the optional Copy Tray-N1 is attached to the main unit, restore it to its original position. For
more information, see "Copy Tray-N1," on p. 3-30.
CAUTION
When closing the upper left cover of the main unit, be careful not to get your fingers
caught, as this may result in personal injury.
4
Follow the instructions on the touch panel display.
NOTE
The screen indicating the location of the paper jam repeatedly appears on the touch panel
display until the paper jam is entirely cleared. For more information, see "Screens Indicating the
Locations of Paper Jams," on p. 8-3.
Содержание CLC5151
Страница 2: ......
Страница 3: ...CLC5151 CLC4040 iR C4580i iR C4080i Reference Guide 0 Frontmatter ...
Страница 18: ...xvi Printing data scanned from an original followed by finishing options such as stapling Copying ...
Страница 68: ...System Settings 1 28 1 Before You Start Using This Machine ...
Страница 102: ...Using a Login Service 2 34 2 Basic Operations 2 Enter the user name press OK 3 Press Password The SDL Login Screen ...
Страница 256: ...Adjusting the Machine 4 76 4 Customizing Settings ...
Страница 483: ...Service Call Message 8 91 8 Troubleshooting The machine starts up in the Limited Functions mode ...
Страница 523: ......


