


External Connections
125
Use the supplied software
ImageMixer 3
S
E
to upload your vid-
eos to the Web.
Installation
S
ee ‘PIXELA Applications’ Installation
G
uide.
Using the software
S
ee ‘ImageMixer 3
S
E
S
oftware
G
uide’ (PDF file).
/
C
onverting Scenes into Standard Definition in the
C
amcorder
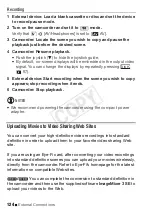
1 Power the camcorder using the compact power adapter.
2 Insert a memory card with sufficient available space in the
camcorder.
3 Open the index screen in the built-in memory that contains the
scenes you want to convert.
• You can pre
ss
to open the index
s
creen for video
s
nap
s
hot
s
cene
s
(
58). You can pre
ss
to open the
playli
s
t index
s
creen.
4
S
elect (
,
) the scene you want to convert.
• You can
s
elect in advance the
s
cene
s
you want to convert. Refer to
Pre-
s
electing Recording
s
from the Index
S
creen
(
• When converting the playli
s
t, you cannot convert individual
s
cene
s
s
o the entire playli
s
t will be converted.
5 Convert the scene(s).
• If a me
ss
age appear
s
regarding mu
s
ic file
s
, follow the in
s
truction
s
on
the
s
creen.
• The left
s
ide of the
s
creen di
s
play
s
the total playbac
k
time of the
s
cene
s
to be converted; the right
s
ide
s
how
s
the file
s
i
z
e of the
s
cene
s
after conver
s
ion and the available
s
pace on the memory
card. Pre
ss
to
s
elect the conver
s
ion
s
etting
s
(bit rate and
recording date/time) a
s
de
s
cribed below.
Operating modes:
VIDEO SNAP
INDEX SEL.
[O
K
]
WEB
FUNC.
CO
PY


