External Connections
119
• You can play bac
k
the converted
s
cene
s
from the [For DVD (
S
D-VIDEO)]
index
s
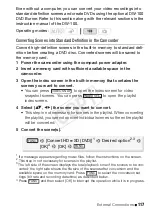
creen on the memory card. Open the original movie
s
index
s
creen on the memory card, pre
ss
and then
s
elect [For DVD
(
S
D-VIDEO)].
C
onnecting to the
C
omputer and
C
reating DVD Discs
1 Power the camcorder using the compact power adapter.
2 Open the [For DVD (
S
D-VIDEO)] index screen on the memory card.
• Open the original movie
s
index
s
creen on the memory card, pre
ss
then
s
elect [For DVD (
S
D-VIDEO)].
• If the device
s
election
s
creen appear
s
,
s
elect [Computer/Printer] and
pre
ss
.
3 Connect the camcorder to the computer using the supplied U
S
B
cable.
• Connection
. Refer to
Connection Diagram
s
(
109).
• On the computer, ImageMixer 3
S
E will launch automatically and the
s
tartup
s
creen (ImageMixer 3 Launcher) will appear.
4 Click [Disc writing] and continue the operation on the computer
following the software’s indications.
S
ee al
s
o ‘ImageMixer 3
S
E
S
oftware Guide’.
IMPORTANT
• While the camcorder i
s
connected to a computer, do not open the
memory card
s
lot cover and do not remove the memory card.
• Ob
s
erve the following precaution
s
while the ACCE
SS
indicator on the
camcorder i
s
on or fla
s
hing. Failing to do
s
o may re
s
ult in permanent
data lo
ss
.
- Do not open the memory card
s
lot cover.
- Do not di
s
connect the U
S
B cable.
- Do not di
s
connect the power
s
ource or turn off the camcorder or the
computer.
C
onnecting to the DW-100 DVD Burner and
C
reating DVD Discs
1 Power the camcorder using the compact power adapter.
Operating modes:
INDEX SEL.
INDEX SEL.
4
CO
PY


