35
When [Multi Layout] is selected
First perform steps 1 to 3 on page 32, then proceed to step 4 below.
4
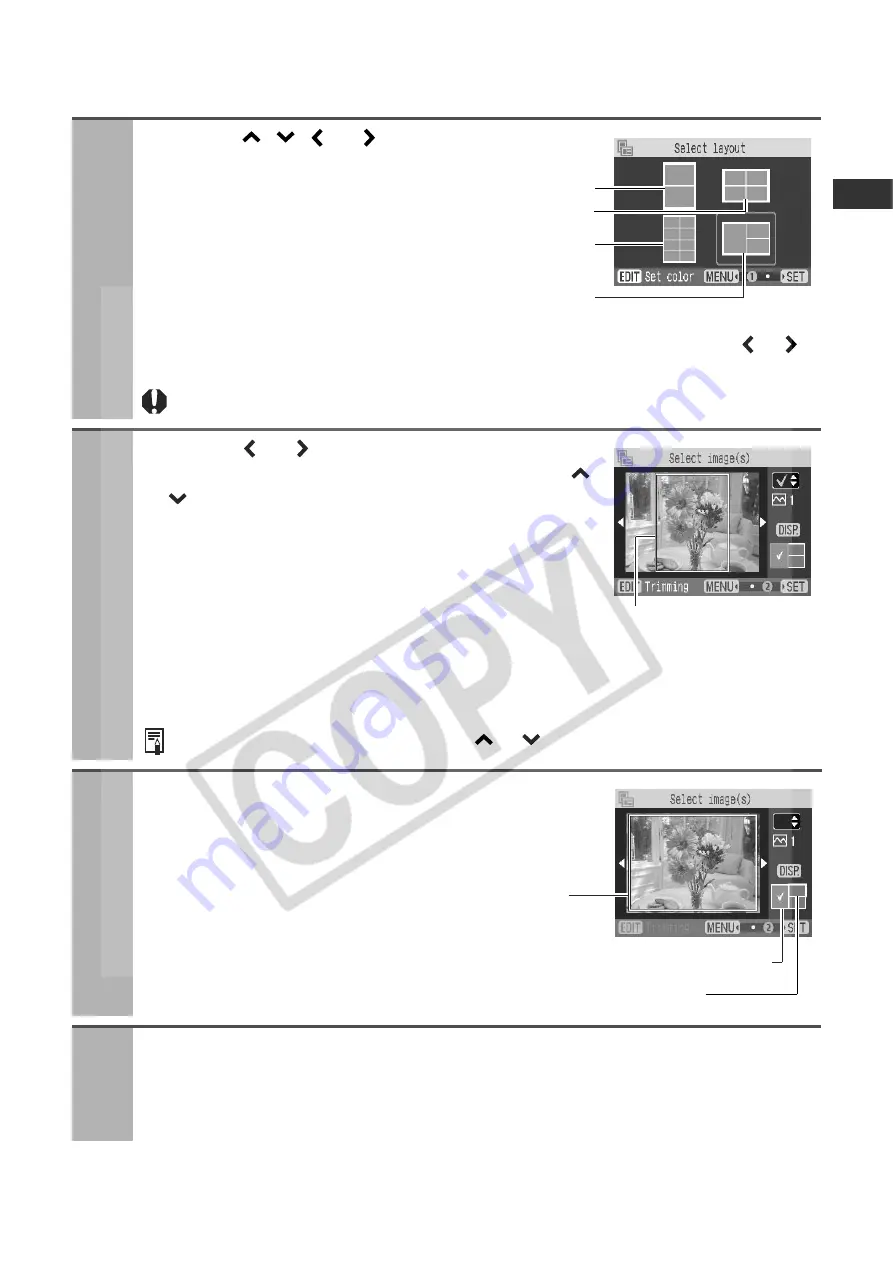
Press the
,
, or
button to select
the layout and press the SET button.
z
You can change the background color by pressing the EDIT button. Press the
or
button to select the color, and press the MENU button.
8 images per sheet layout can be specified only when printing on card size paper.
5
Press the or
button to select the image
to assign to the initial frame and press the
or
button.
z
You can switch the image display to index playback,
enlarged display and other displays (see
Single Photo Print
step 2 on page 28). Note that image information is not
displayed.
z
Press the EDIT button to trim images assigned to the
layout frame (see
Single Photo Print
step 3 on page 29).
Note that trimming is performed matching the aspect ratio of the assigned layout frame
(e.g., width-to-height ratio approximately 4:3 for 2-up and 4-up).
To cancel an assigned image, press the
or
button again.
6
Press the DISP. (Display) button to select the
next frame.
7
Repeat steps 5 and 6 to assign images to desired frames.
z
If you want to create a blank space, press the DISP. (Display) button to move the frame.
Write comments or the title in the blank spaces with an oil-based pen.
2 images per sheet
4 images per sheet
8 images per sheet
3 images per sheet
Outline of the
printable area
Layout frame already assigned an image
Currently selected layout frame
Outline of the
printable area
Содержание 0324B001 - SELPHY ES1 Photo Printer
Страница 77: ...75 MEMO ...


