
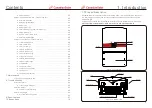


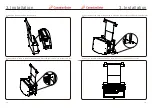

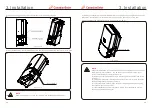


3. Installation
3. Installation
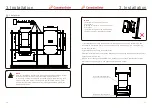
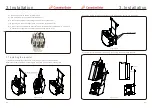
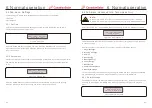
6). Remove the two M6 screws and locking plate on the wire box mounting rack,and use two
M6 screws to attach the inverter and wire box on each side, the torque is 1.6-2 N.m.
Tighten the M6 screws loosened in Step 2, the torque is 4-6N.m.
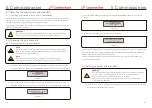
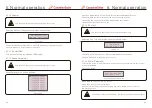
4). The positioning plate of inverter should insert into the positioning slot.
Positioning plate
Positioning slot
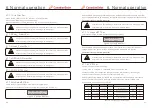
5). Use two M6 screws to attach the power train and wire box on both side, the torque is 1.6-2 N.m.
Hex screw M6
Hex screw M6
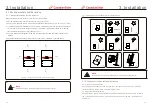
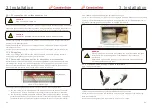
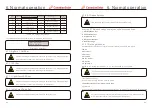
NOTE
1) Before installation, it is necessary to ensure the switches on both sides of
the wire box are turned 'OFF'. The switch knob should point to the 'OFF'.
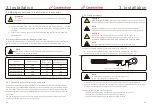
2) There are two ways to install the inverter.
A) Hoisting (recommended):There are 2 hoisting holes on both sides of the
inverter.
B) Lifting:There is one M10 holes on each side of the inverter,and install the
M10 handle(please prepare by yourself).
3) If using the lifting method, align the power train and the wire box exactly
to avoid damage to the inverter.
4) If the installation position is relatively high, a lift or scaffolding may be
necessary to install the inverter.
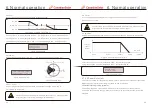
NOTE
Ensure the torque is correct. Too much torque will damage the inverter.
Figure 3.18
Figure 3.19
Figure 3.20
.29.
.28.


