
20
6UJL H TV]PL ÄSL Z[HY[Z WSH`PUN [OL UVYTHS WSH`IHJR JVU[YVS M\UJ[PVUZ HYL
available:
;VZ[VW[OLTV]PLHUKYL[\YU[V[OLÄSLIYV^ZLYWYLZZ[OL
button. You
can also press the Home button at any time to stop the playback and return
to the Home menu.
7YLZZ[OL6W[PVUZI\[[VU[VHJJLZZMLH[\YLZZ\JOHZ:\I[P[SL(KQ+AVVT
Angle, PIP and SAP. For more details, see later section of the manual.
9LHZLQJSKRWRðOHV
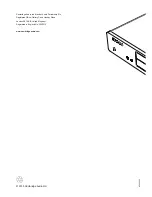
;V]PL^KPNP[HSWOV[VÄSLZZ[VYLKVUHUVW[PJHSKPZJVY<:)KYP]LZLSLJ[7OV[V
MYVT[OL/VTLTLU\(ÄSLIYV^ZLY^PSSHWWLHY[VHZZPZ[`V\PUUH]PNH[L[OL
ÄSLZHUKMVSKLYZ
;OLÄYZ[Z[LWPZ[VZLSLJ[[OL+H[H+PZJVY<:)KL]PJL[OH[JVU[HPUZ[OLWOV[V
ÄSLZ;OLWSH`LY^PSS[HRLHTVTLU[[VYLHK[OLTLKPHHUKSPZ[[OLMVSKLYZHUK
WOV[VÄSLZ
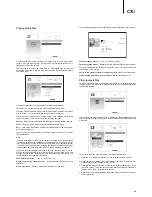
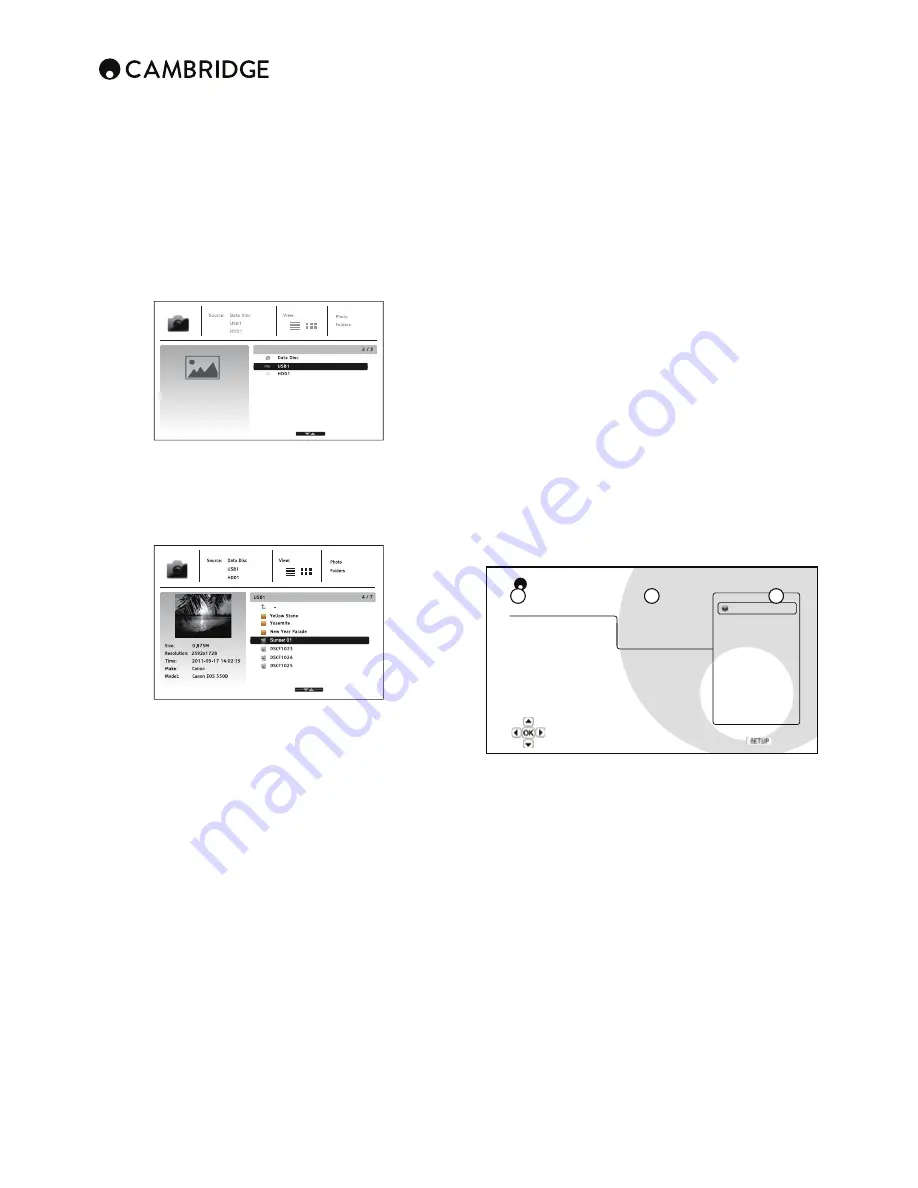
In the photo browser, you can perform the following operations:
1. Press the
/
I\[[VU[VTV]L[OLJ\YZVYHUKZLSLJ[WOV[VÄSLZ
2. Press the Options button to access features like sort order.
3. Press the Top menu button to move the cursor to the category menu in
the top of the screen.
>OLUHWOV[VÄSLPZOPNOSPNO[LKI`[OLJ\YZVYWYLZZ[OL,U[LYVY
button
to play back the photos as a full screen slideshow.
The following operations are available during the photo slideshow:
Display the help screen
– Info button.
Normal playback controls
–
,
,
,
/
buttons.
Adjust slideshow speed
–
and
buttons.
Zoom
– Zoom. Once zoomed in, the
navigational buttons can be
used to pan around the photo.
5HñHFW
ÅPWZ[OLWOV[VOVYPaVU[HSS`[VTHRLP[\WZPKLKV^U
button.
Mirror
ÅPWZ[OLWOV[V]LY[PJHSS`[VTHRLP[HTPYYVYPTHNL
button.
Rotate left
(counterclockwise) –
button.
Rotate right
(clockwise) –
button.
Repeat
– Repeat button.
Show photos in Digest mode
– Red colour button. The Digest mode shows
the photo thumbnails on the screen to make visual navigation easy.
Show EXIF information
– Green colour button
Play in random sequence
– Blue colour button
&KDQJHVOLGHVKRZWUDQVLWLRQHσHFW
– Yellow colour button.
Press the Options button to access the features like Image Zooming and
Image Rotation. For more details, see later section of the manual.
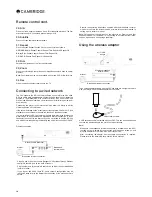
Adding background music
You can also add background music to the photo slideshow. To do so, you
^PSSULLK[VWYLWHYLKPNP[HST\ZPJÄSLZ;OLT\ZPJÄSLZJHUILZ[VYLKVU[OL
ZHTLKPZRHZ[OLWOV[VZVYVUHKPɈLYLU[<:)KYP]L:[HY[T\ZPJWSH`IHJR
ÄYZ[ I` ZLSLJ[PUN 4\ZPJ MYVT [OL /VTL TLU\ 6UJL [OL T\ZPJ PZ WSH`PUN
press the Home button to get back to the Home menu, and start the photo
slideshow by selecting Photo in the usual manner.
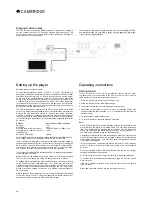
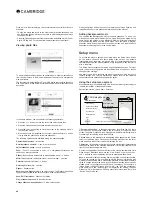
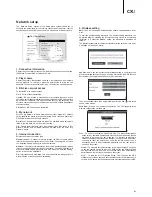
Setup menu
To access the player's setup menu simply press the Setup menu button
on the remote control. Since some Setup menu options can become
inaccessible when the player is playing a disc, it is recommended that you
operate the Setup menu when playback is fully stopped or when there is no
disc in the player.
;OL :L[\W TLU\ WYLZLU[Z THU` ZL[\W HUK JVUÄN\YH[PVU VW[PVUZ -VY TVZ[
\ZLYZ [OL KLMH\S[ JVUÄN\YH[PVU ^PSS IL Z\ɉJPLU[ HUK ^PSS VM[LU UV[ YLX\PYL
changes to the settings.
/V^L]LY PM `V\ ^PZO [V JVUÄN\YL [OL WSH`LY [V WLYMLJ[S` TH[JO `V\Y OVTL
theatre settings and viewing preferences, please refer to the following
ZLJ[PVUZMVYKL[HPSZHIV\[LHJOJVUÄN\YH[PVUVW[PVU
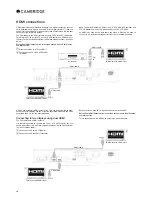
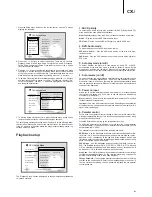
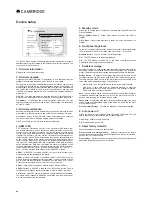
Using the setup menu system
When performing menu adjustments, we will use the following terminology to
indicate the location of the desired function:
Setup menu section > menu Item > Selection
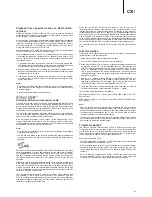
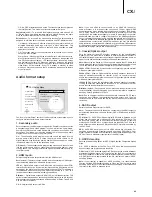
CXU Setup Menu
Playback Setup
SACD Priority
Video Setup
DVD-Audio Mode
Audio Format Setup
Auto Play Mode
Audio Processing
Auto Resume
Device Setup
Power On Input
Network Setup
Parental Control
Exit
Language
Exit
Playback starts automatically when a disc is loaded
On
Off
1.
Setup menu section
– is the uppermost menu level. With the CXU there
are six Setup menu sections listed in the left column of the Setup menu
screen. These are: Playback Setup, Video Setup, Audio Format Setup, Audio
Processing, Device Setup, and Network Setup.
2.
Menu item
– is the parameter to be adjusted which appears in the Center
column of the Setup menu. Once you enter a Setup menu Section, the list of
menu items and their current value are displayed in a box.
3.
Selection
– is the actual numeric or descriptive element that represents the
change being made to the selected parameter. It is the item located to the
right of its corresponding menu item.
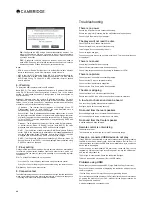
A scroll icon appears at the top or bottom of the menu when there are more
TLU\P[LTZVY:LSLJ[PVUZ[OHU^OH[JHUÄ[PUHZJYLLU@V\TH`\ZL[OL
and
buttons to scroll the display in order to access additional items.
Note:
It is possible that some setup items are greyed-out and inaccessible.
This can be caused by a disc still being played back or interlocking with
mutually exclusive setup items. Please stop playback or eject the disc before
trying to change these setup items. If you still cannot access the setup item,
WSLHZL JOLJR MVY JVUÄN\YH[PVU JVUÅPJ[Z HUK JVUZPZ[LUJ` -VY L_HTWSL PM
=PKLV:L[\W%W6\[W\[ PZZL[[V 6Ɉ [OL +=+WJVU]LYZPVU
menu items "Auto" and "Source Direct" will be grayed-out. Setting "1080p24
Output" to "On" will enable the "DVD 24p conversion" menu items "Auto" and
"Source Direct" to be set.
1
2
3
Содержание CXU
Страница 1: ...CXU UNIVERSAL DISC PLAYER ...
Страница 17: ...CXU UNIVERSAL DISC PLAYER ...
Страница 54: ...TM B u ragDisc Software restore disc 1 Please retain Only for use in case of future software upgrade ...
Страница 55: ......


