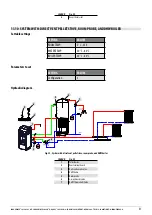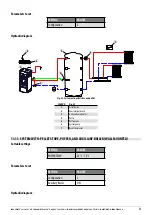
IDRO PRINCE
3
12-16-23-23 H
2
O - IDRO PRINCE 30-30 H
2
O - AQUOS
3
16-23-23 H
2
O - IDRON 16-22 AIRTIGHT - MIRA 16-22 - TESIS 16-23 AIRTIGHT - HIDROFIRE 22.8
55
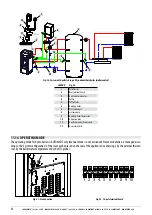
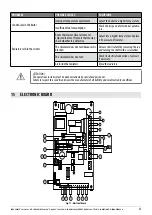
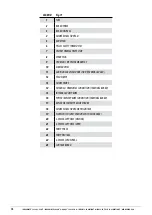
11.15 ELECTRICAL CONNECTIONS
Terminal board contacts (see
CONTACTS
POS.1-2 EXTERNAL THERMOSTAT/PUFFER THERMOSTAT
POS.3-4 PUFFER/BOILER PROBE
POS.5 EARTHING
POS.6-7 ADDITIONAL BOILER
POS.8 3-WAY VALVE NEUTRAL
POS.9 3-WAY VALVE PHASE (DHW)
POS.10 3-WAY VALVE PHASE (heating)
To access the “W” terminal board, remove the cap as shown in part 1 of the manual (in the paragraph dedicated to removing
the back), then loosen the two “z” screws and remove the “W” terminal board. Make the necessary connections and reassemble
everything.
The connections to the terminal board must be made with cables with a maximum length of 3 metres (regardless
of whether they are signal or power cables).
z
W
Fig. 59 - Connections
Note: FOR THE ELECTRICAL CONNECTIONS, REFER TO THE
ELECTRICAL CONNECTION a pag. 40
CHAPTER.
- The water manostat cables that are prearranged in the boiler must be connected to the
hydraulic kit (optional).
- The flow switch cables are prearranged in the boiler for connection to the hydraulic kit (op-
tional) with domestic water.
11.16 START-UP
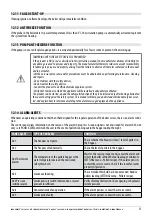
Press key 1 (esc) to begin start-up, the control panel displays ON with a flashing flame. When the flame stops flashing the boiler
has reached the “power output” operating mode.
The room temperature set by default is 20°C, if one wishes to change it act as instructed in the adjustments menu; act likewise to
set the heating water temperature and the room fan speed (if envisaged). To activate external thermostat if any see the relative
section.


