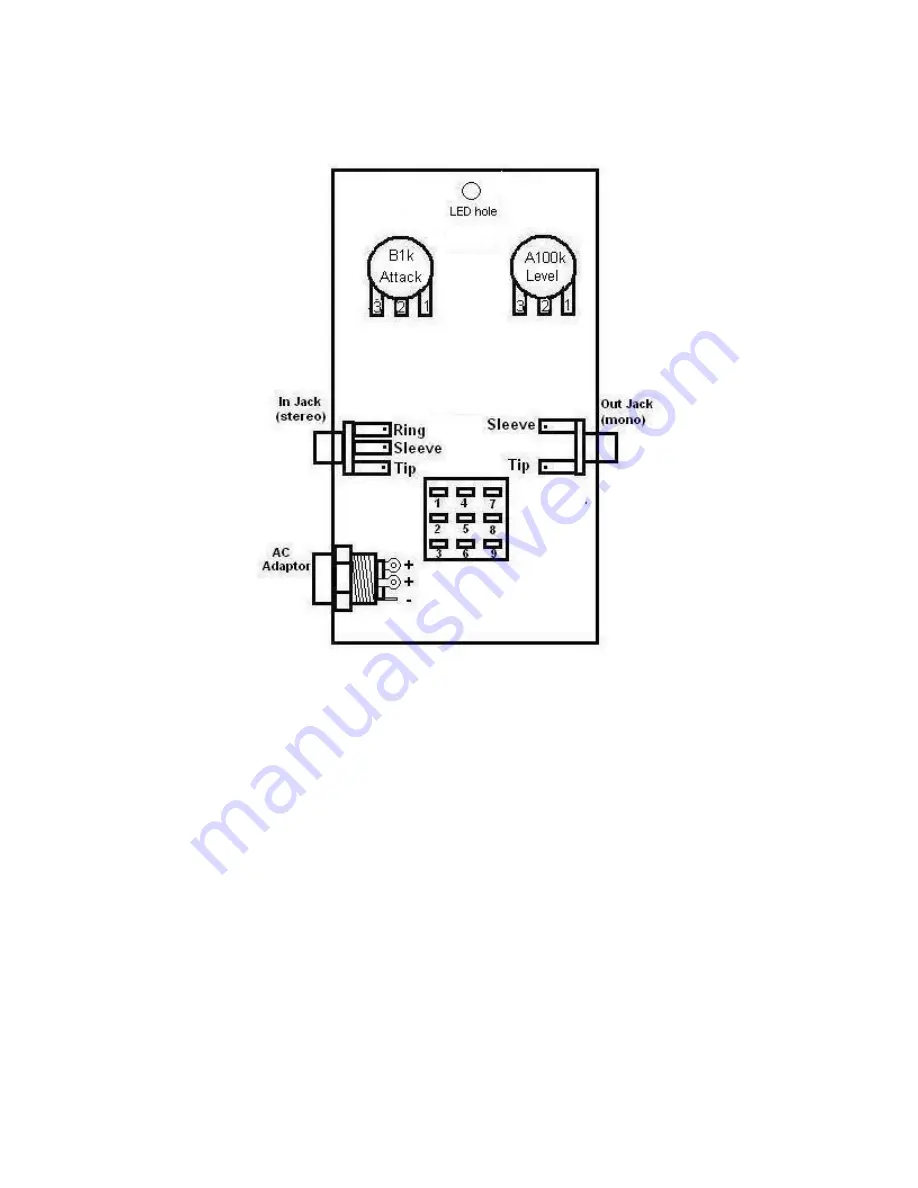
Assembly
1. Install the jacks first. If you are looking down inside the enclosure, the mono jack
goes on the right side and the stereo jack goes on the left. Place the washer on the
outside of the enclosure. Use a 1/2" wrench to tighten
2. Install the AC adaptor jack. The bolt goes on the inside. Use a 3/4" or 14mm wrench
to tighten
3. Install the potentiometers so that the solder lugs are pointing down. The washers go
on the outside. Use a 10mm wrench to tighten but only snug. Do not over tighten the
pots. You should leave the pots somewhat loose until they are soldered to the PCB so
that it will be easier to mount them.
4. Install the footswitch. The first bolt and metal washer go inside. The plastic washer
and second bolt go on the outside. It does not matter which side you designate as the
"leading edge" of the footswitch as long as you orient it so that the flat sides of the solder
lugs are aligned in horizontal rows, not vertical columns.


