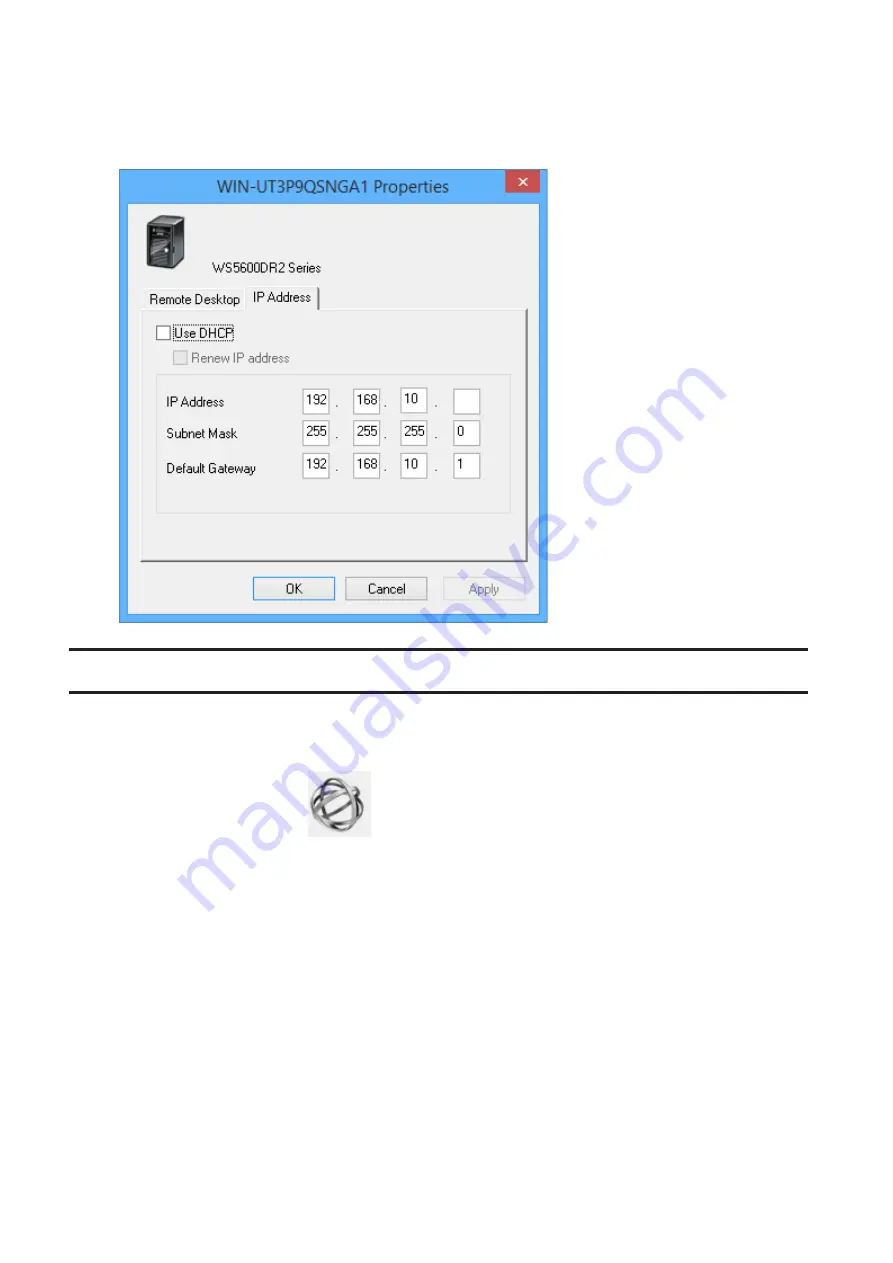
2
Right-click on your TeraStation's icon and choose
Properties
-
IP Address
.
3
Clear the "Use DHCP" checkbox, enter the IP address and subnet mask, and click
OK
. If the username and
password prompts appears, enter the admin username and password.
NAS Navigator2 for macOS
NAS Navigator2 is a utility program that makes it easy to display Windows Storage Server, change the IP address, or
check its hard drive in remote desktop. If you installed the TeraStation with the TeraNavigator, NAS Navigator2 was
installed automatically.
To launch NAS Navigator2, click the
icon in the Dock.
95
Содержание TeraStation WS5200DN2
Страница 5: ...Chapter 1 Getting Started Diagrams WS5600DN2 WS5600DR2 WS5400DN2 WS5400DR2 4...
Страница 23: ...4 Click Next 5 Enter the volume size that you want to create and click Next 22...
Страница 26: ...2 Click Disk Management 3 Right click the volume that you want to format and select Format 25...
Страница 39: ...4 Click Next 38...
Страница 40: ...5 Select Custom and click Next 39...
Страница 41: ...6 Click Add Items 7 Select the backup source folders or drives and click OK 40...
Страница 42: ...8 Click Next 41...
Страница 43: ...9 Specify the schedule to run the backup and click Next 42...
Страница 46: ...3 Right click on Local Backup and click Recover The recovery wizard will start 4 Click Next 45...
Страница 47: ...5 Select the date when backing up the data and click OK 46...
Страница 51: ...2 Click Change 3 Select Domain enter a domain name and click OK 50...
Страница 53: ...Installing DFS 1 In Server Manager click Dashboard Add roles and features 2 Click Next 52...
Страница 54: ...3 Select Role based or feature based installation and click Next 4 Click Next 53...
Страница 56: ...7 Click Next 8 Click Install 9 Click Close to finish 55...
Страница 57: ...Creating Namespaces 1 In Server Manager click Tools DFS Management 2 Click Namespaces New Namespace 56...
Страница 58: ...3 Enter a hostname for the namespace server and click Next 57...
Страница 59: ...4 Enter a name for the namespace and click Next 58...
Страница 63: ...2 Click Replication New Replication Group 62...
Страница 64: ...3 Select the type of replication group and click Next 63...
Страница 65: ...4 Enter a name for the replication group and click Next 64...
Страница 66: ...5 Enter the hostname of the file server for the replication source and click Next 65...
Страница 67: ...6 Click Add 66...
Страница 68: ...7 Enter the path of the replication source and click OK 67...
Страница 69: ...8 Click Next 68...
Страница 70: ...9 Enter the hostname of the file server for the replication target and click Next 69...
Страница 77: ...3 Right click the user whose password will be changed and click Set Password 4 Click Proceed 76...
Страница 80: ...3 Right click Groups and choose New Group 4 Enter a group name and click Add 79...
Страница 81: ...5 Click Advanced 6 Click Find Now 80...
Страница 82: ...7 Select the users to be registered to the group then click OK 8 Click OK 81...
Страница 86: ...8 Choose Everyone and check Allow for Change 85...
Страница 87: ...9 In the Security tab click Edit Add 10Enter Everyone under Enter the object names to select then click OK 86...
Страница 109: ...For Customers in China CCC A For Customers in Taiwan BSMI For Customers in Korea KC A 108...


