www.plusdeck.com
●
Converting the tape to digital files
2
51
Part 6
Getting more out of Plusdeck2c
50
3
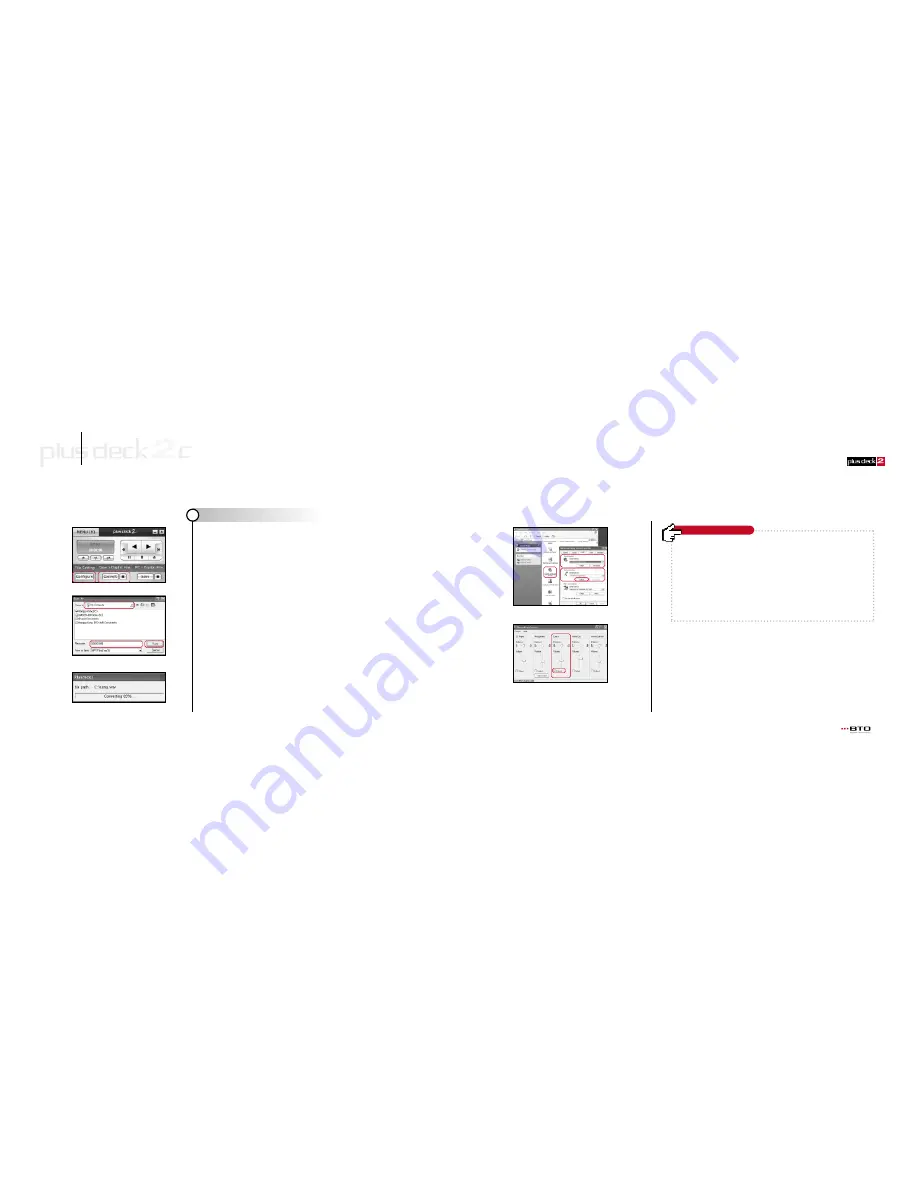
1. Insert the tape to be converted.
2. Start the Plusdeck2c software.
3. Find where you want to start converting in the tape and stop all Plusdeck2c
operation.
4. Setting can be changed by clicking Configure button. The setting does not need to
be changed each time because the previous setting is stored.
5. Click Convert button under Tape
▶
Digital File menu
6. Specify a folder and file name when Save As window appears.
(Special characters such as ?./ can not be used in the name.)
7. If you click Save button, converting is started while the tape is being played.
8. Click
■
(Stop) button to finish the process manually or the process will continue
until it stops according to the stop option selected.
9. File is stored first as native wave format. If mp3 format is selected, wave file is
compressed to mp3 and wave file is removed afterward.
10. If wave format is selected, the process ends without mp3 compression process.
(If the intended job is to make an audio CD, it is recommended that file be stored
as wave format.)
Specify a folder and file name
Compressing wave to mp3
In case there is no sound in created files, the sound card setting needs to be
changed as shown in the picture on the left.
1. Check the sound card setting in the control panel
Windows98: Start
1
Control Panel
1
Multimedia
WindowsXP: Start
1
Control Panel
1
Sounds and Audio devices
1
Audio tab
2. Sound playback and recording device must use the same device. If Sound
recording appears gray, the sound card driver needs to be reinstalled.
3. Click Volume in Sound recording and check if Line In is selected. The Line In
volume level should be increased if it is set too low.
Problem/Solution 1
Windows
XP


