


4-11
Confidential
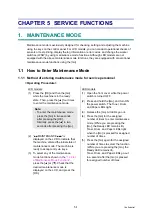
3.1 Entering Adjusted Value of Laser Unit
<Operating Procedure>
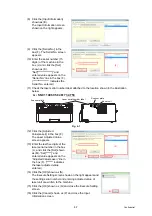
(1) Follow the procedure below to enter the maintenance mode.
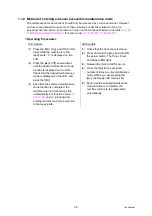
(2) Connect the machine to your computer using
the USB cable.
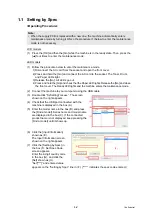
(3) Open the temporary folder and double-click
“SvSettingTool.exe”. The screen shown on the
right appears.
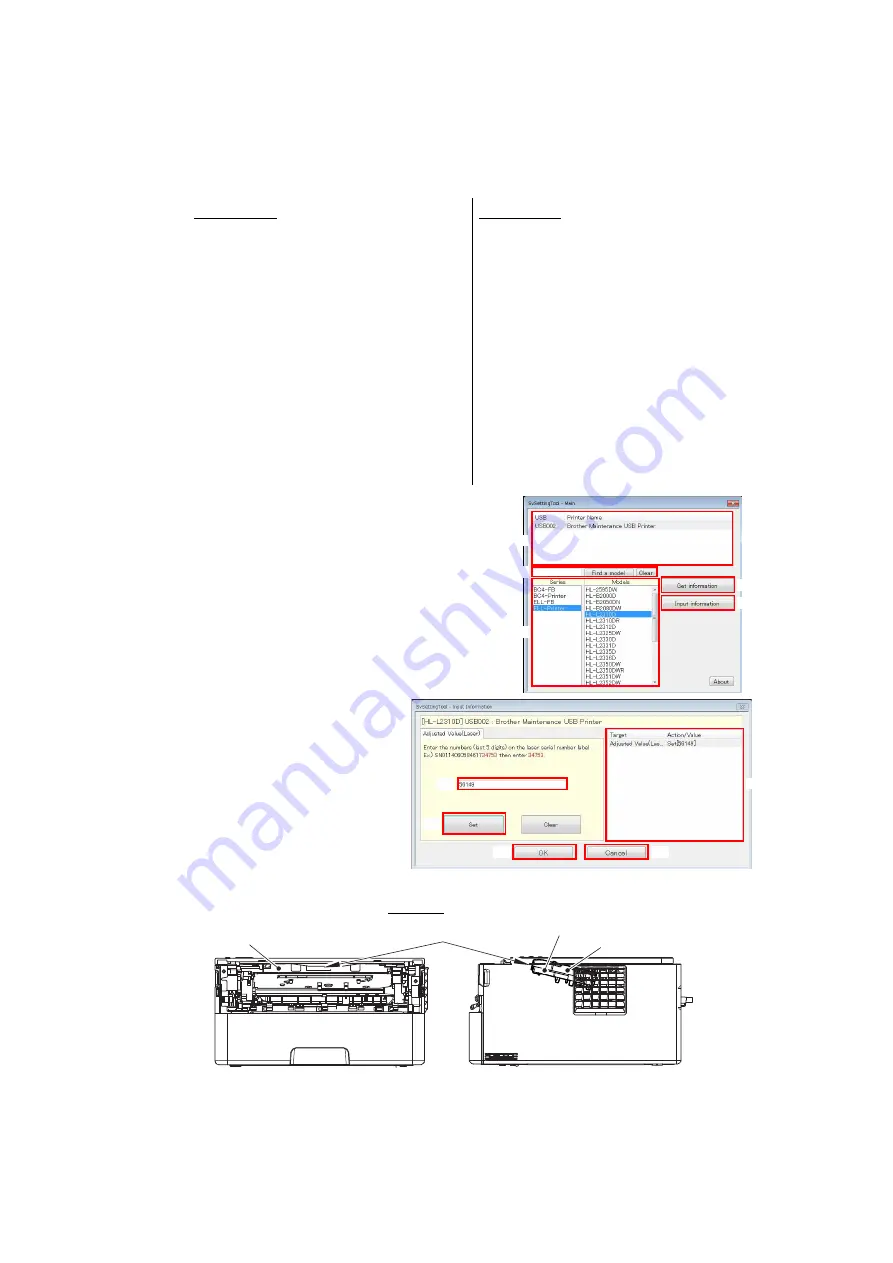
(4) Check that the USB port connected with the
machine is displayed in the box (A).
(5) Enter the model name in the box (B) and press
the [Find a model]. Series name and model
name are displayed in the box (C).
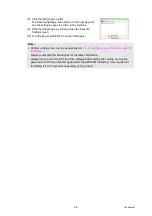
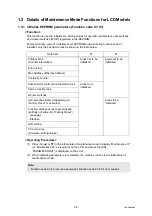
(6) Click the [Input information]
shown as (E).
The Input information screen
shown on the right appears.
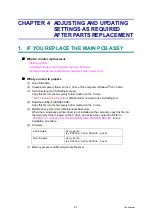
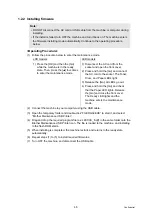
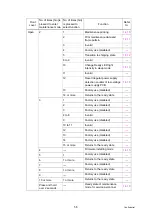
(7) Check the laser serial number
label attached to the location
shown in the illustration below.
Ex.)
SN011406058461734753
Fig. 4-2
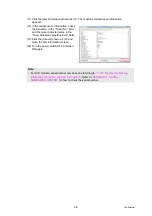
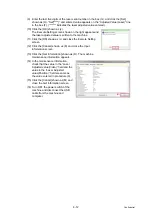
(8) Click the [Adjusted Value(Laser)] in the box (F). The Laser Adjusted Value screen
appears.
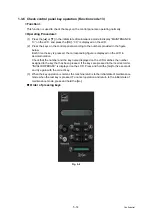
LCD models
1) Press the [OK] and then the [Go]
while the machine is in the ready
state. Then, press the [
▲
] four times
to enter the maintenance mode.
LED models
1) Disconnect the AC cord from the
socket and open the front cover.
2) Press and hold the [Go] and connect
the AC cord to the socket. The Toner,
Drum, and Paper LEDs light.
3) Release the [Go]. All LEDs go out.
4) Press and hold the [Go] and check
that the Paper LED lights. Release
the [Go] and close the front cover.
The Ready LED lights and the
machine enters the maintenance
mode.
(A)
(B)
(C)
(D)
(E)
(F)
(J)
(K)
(G)
(H)
Laser unit
Laser serial number label
Scanner plate
Scanner plate
Содержание HL-B2080DW
Страница 30: ...2 8 Confidential MP models Fig 2 4 Feed from MP tray Eject to back side Back side Front side ...
Страница 152: ...3 43 Confidential 9 17 Filter 1 Release the Hook to remove the Filter from the Air duct Fig 3 38 Hook Filter Air duct ...
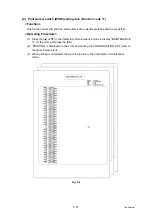
Страница 211: ...5 27 Confidential Fig 5 6 K 100 K 1 W 100 K 5 Lattice Total ...
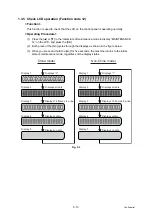
Страница 216: ...5 32 Confidential Test pattern Fig 5 9 ...


