IV –
26
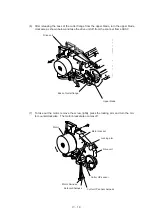
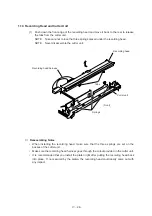
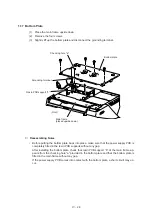
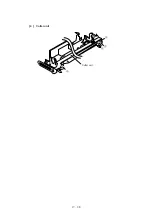
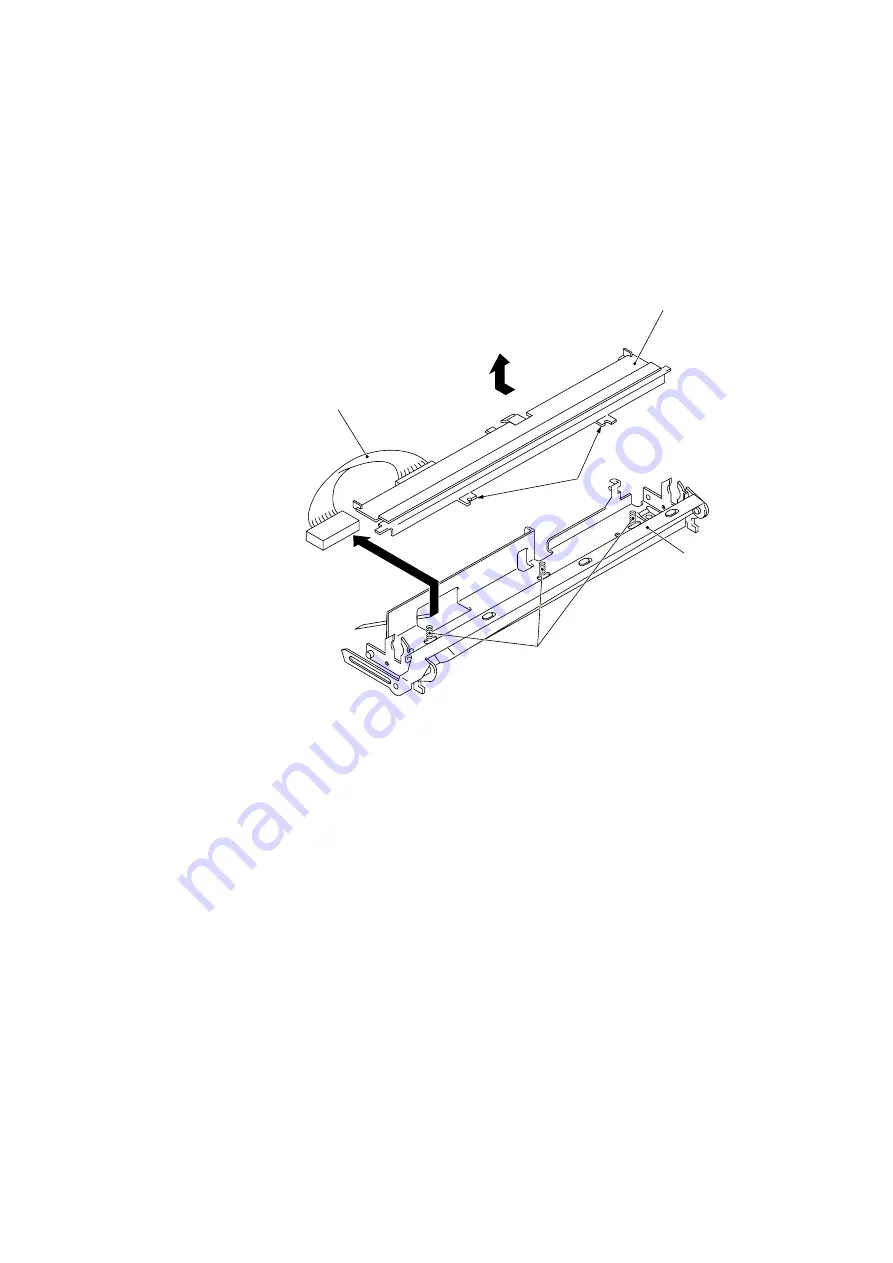
1.14 Recording Head and Cutter Unit
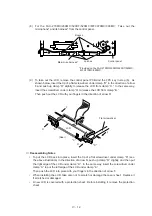
(1)
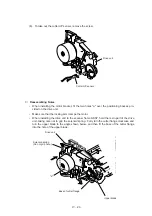
Push down the front edge of the recording head and move it back to the rear to release
the tabs from the cutter unit.
NOTE:
Take care not to lose the three springs placed under the recording head.
NOTE:
Never disassemble the cutter unit.
Recording head harness
Recording head
(Front)
■
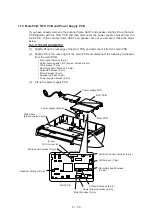
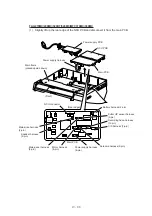
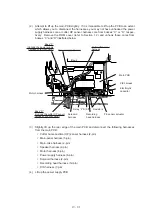
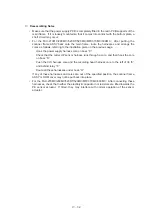
Reassembling Notes
•
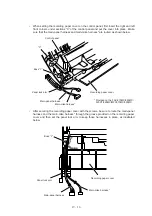
When installing the recording head, make sure that the three springs are set on the
bosses of the cutter unit.
•
Make sure the recording head harness goes through the cutout provided in the cutter unit.
•
It is recommended that you install the platen right after putting the recording head back
into place. If not secured by the platen, the recording head could easily come out with
any impact.
Cutter unit
Springs
Tabs
Содержание FAX-270MC
Страница 4: ...CHAPTER I GENERAL DESCRIPTION ...
Страница 11: ...CHAPTER II INSTALLATION ...
Страница 12: ...CHAPTER III THEORY OF OPERATION ...
Страница 49: ...CHAPTER IV DISASSEMBLY REASSEMBLY AND LUBRICATION ...
Страница 86: ...IV 36 4 Cutter unit Cutter unit A A A A ...
Страница 87: ...CHAPTER V MAINTENANCE MODE ...
Страница 140: ...CHAPTER VI ERROR INDICATION AND TROUBLESHOOTING ...
Страница 157: ...March 98 5X1S112 Printed in Japan ...
Страница 173: ...D POWER SUPPLY 100 120 V U S A CANADA ...
Страница 174: ...POWER SUPPLY 200 240 V EUROPE SOUTH AMERICA D ...
Страница 175: ...POWER SUPPLY 200 240 V GULF ASIA CHINA D ...
Страница 192: ...D POWER SUPPLY 100 120 V U S A CANADA ...
Страница 193: ...POWER SUPPLY 200 240 V EUROPE SOUTH AMERICA D ...
Страница 194: ...POWER SUPPLY 200 240 V GULF ASIA CHINA D ...
Страница 195: ...FACSIMILE EQUIPMENT PARTS REFERENCE LIST MODEL FAX170 190 190 Plus 195 ...
Страница 198: ......
Страница 203: ......
Страница 206: ...Remarks 8 8 8 8 8 8 9 9 8 8 8 8 8 8 0 1 0 1 Brother Technical Information FAX98250 4 ...
Страница 208: ... 8 01 8 01 8 8 8 8 0 1 0 1 8 8 8 8 Brother Technical Information FAX99102 6 ...
Страница 220: ......

