Briteq BTX-700SW Скачать руководство пользователя страница 6

BRITEQ®

7

BTX-700SW

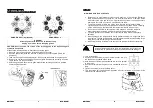
5. Gobo and Lamp

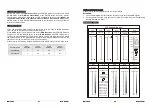
5.1 Inserting/Exchanging rotating gobos

GOBO WHEEL 1 (replaceable)

GOBO WHEEL 2

DANGER!

Install the gobos with the device switched off only.

Unplug from mains before changing gobos!

CAUTION: Never unscrew the screws of the rotating gobo as the ball bearing will
otherwise be opened!

Please follow the steps below to insert/change rotating gobos
1. Open the cover by loosening the fastening screws on the cover.
2. Push the gobo plate (follow the direction 1) and gently pull out the plate (follow the

direction 2).

3. Take out the ring with an appropriate tool. Do not touch the surface of the glass gobo.
4. Remove the original gobo and inset a new one (glazy side towards the lamp). Insert the

ring to secure it in the gobo holder.

5. Install the gobo plate back into the gobo wheel. Make sure the gobo plate is installed

under the pressure plate.

BRITEQ®

8

BTX-700SW

5.2 Lamp

MSR/ MSD Gold 700/2 miniFastFit

Because of its high internal pressure, there might be a risk that the Discharge
lamp would explode during operation. The lamp emits intense UV radiation which
is harmful to the eyes and skin. The high luminance of the arc can cause severe
damage to the retina if you take a close look at the lamp.

To protect the lamp, always turn off the lamp first (via control panel or DMX
controller) and let the unit run at least five minutes to cool down before switching
off the mains supply. Never handle the lamp or luminaries when it is hot.

Do not touch the bulb with bare hands. If this happens, clean the lamp with
denatured alcohol and wipe it with a lint free cloth before installation.

The lamp generates UV radiation. Never operate the lamp without appropriate
shielding.

When lighting up, the lamp operates at high pressure and there is a slight risk of arc
tube rupture. The risk increases with age, temperature and improper handling of the
lamp. Do not use the lamp longer than its lifespan.

Make sure the lamp is located in the center of the reflector for the best projection.

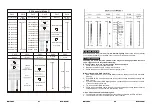
Change Lamp

WARNING

1. Turn off the power.
2. Unscrew the two screws (A), open the lamp cover, turn it to

the position as the sketch shown below.

3. Hold the base of the lamp, anticlockwise turn until it is parallel

to the groove.

4. Inset a new lamp follow the groove, turn it clockwise to fix the

lamp.

5. Tighten the screws (A) to fix the lamp cover.
6. Turn the screws (B) to adjust the lamp position be sure it is located in the center of the

reflector for the best projection.

In case of replacement of the lamp or maintenance, do not open the
fixture within 15 minutes until the unit cools down after switching off.

Содержание BTX-700SW

Страница 1: ......

Страница 2: ......

Страница 3: ...e minimum distance between light output and the illuminated surface must be more than 2 5 meters Disconnect mains power before fuse lamp replacement or servicing Replace fuse lamp only with the same t...

Страница 4: ...y powerful output High quality diachronic lenses Beam angle 15 35 Movement Pan 540 Tilt 270 Pan Tilt moving speed adjustable Automatic Pan Tilt correction Easy calibration and maintenance by magnetic...

Страница 5: ...ed for transportation protection the tilt lock button 4 is pressed and 1 Arm 2 Front panel 3 head 4 Tilt lock button Black 5 Tilt unlock button Gray 6 Pan lock 7 Handle 8 Base 9 Antenna optional BRITE...

Страница 6: ...close look at the lamp To protect the lamp always turn off the lamp first via control panel or DMX controller and let the unit run at least five minutes to cool down before switching off the mains sup...

Страница 7: ...ose the submenu press the ENTER button to store and automatically return to the last menu Press MENU button or let the unit idle one minute to exit menu mode In the event of disconnecting with mains p...

Страница 8: ...button to confirm use UP and DOWN button to select Yes or No press ENTER button to store Press MENU button back to the last menu or let the unit idle one minute to exit menu mode Reset Memory Select R...

Страница 9: ...X controller to make the lamp on BRITEQ 14 BTX 700SW Off If DMX Off l Lamp turns off when DMX signal is cut off Select Off If DMX Off press ENTER button to confirm present mode will blink on the displ...

Страница 10: ...or CMY Gobo Shutter Dimmer Focus Zoom Prism Frost Iris Flatb or All BRITEQ 16 BTX 700SW Pan Tilt Reset Pan Tilt Select Pan Tilt press ENTER button to confirm use UP and DOWN button to select Yes the u...

Страница 11: ...offset the value from 128 to 127 press ENTER button to store Press MENU button to exit Cyan Cyan home position adjust Enter offset mode Select Cyan press ENTER button to confirm the present position w...

Страница 12: ...It appears when the lamp has been on over 700 hours please turn off the lamp Memory Initial Fail It appears when the memory IC is damaged CPU B Error CPU C Error CPU D Error They appear when board P...

Страница 13: ...idle one minute to exit menu mode Please refer to the following diagram to address your DMX512 channel for the first 4 units Channel mode Unit 1 Address Unit 2 Address Unit 3 Address Unit 4 Address 2...

Страница 14: ...234 255 Color11 Ch21 Focus 0 255 0 0 255 100 190 193 Stop BRITEQ 24 BTX 700SW 22 Channels mode 2 Ch5 Ch6 Ch1 Ch2 Ch3 Ch4 Shutter 22Channels Mode 2 Ch7 Ch8 Ch9 Ch10 Ch11 Color Cyan Magenta Yellow Dimme...

Страница 15: ...r Cyan Magenta Yellow 0 0 255 100 0 0 255 100 0 0 255 100 Function Pan Tilt Macro 000 007 Stop 008 015 Macro1 016 023Macro2 024 031Macro3 032 039Macro4 040 047Macro 5 056 063Macro7 064 071Macro8 072 0...

Страница 16: ...he user manual of our firmware updater not included order code 4319 to update the fixture 9 Troubleshooting Following are a few common problems that may occur during operation Here are some suggestion...

Страница 17: ...tight as it is can easily rupture 5 Reverse the procedures from step 3 to 2 10 Maintenance and Cleaning Maintenance Ignitor Ballast Filter A As the pictures shown above please replace the cable or ca...

Отзывы: