background image

Instructions for Installation & Use - Series No. 6100/A/2013

Instructions for Installation & Use - Series No. 6100/A/2013

2

3

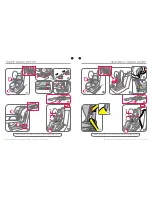
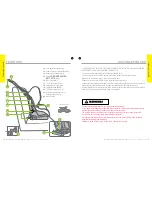
ISOFIT QUICK SETUP

SEATBELT QUICK SETUP

7

2

1

9

8

8

7

SEE PAGE 19 - 23 FOR FURTHER INFORMATION

SEE PAGE 24 - 27 FOR FURTHER INFORMATION

5

3

4

2

3

6

1

5

6

4

Содержание TRUFIX

Страница 1: ...ISOFIX COMPATIBLE 6 months to 4 years approx Series No 6100 A 2013 IMPORTANT KEEP THIS BOOKLET IN THE PLACE PROVIDED ON THE CHILD RESTRAINT SHOULDERS MUST BE BELOW THIS LINE SHOULDERS MUST BE ABOVE T...

Страница 2: ...Series No 6100 A 2013 Instructions for Installation Use Series No 6100 A 2013 2 3 ISOFIT QUICK SETUP SEATBELT QUICK SETUP 7 2 1 9 8 8 7 SEE PAGE 19 23 FOR FURTHER INFORMATION SEE PAGE 24 27 FOR FURTHE...

Страница 3: ...rn s incorporado o un asiento elevador hasta que sus hombros alcancen el marcador de altura superior del asiento elevador E 6 4 IND 6 4 KSA AUS Da utilizzare solo nel senso di marcia da un bambino le...

Страница 4: ...stallation in this book If in doubt about the method of installation consult Britax childcare or agent or a child restraint fitter or in New Zealand to consult the agent for the vehicle THIS RESTRAINT...

Страница 5: ...t attach the lower attachment connectors of two separate child restraints to the same ISOFIX low anchorages in your car Always attach the top tether strap to the child restraint upper anchorage in you...

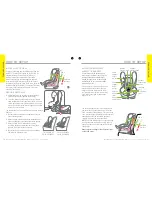
Страница 6: ...elow the lower shoulder height marker Continue to use your current child restraint Do not continue to use the restraint if the child s shoulders are above the upper height marker Marker A Marker B Fro...

Страница 7: ...8 years of age Or you can use a booster seat suitable for children up to 8 10 years of age with a lap sash seatbelt or a Child Harness suitable for use with the booster seat 12 13 SPECIAL FEATURES 1...

Страница 8: ...nal Road Rules for exemptions SUITABLE FOR USE Do not use the restraint without the top tether strap correctly attached If your vehicle is not fitted with an anchor point please contact a Child Restra...

Страница 9: ...e seat back page 22 Ref I after recline adjustment D Ensure the slack is removed from the vehicle seatbelt and or the top tether before use INSTALL INTO VEHICLE 17 HOW TO SETUP ADJUSTING HASSLE FREE H...

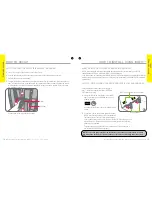
Страница 10: ...es installation mistakes by optimising the protective effect of a solid connection between vehicle and ISOFIX compatible child restraint HOW TO INSTALL USING ISOFIT HOW TO INSTALL USING THE VEHICLE S...

Страница 11: ...Lower Connector Protection Moulding and store in a safe place This lower connector protection is required when just using a seatbelt E The hook must be open on both ISOFIT connectors To open the hook...

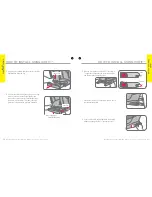
Страница 12: ...move slack as shown but do not over tighten causing the restraint base to lift off the vehicle seat Always secure the loose end of the top tether strap to prevent it hanging out of the car or being ac...

Страница 13: ...upper anchorage point then refer to page 41 to 44 for the installation of the upper anchorage point provided with this child restraint G If using just a lap seatbelt thread the seatbelt through the ba...

Страница 14: ...hed to the cover Pull Adjustment Strap to remove slack C A EXPLANATION NOTE This method of installation ensures good seatbelt tension even with the child in the seat We recommend that as your child gr...

Страница 15: ...ness tongue into the harness buckle followed by the other tongue until a click is heard Should the second tongue not insert press the red button and reinsert the tongues When both tongues are inserted...

Страница 16: ...Check the webbing straps for fraying B Check there are no cracks in moulding C Check the harness adjuster is operating and is clamping the webbing D Ensure the buckle is free of fluff liquid or other...

Страница 17: ...ve the harness buckle from the restraint From the underside of the restraint pull each crotch 3 bar slide then turn the 3 bar slide and push back through each slot B Place the harness buckle under war...

Страница 18: ...e front of the headrest cover E Lift the top of the headrest cover over the moulding and then pull down cover away from moulding F Lift headrest up to highest position Unclip the press studs on the co...

Страница 19: ...child and are easily fitted to the shoulder harness straps by A Pull apart fasteners and remove shoulder pads from harness B Re fit shoulder pads to harness and attach fasteners for use Use of afterm...

Страница 20: ...UPPER ANCHORAGE POINT Consult the vehicle owner s handbook for location of anchorage fittings or anchorage points and the possible use of spacers Some vehicles may have an anchor fitting fitted by th...

Страница 21: ...OLT MAXIMUM TORQUE IS 20 Nm 14 75 ft lb Note Minimum of five full turns of attachment bolt is required before tightening force is applied IF THE CAR IS NOT FITTED WITH CHILD RESTRAINT UPPER ANCHORAGE...

Страница 22: ...D METAL OR TO WOOD OR SYNTHETIC STRUCTURES WHEN DRILLING 9 MM HOLE DO NOT DRILL THROUGH FUEL LINES FUEL TANKS ELECTRICAL WIRING OR RADIO SPEAKERS WEBBING STRAPS MUST BE PROTECTED FROM SHARP CORNERS AN...

Страница 23: ...e child restraint This notice is to advise you of the requirements of the Australian New Zealand Standards and our obligation in complying with the standards Please assist the owner of this restraint...

Страница 24: ...support their head Children that have out grown this restraint are safest in their booster seat until their shoulders reach the upper shoulder height marker of the booster seat For tether straps Stra...

Страница 25: ...perty of Britax Childcare Pty Ltd Australia The BRITAX trademark is the property of Britax Childcare Holdings Ltd UK We reserve the right to alter this product without notice 2014 Britax Childcare Pty...

Отзывы: