


Instructions for Installation & Use - Series No. 40/A/2013
Instructions for Installation & Use - Series No. 40/A/2013
72
73
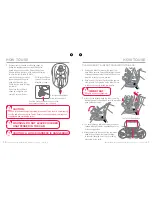
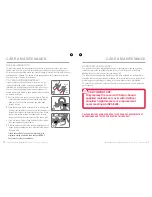
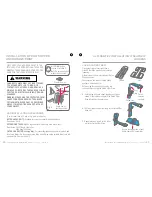
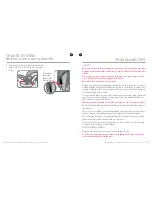
HOW TO REMOVE THE BRITAX
CLICK & GO™ADAPTOR
To remove the Britax Click & Go™ Adaptor,
ensure handle is in “rocking position” .
Cover removal is not necessary.
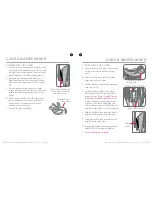
A. Unclip the two infant carrier cover elastic
straps which are secured by a plastic hook
under the handle pivot.
B. Gently unscrew the Press Pin and remove.
Pull out the locking pin and carefully
remove the adaptor from carry handle.
C. Store for future use with these instructions.
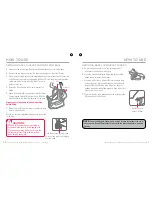
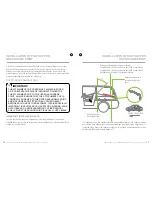
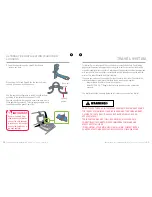
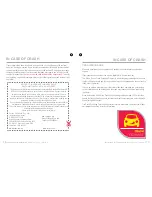
HOW TO REPLACE THE BRITAX CLICK & GO™ADAPTOR
2
Push in under handle
Pull down away
from under handle
B. Align the Adaptor in the recess under the handle
boss, push up and click into place.
A. To attach the Britax Click & Go™ Adaptor to the Infant Carrier ensure the Carrier's
Handle is in “Rocking position” , disconnect the elastic under the handle boss and
pull the trim away from the side of the carrier to align the holes.
2
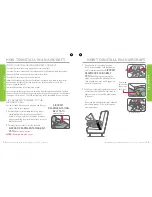
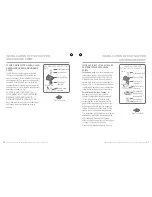
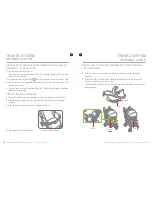
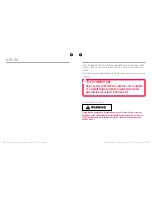
Push in Locking Pin
Pull out Locking Pin
C. Insert Locking Pin into hole. Align both top and
bottom holes.
2
C
B
Unhook
elastic
underneath
the adaptor
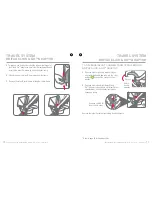
D. Then push the Press Pin in the bottom hole and
push into place.
Push in Press Pin
D
TRAVEL SYSTEM
BRITAX CLICK & GO™ADAPTOR
TRAVEL SYSTEM
BRITAX CLICK & GO™ADAPTOR


