


Instructions for Installation & Use - Series No. 40/A/2013
Instructions for Installation & Use - Series No. 40/A/2013
68
69
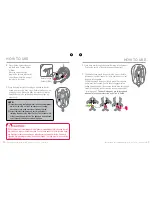
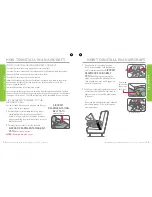
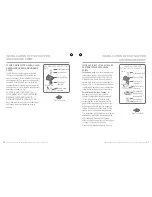
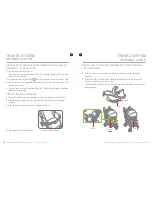
D. Then lower the foot end of the Infant Carrier until it rests on the seating surface of the
stroller.
E. Rotate the Infant Carrier handle down if
required, then check the Infant Carrier is
securely fixed to the stroller before use.
F. Refer to the Stroller instruction book for
other instructions.
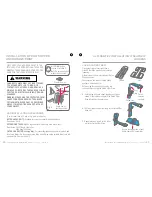
REMOVING THE INFANT CARRIER FROM THE STROLLER
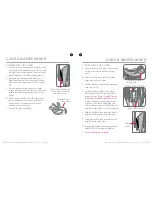
A. Roate the Infant Carrier handle up to the "carry position" as above and grip firmly in
one hand.
B. Raise the Infant Carrier release catch located on the rear of the Infant Carrier.
C. Lift the Infant Carrier clear of the stroller.
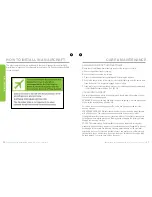
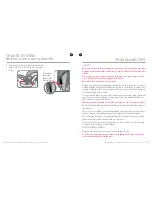
ENSURE THE BABY IS SECURED IN THE INFANT CARRIER WITH THE HARNESS
AT ALL TIMES. THE INFANT CARRIER IS FITTED WITH A CANOPY WHICH CAN BE
USED WHEN THE CARRIER IS CONNECTED TO THE STROLLER. THE CANOPY
CAN ALSO BE USED IN THE CAR.
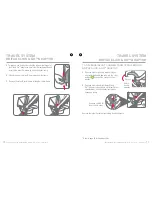
Stroller seating surface
* Refer to page 23 for handle position
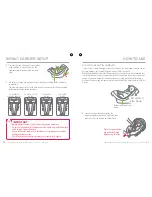
TRAVEL SYSTEM
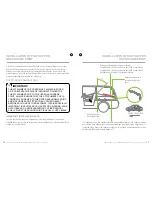
BRITAX CLICK & GO™ADAPTOR
Only use Infant Carrier with compatible Britax/Steelcraft Stroller. Or with
other brand strollers that have an approved Britax Click & Go
™
receiver.
IMPORTANT :
IMPORTANT :
ATTACHING THE INFANT CARRIER TO THE STROLLER
FRAME
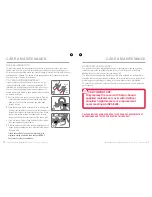
If the Infant Carrier is fitted with Britax Click & Go™Adaptor, then fit as follows:
A
A
A. Remove Stroller seat or Carry cot from frame, The
Infant Carrier must face the Stroller handle. With
the Infant Carrier handle in the upright position, just
place the Click & Go
™
adapters over the stroller
frame sockets and push the Infant Carrier into the
socket. The adapters will click in with an audible
click.
Secure your baby into the Infant Carrier with the
harness provided.
Pull up on both sides of the Infant Carrier and confirm
it is locked into the frame. If not locked on both sides,
repeat above steps.
Click
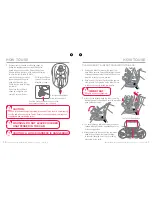
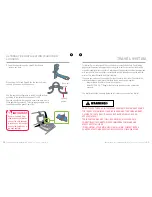
TRAVEL SYSTEM
INTEGRAL LATCH


