background image

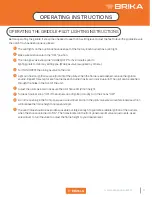
Utilisation des instructions d’allumage de la plaque chauffante-pilote
Avant d’utiliser la plaque chauffante, elle doit être vérifiée pour s’assurer qu’elle est à niveau. Ajustez les pieds pour 
niveler la plaque chauffante. Assurez-vous que le bac de récupération a été correctement placé.

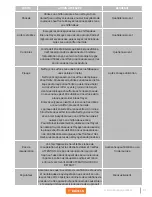
Les témoins lumineux de l’appareil ont été réglés en usine. Chaque brûleur a une veilleuse:

Assurez-vous que tous les boutons sont en position « OFF ».

Le robinet de gaz principal doit être « FERMÉ/ÉTEINT » pendant cinq minutes avant
allumer les veilleuses pour évacuer tout gaz sortant. (La vanne de gaz principale est fournie par d’autres.)

Tournez sur « ON/OUVRIR » le robinet de gaz principal de l’unité.

Allumez et maintenez une source d’allumage (allumette) au niveau des pilotes. Quand la flamme est établie, 
retirez la source d’inflammation. Répétez cette étape pour chaque brûleur car chaque brûleur a sa propre 
veilleuse individuelle. Le pilote peut être atteint par les trous à l’avant de l’appareil.

Ajustez la vanne pilote et assurez-vous que la flamme pilote est à 1/2 pouce de hauteur.

Tournez chaque bouton de brûleur sur « ON ». Si les brûleurs ne s’allument pas rapidement, tournez le Bouton
 « OFF », À partir de l’ouverture dans le panneau avant, utilisez un tournevis et tournez la vis de la vanne pilote 
dans le sens inverse des aiguilles d’une montre, ce qui augmentera la hauteur de la flamme et répétez l’étape 4.
La flamme de la veilleuse doit être aussi petite que possible mais suffisamment grande pour garantir un 
allumage fiable des brûleurs lorsque les boutons sont tournés sur « ON ». Les trous situés dans le panneau 
avant sont les réglages de la vanne pilote. Utilisez un tournevis pour tourner la vanne pour ajuster la hauteur de la 
flamme au niveau souhaité.

Pour allumer le brûleur, tournez le bouton sur la position « ON ». Revenez ensuite au niveau de flamme souhaité. 
La plage de réglage est pratiquement infinie entre « ON » et « OFF »
L'espace entre les jambes au fond admet l'air de combustion. NE BLOQUEZ PAS CET ESPACE.
Tous les brûleurs sont allumés par des veilleuses allumées en permanence. Il suffit de tourner la vanne à la 
hauteur de flamme souhaitée pour mettre l'unité en service.
Ne laissez pas les ventilateurs souffler directement sur l'appareil. Dans la mesure du possible, évitez d'ouvrir les 
fenêtres sur les côtés ou à l'arrière de l'unité. Évitez les ventilateurs muraux qui créent des courants d'air croisés 
dans une pièce.
Il est également nécessaire qu'une quantité d'air suffisante puisse entrer dans la pièce pour compenser la 
quantité d'air évacuée par tout système de ventilation. Sinon, une pression atmosphérique inférieure à la 
normale se produira, affectant le fonctionnement et provoquant des conditions de travail indésirables.
Une hotte correctement conçue et installée agira comme le cœur du système de ventilation de la pièce dans 
laquelle l'unité est installée, et laissera l'unité indépendante des conditions de tirage changeantes.

 REMARQUE :

 il peut être nécessaire d'ajuster l'équilibre de l'alimentation en gaz, en volume et en air de chaque 

brûleur. Cela doit être fait par un technicien autorisé.

1

2

4

5

6

3

ALLUMER LE BRULEUR

19

www.brikaequipment.ca

MODE D’EMPLOI

Содержание BMG-24

Страница 1: ...CUSTOMER SERVICE 1 800 567 3620 Distributed by Distex M M 585 AVENUE MELOCHE DORVAL QC CANADA H9P 2P1 www brikaequipment ca ProductManual Manueld instructions MODELS MODÈLES BMG 24 BMG 36 BMG 48 ...

Страница 2: ...INGINSTRUCTIONS 9 TROUBLESHOOTING 11 CONVERSIONTOLPG 12 LIMITEDWARRANTY 13 ENGLISH FRANÇAISE ÀL ATTENTIONDESPROPRIÉTAIREETDESEXPLOITANTS 15 DÉBALLAGE INSTALLATION 16 AVERTISSEMENTSETMESURESDESÉCURITÉPOURLE FONCTIONNEMENT 18 MODED EMPLOI 19 INSTRUCTIONSDENETTOYAGE 20 DÉPANNAGE 21 CONVERSIONAUGAZPROPANE 23 24 GARANTIELIMITÉE 25 2 www brikaequipment ca ...

Страница 3: ...theyareover18yearsold areadequatelytrained andsupervised andhavereadandunderstoodthismanual Donotattempttorepairorconvertanygastypesoneyour own Repairsandconversionsaretobemadesolelybyanauthorizedlocalservicer Ownersshouldalsoensurethatnocustomers visitorsorotherunauthorizedpersonnelcomeincontactwiththis equipment Pleaserememberthatsuppliercannotanticipateeverycircumstanceofenvironmentinwhichitseq...

Страница 4: ...e CSA B149 2asapplicableandinaccordancewithlocalcodes WARNING Theapplianceanditsindividaualshutoffvalve tobesuppliedbyuser mustbedisconnectedfromthegassupplypipingsystemduring anypressuretestingofthatsystemattestpressuresinexcessof1 2psi 3 45kPa Thesemodelsaredesigned built andsoldforcommercialuseonly Instructionsmustbepostedinaprominentlocation ALLsafetyprecautionsmustbetakenintheeventtheusersmel...

Страница 5: ...tothepermanentlyfastenednutsonthefourcornersoftheunitandtightenbyhand Legsmust beinstalledtoadequatelyprovideproperventilationtotheunit Levelunitbyadjustingthefourfeetandtightensecurely Theadjustablefeethaveanadjustmentofoneinch forlineupwithothercountertoplines Donotslideunitwithlegsmounted liftifnecessarytomoveunit Thesuppliedgaspressureregulatorisfactoryseta4 NaturalgasW C or10 forL P THESEUNIT...

Страница 6: ...Ifyousmellgas immediatelyshutoffthemaingasvalve extinguishallheatandflames andcall911 Safetyinformation canbeobtainedfromyourlocalgassupplier Thecommissioningofyournewgriddleisoftheutmostimportance Commissioningisthethoroughandmethodical testingoftheequipment subsystems andsystemstoensurethatthefinalproductfunctionsproperlyandsafely attheworksite Byidentifyinganypotentialproblems i e equipmentloca...

Страница 7: ...foranyuseotherthantheuseintendedbythemanufacturer Neverusetheequipmentnearaheatingsource Thegriddledoesnotcontainanyuser serviceableparts Dealersorrecommendedqualifiedtechnicians shouldcarryoutrepairs Donotremoveanycomponentsorservicepanelsonthisproduct Neverbypass alter modifyorattachanyunauthorizedpartsorthisequipment Doingsomaycreate hazardsandwillvoidwarranty Suppliertakeseverycaretoensurethat...

Страница 8: ...t Lightandholdanignitionsource match atthepilots Whentheflameis established removetheignition source Repeatthisstepforeachburneraseachburnerhasitsownindividualpilot Thepilotcanbereached throughtheholesinthefrontoftheunit Adjustthepilotvalveandmakesurethepilotflameat1 2inchheight Turneachburnerknob ON Iftheburnersdonotignitepromptly turnthe knobs OFF Fromtheopeninginthefrontpanel useascrewdriverand...

Страница 9: ...SH OPERATINGTHEGRIDDLE 1 2 3 4 5 6 9 www brikaequipment ca Toignitetheburner turnknobtothe ON position Thenbackofftothedesiredflamelevel Therangeof adjustmentisvirtuallyinfinitebetween ON and OFF Thespacebetweenthelegsatthebottomadmitscombustionair DONOTBLOCKTHISSPACE Allburnersarelitfromconstantlyburningpilots Turningthevalvetothedesiredflameheightisallthatis requiredtoputtheunitinservice Donotpe...

Страница 10: ... recommended that the unit be disconnected from the gas supply by closing the main gas valve Use a clean cloth to wipe any down con trols and or knobs Daily Griddle Plate Clean surface with wire brush or metal spatula Clean the griddle surface thoroughly If necessary use a griddle stone wire brush or steel wool on the surface Rub with the grain of the metal while the griddle is still warm A mild s...

Страница 11: ...tubeclogged Replacepilottube Callforservice Strongsmellofgasincookingarea Maingaslineleak Turnoffmaingasvalve DONOTLIGHT FLAME igniteanything orturn switchon anythingelectrical Callfiredepartmentif neededandcallforservice Cookingsurfaceisheatingupslowly Carbonbuildup Ensurethattheburnersarekeptclean andfreefromcarbonbuildup debris IFproblemspersistandtheassignedsolutiondoesnotremedytheissue please...

Страница 12: ...htheunit Turnoffthemaingassupplybeforedoingany maintenance Removetheknobsand frontpanel Unscrewboltsandpilotvalve thenremovemanifold 2 WARNING GRIDDLECONVERSIONKITINSTRUCTIONS IMPORTANTSAFETYNOTICE Theseconversioninstructionsareforconversionofthegriddle Theinstructionsprovidedinthiskitareforthe conversionofNaturalGastoLPgasandrefertotheconversionoftheunitandkitprovided Animportantcoversionof thisu...

Страница 13: ...asticinsertattachedtothe headofthecap flipitoverandsnapbackinplace Picturedistheplasticinsert Pulloffinsertfromtheoctagon capheadandreversetheplasticinsertpositionsothatthe L P positionisattachedtotheoctagoncaphead Replacethefrontpanelandknobs 4 5 Continuewithinstallaion 13 www brikaequipment ca ...

Страница 14: ...ENTIALDAMAGESTOBUYERORANYTHIRD PARTYINCLUDING WITHOUTLIMITATION LOSSOFPROPERTY PERSONALINJURY LOSSOFBUSINESSORPROFITSOR OTHERECONOMICLOSSES ORSTATUTORYOREXEMPLARYDAMAGESWHETHERINNEGLIGENCE WARRANTY STRICT LIABILITY OROTHERWISE Thiswarrantyisgivenonlytothefirstpurchaserfromaretaildealer Nowarrantyisgiventosubsequenttransferees Warrantydoesnotcoverproductfailurescausedby failuretomaintain neglect ab...

Страница 15: ...tementformésetsupervisés etqu ilsaientluetcompriscemanuel N essayezpasderéparerou deconvertirvous mêmeuntypedegaz Lesréparationsetlesconversionsdoiventêtreeffectuéesuniquementparun réparateurlocalagréé Lespropriétairesdoiventégalements assurerqu aucunclient visiteurouautrepersonnelnonautorisén entreen contactaveccetéquipement N oubliezpasquelefournisseurnepeutpasanticipertouteslescirconstancesde l...

Страница 16: ...ndeséviersetdesdan gersdel eau NEJAMAIScontourner altéreroumodifiercetéquipementdequelquemanièrequecesoitparrapportàsonétat d origine Celapeutcréerdesdangersetannuleralagarantie GAZetPRESSIONDEGAZ Cetappareilestfournienusineaugaznaturel Cetteunitépeutêtreconvertieaugazpropaneparuntechnicienengaz licenciéetcertifié Unedocumentationpeutêtrenécessairepourlesproblèmesdegarantie Lenon respectdecette in...

Страница 17: ...STALLATIONSURDESSURFACESNONCOMBUSTIBLES UNIQUEMENT Dégagementsincombustibles 0 côté 0mm 6 arrière 152mm 4 plancher 102mm Nepasobstruerlefluxd airdecombustionetdeventilation sousl appareilparlespiedsouderrièrel appareilpar leconduitdefumée Neplacezpasd objetsentrelebasdel appareiletleplandetravail Ildoityavoirundégagementsuffisantpourleretraitdupanneauavant Touteslespiècesprincipales à l exceptiond...

Страница 18: ...eil Netouchezjamaisdirectementlesbrûleursdesgrillesdecuissonlorsquelaplaquechauffanteestallumée Éteigneztoujoursl appareillorsqu iln estpasutilisé lorsdel entretienouduréglagedepiècesoud accessoires etavantlenettoyage N utilisezpasd équipementavecuneconduitedegazendommagéeouquifuit unallumeurdevannesousi l unitéesttombéeouendommagéedequelquemanièrequecesoit Appellezaudépartmentdeservicede Brika L ...

Страница 19: ...ndepourgarantirun allumagefiabledesbrûleurslorsquelesboutonssonttournéssur ON Lestroussituésdanslepanneau avantsontlesréglagesdelavannepilote Utilisezuntournevispourtournerlavannepourajusterlahauteurdela flammeauniveausouhaité Pourallumerlebrûleur tournezleboutonsurlaposition ON Revenezensuiteauniveaudeflammesouhaité Laplagederéglageestpratiquementinfinieentre ON et OFF L espaceentrelesjambesaufon...

Страница 20: ...uissonsur laplaquechauffante environuneonce 30cc parpiedcarrédesurface Étalezl huilesurtoutelasurface delaplaquechauffanteavecunchiffonpourcréerunfilmmince Essuyeztoutexcèsd huileenexcès d huileavecunchiffon Répétezcetteprocédure2à3foisjusqu àcequelaplaquechauffanteaitune surfacelisseetsemblableàunmiroir Allumezlesbrûleursenviron15à20minutesavantlacuissonpourlepréchauffage Réglezlesboutonssur laha...

Страница 21: ...facedela plaquepouraideràlanettoyer Enlevezsoigneusementtoutlesavonetlesdébris avecunchiffonpropreethumide Laplaquedoitensuiteêtrerecouverted unmince filmd huilepouréviterlarouille Nettoyezlessurfac esenacierinoxydableavecunchiffonhumideet polissezavecunchiffondouxetsec Pouréliminerladécoloration utilisezunnettoyant nonabrasif Aprèschaquenettoyagehebdomadaire laplaquechauffantedoitêtreànouveauassa...

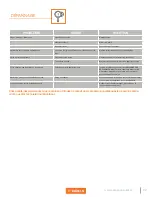
Страница 22: ...degazdanslazonedecuisson Fuitedegazsurlaligneprincipale Fermezlerobinetdegazprincipal N ALLUMEZPAS DEFLAMME n allumezrien n allumez n allumezrien d électrique appelezlespompierssinécessaireet placezunappeldeservice Surfacedecuissonseréchauffelentement Amasdecarbone Assurez vousquelesbrûleurssontmaintenuspropres etexemptsd accumulationdecarbone débris Letypedegazdel unitédoitêtreconverti Contactezu...

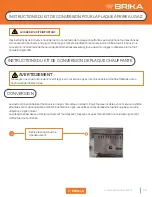
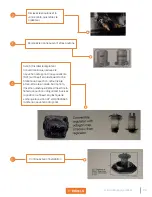
Страница 23: ...naturel LespiècesnécessairesauGPL propane sontfourniesavecl appareil Coupezl alimentationprincipaleengazavant d effectuertoutentretien AVERTISSEMENT Cesinstructionsdeconversionconcernentlaconversiondelaplaquechauffante Lesinstructionsfourniesdansce kitconcernentlaconversiondugaznaturelengazGPLetseréfèrentàlaconversiondel unitéetdukitfournis Une conversionincorrectedecetappareilpeutentraînerdesbles...

Страница 24: ...AT surl insertenplastiqueattaché àlatêteducapuchon retournez le etremettez leenplace Surlaphoto l insertenplastique Retirezl insertdela têteducapuchonoctogonaletinversez lapositiondel insertenplastiquede sortequelapositionL P soitattachéeà latêteducapuchonoctogonal Replacezlepanneauavantetlesboutons 4 5 Continuezavecl installation 24 www brikaequipment ca ...

Страница 25: ...arantieseronteffectuéesparunagentdeserviceagrééBRIKApendantles heuresnormalesdetravail Cettegarantienecouvrepaslesserviceseffectuésauxheuressupplémentairesouàdestauxdemain d œuvre majorés L utilisateurfinalestresponsabledeladifférenceentrelestarifsdeservicenormauxetlestarifsdeservice premium ENAUCUNCASBRIKANEPOURRAÊTRETENURESPONSABLEDESDOMMAGESACCESSOIRESOUCONSÉCUTIFSÀ L ACHETEUROUÀUNTIERS YCOMPRI...

Отзывы: