BRT7989/7200
Page 15
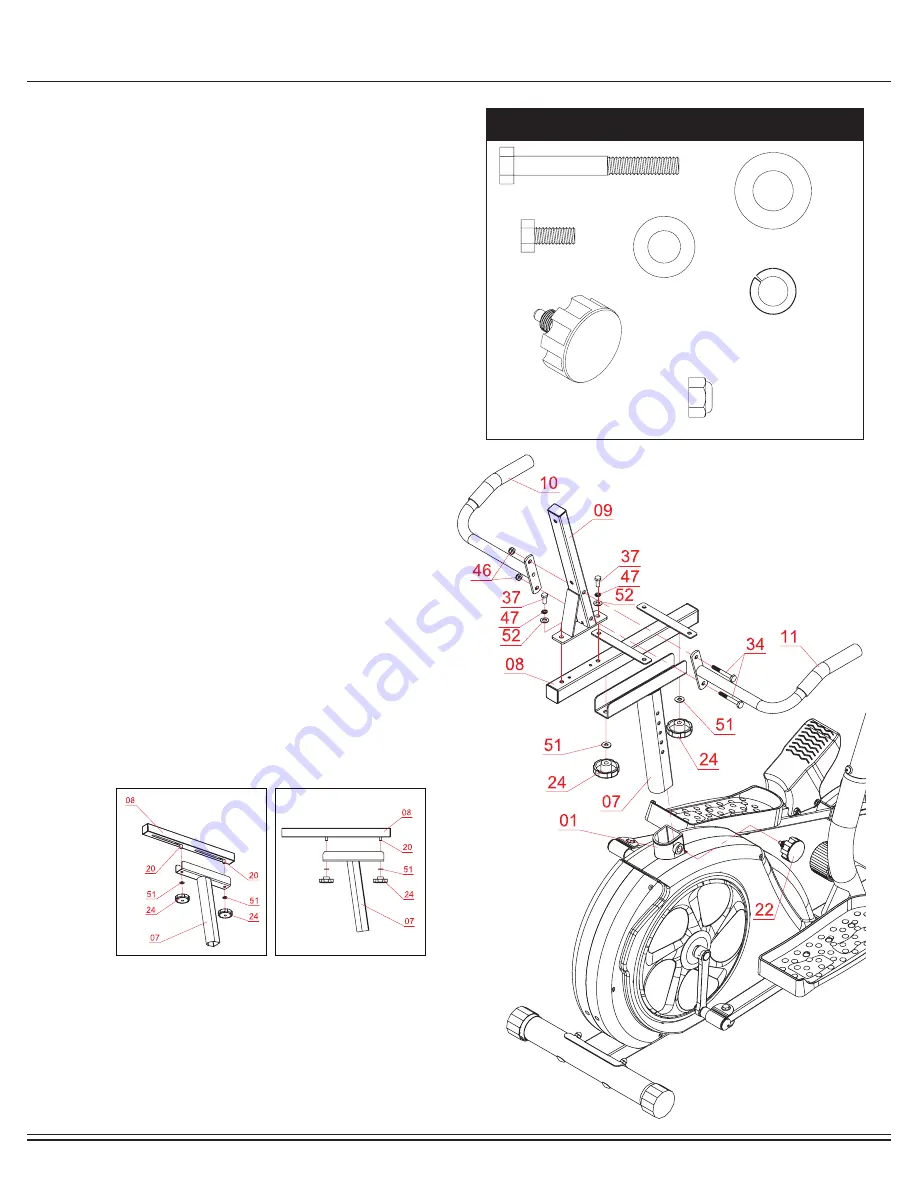
Assembly STEP 8
Hardware Required
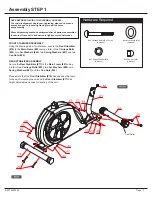
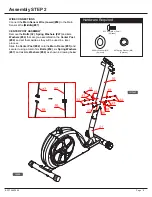
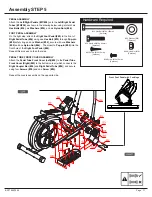
SEAT FRAME ASSEMBLY
Attach the
Spring Loaded Knob (#22)
to the
Main Frame (#01)
.
Loosen the
Spring Loaded Knob (#22)
and pull back slightly on
it so that you may proceed to insert the
Seat Post (#07)
into the
opening of the post that is protruding from the
Main Frame (#01)
down a minimum of four inches so that the corresponding holes can
engage. Screw in the
Spring Loaded Knob (#22)
through the
Main
Frame (#01)
and then through any one of the holes located on the
Seat Post (#07)
.
Note:
The
Spring Loaded Knob (#22)
has a safety feature that
allows you to loosen it by turning it counter-clockwise three times as
you pull it out-ward. This knob can be loosened to adjust the seat
height. Adjust the seat height and then release the knob back in.
Tighten the knob by turning clockwise.
Remove the
Lock Knobs (#24)
and
Washers (#51)
from the
Seat
Cushion Frame (#08).
Set them aside nearby as they will be used
later in this process.
Slide the
Seat Cushion Frame (#08)
onto the trough of the
Seat
Post (#07)
as shown below. Secure using two
Lock Knobs (#24)
through two
Washers (#51)
that were previously removed.
Attach
Backrest Cushion Frame (#09)
to the
Seat Cushion
Frame (#08)
and secure by using two
Hex Bolts (#37)
,
two
Spring Washers (#47)
and two
Washers (#52)
.
REAR HANDLE BAR ASSEMBLY
With the help of an assistant, align the four holes of the
Left Rear
Handle Bar (#10)
and
Right Rear Handle Bar (#11)
to the holes
on the
Backrest Cushion Frame (#09)
and secure all using the
two
Hex Bolts (#34)
, and two
Nylon Nuts (#46)
.
#37 Hex Bolt (M8 x 20mm)
[2 pieces]
#34 Hex Bolt (M8 x 60mm)
[2 pieces]
#47 Spring Washer (M8)
[2 pieces]
#51 Washer (M10)
[2 pieces]
#52 Washer (M8)
[2 pieces]
#46 Nylon Nut (M8)
[2 pieces]
#22 Spring Loaded Knob (M16)
[1 piece]
Содержание TRIO-TRAINER BRT7200
Страница 31: ...This page is left blank intentionally ...


