Form No. 1045-69 r5/21/14 © 2014 Bobrick Washroom Equipment, Inc. Printed in U.S.A.
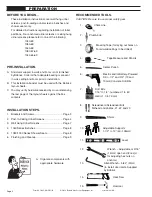
RECOMMENDED TOOLS.
CAUTION: Be sure to use proper safety gear.
1.
Chalk Line
2. Plumb-bob
3.
Masking Tape (for laying out holes on
floors/walls/ceilings to be drilled)
4.
Tape Measure and Pencils
5.
Center Punch
6.
Electric and/or Battery-Powered
Drill – 1/2" and 3/4" (13 and
19mm) Concrete Drill Bits
7.
Drill Bits
1/16" to 1/4", numbered 1 to 60
metric 1.0 to 7.0mm
8.
Screwdrivers/Screwdriver Bits
flathead and phillips, #1, #2 and #3
9.
Shims
10.
Adjustable Supports
1-1/2" to 12" (40–105mm)
11.
Level
12.
Wrench – Adjustable or 9/16"
(14mm) open end (2 req'd.
for adjusting hex nuts on
anchors)
13.
Allen Wrench – 5/64" (2mm)
(to install door latch)-Supplied
by Bobrick
14.
Hack Saw
15.
Hammer
BEFORE YOU BEGIN...
These installation instructions cover wall hung urinal
screens, post-to-ceiling urinal screens, benches and
shower seats only.
For detailed instructions regarding installation of toilet
partitions, floor anchored urinal screens or ceiling hung
urinal screens please refer to one of the following:
1040-69
1080-69
1540-69
1080.67-69
1040.65-69
PRE-INSTALLATION.
A. Structural support in walls and floors is not furnished
by Bobrick. Confirm that adequate backing is present
in wall, ceiling and floors prior to installation.
B. This installation booklet must be used with the Bobrick
layout sheets.
C. You may verify hardware received by cross-referencing
the last page of the layout sheets against the box
contents.
INSTALLATION STEPS.
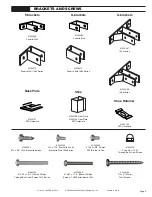
1. Brackets and Screws......................................... Page 3
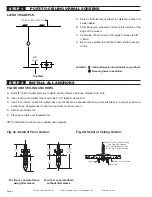
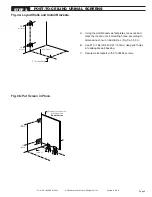
2. Post-to-Ceiling Urinal Screens .......................... Page 4
3. Wall Hung Urinal Screens ................................. Page 7
4. 1040 Series Benches ........................................ Page 8
5. 1080/1180 Series Shower Seats....................... Page 8
6. Finishing and Cleanup ...................................... Page 9
A. Organize components with
appropriate hardware.
PREPARATION
Page 2


