5
3. Operation
D1 series
3-1
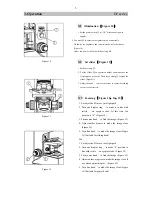
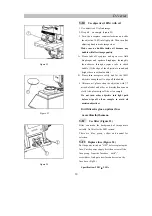
illumination
(
Figure 10
)
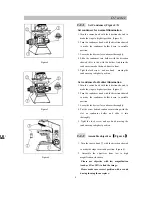
1. Set the power switch
①
at “ON” after connect power
suppler.
2. Use knob
②
to adjust the brightness more comfortable.
Clockwise for brightness and counter-clockwise for darkness.
(Figure 10)
Under low power, the bulb will have long life.
3-2
Set slides
(
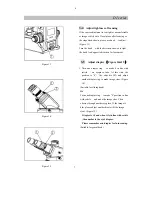
Figure 11
)
1. Push the clamp
①
.
2. Put the slides
②
on specimen holder and make sure the
frontispiece up towards. Then loose clamp
①
to tight the
slides. (Figure 11)
3. Adjust the knob to move the slides to center (according
to center of objective).
3-3
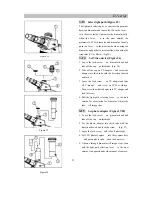
Focusing
(
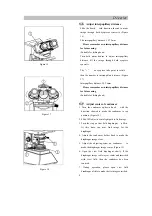
Figure 12
、
14
、
15
)
1. Let objective 4X move into light path.
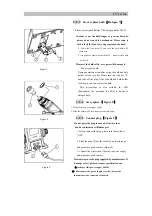
2. Turn one dioptor ring to make it in line with
reticle on eyepiece tube. At this time, the
position is “0”. (Figure 14)
3. Turn coarse knob to find the image. (Figure 12)
4. Adjust anther dioptor to make the image clear.
(Figure 14)
5. Turn fine knob to make the image clear. (Figure
12) (Suitable for sliding head)
Or
1. Let objective 4X move into light path.
2. Turn one dioptor ring to make “0” position in
line with reticle on eyepiece tube. (Figure 15)
3. Turn coarse knob to find the image. (Figure 12)
4. Adjust anther eyepiece to make the image clear. If
not, please adjust dioptor. (Figure 15)
5. Turn fine knob to make the image clear. (Figure
12) (Suitable for gemel head)
Figure 11
Figure 12
Figure 10


