ProxySG 900 Series Maintenance & Upgrade Guide
99
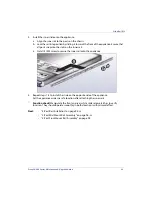
2.
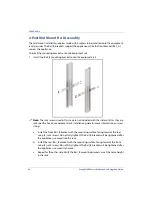
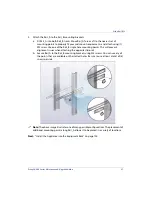
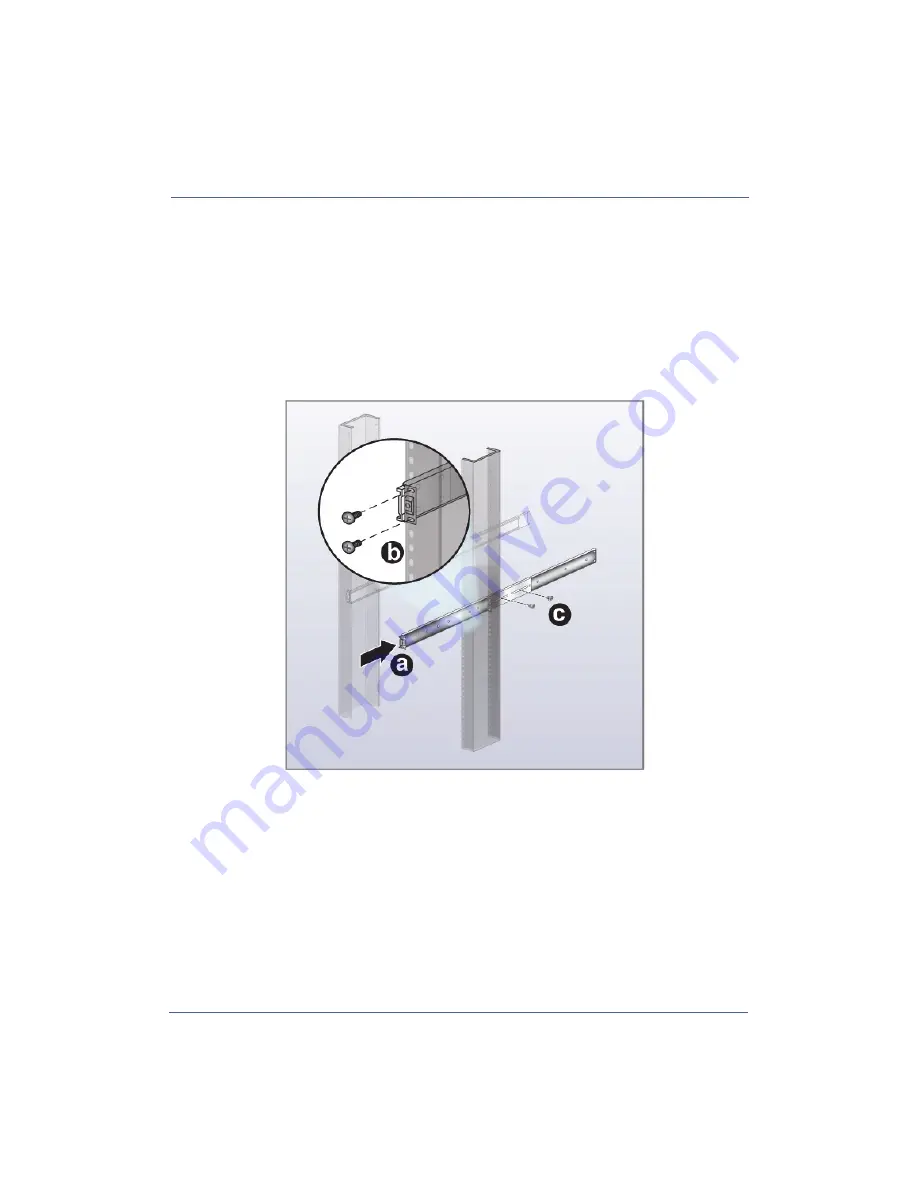
Attach Rail_A rail assembly to the equipment rack and the supporting Rail_B mounting
bracket.
a.
Align Rail_A with the Rail_B tracks. Move Rail_A rearward until the rear face of the
bracket is flush with the equipment rail.
b.
Secure Rail_A using (2) rack screws.
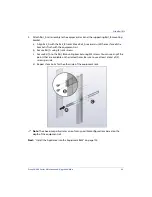
c.
Secure Rail_A to the Rail_B mounting bracket using M3 screws. You can use any of the
points that are available on the slotted holes. Be sure to use at least a total of (2)
screws per side
d.
Repeat steps 2a-2c for the other side of the equipment rack.
Note:
The above image illustrates one of many possible configurations based on the
depth of the equipment rail.
Next:
Содержание ProxySG SG900-10
Страница 6: ...6 ProxySG 900 Series Maintenance Upgrade Guide...
Страница 28: ...About This Guide 28 ProxySG 900 Series Maintenance Upgrade Guide...
Страница 34: ...34 ProxySG 900 Series Maintenance Upgrade Guide Fan Assembly...
Страница 56: ...56 ProxySG 900 Series Maintenance Upgrade Guide Memory Module...
Страница 86: ...86 ProxySG 900 Series Maintenance Upgrade Guide BIOS Battery...
Страница 103: ......
Страница 104: ...www bluecoat com...


