


35
CHAPTER 5: Operation
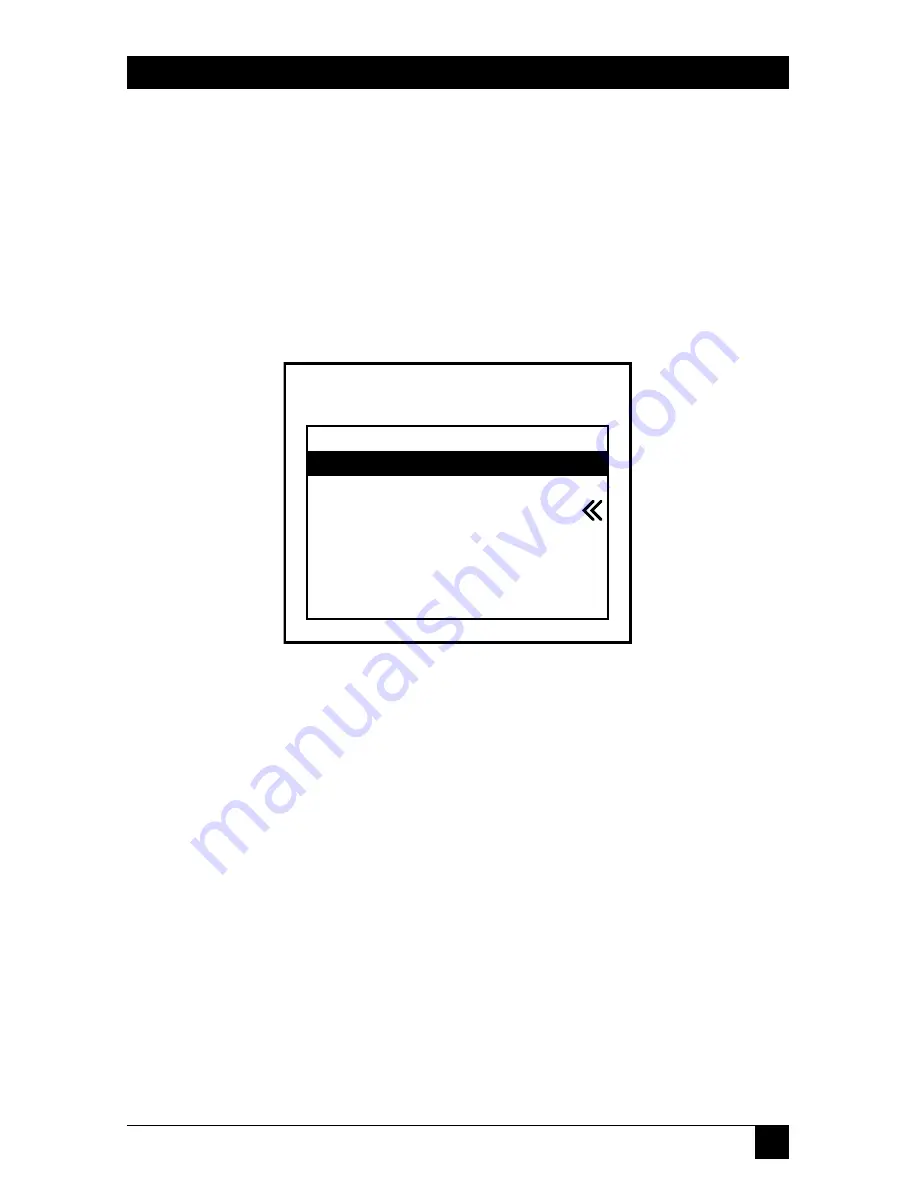
5.6 On-Screen Menu Control
Another convenient way to select CPU channels on the ServSwitch Wizard Pro
is through the Switch’s on-screen menu, shown in Figure 5-3 below. This menu
consists of channel numbers (and, in cascaded systems, channel addresses) paired
with computer names that you assign. The menu is called up by pressing the
hotkey sequence followed by the letter “M” at the shared keyboard. When the
menu is first called up, there will be no names listed for any of your computers;
you have to enter the names and channel numbers that will make up the menu.
(When you’re finished, press [Esc] to exit.)
Figure 5-3. A sample menu screen.
In each case, the double arrow (“<<”) shows the currently selected computer.
5.6.1 A
DDING A
C
OMPUTER TO THE
M
ENU
L
IST
With the menu visible on the screen, press the [Insert] key. This will cause a new
“Computer” entry field to be inserted on the menu. This is highlighted in red with
a cursor to indicate the text entry position. Type in a name up to 16 characters
long (you can use uppercase, lowercase, special, and space characters). When
you’re finished, press [Enter].
The red highlighted area now moves into the “Port” entry field, and you can
enter the port number for the named computer. On single units, specify port
numbers with single digits. If you are using cascaded ServSwitch Wizard, ServSwitch
Wizard Pro, or ServSwitch Duo units, you’ll have to specify the whole channel
address (see
Section 5.11
and the “{Hotkeys} + {Channel Address}” paragraph in
Section 5.5
). To specify CPU port 5 on a subsidiary Switch that is cascaded off CPU
port 3 of the master Switch, you would enter the channel address as “35” unless
Computer
NT Server A
NT Server B
Local IBM PC
Local Compaq PC
Web Browser
Comms Server A
Comms Server B
Fred’s PC
Port
355
356
1
2
4
5
6
7
BLACK BOX SERVSWITCH


