6
7
CHARGING/RECHARGING
This product has a sealed lead acid battery. For maximum battery life, we recommend the Jump-
Starter be kept fully charged at all times. Recharge after purchase, before first use, immediately after
each use, and once a month if not used. Failure to do this may reduce the battery life dramatically. To
check the battery charge status at any time, press the Battery Charge Level Pushbutton.
When the battery is overly discharged and if the green LED is lit when the charger is plugged in, this
indicates the battery is at a high impedance stage.
In this event, recharge the unit and leave the unit charging for a period of 24-48 hours before use.
Note:
This unit is delivered in a partially charged state – you must fully charge it after purchase and before using it for the first time. Initial
AC charge should be for 24 hours.
CAUTION: RISK OF PROPERTY DAMAGE:
Failure to keep the battery charged will cause permanent
damage and result in poor jump starting performance.
Charging/Recharging Using the 120 Volt AC Charger and a Standard Household
Extension Cord (not included)
1. Lift the AC charger cover located on the right side of the unit and connect an extension cord to the
unit. Plug the other end of the cord into a standard 120 volt AC wall outlet.
2. Charge until one red, two yellow and one green LED Battery Status Indicators light or flash.
3. Once fully charged, disconnect the extension cord.
Note:
The unit cannot be overcharged using the AC method.
JUMP-STARTER
This Jump-Starter is equipped with an ON/OFF Power Switch. Once the connections are properly
made, turn the switch ON to jump-start the vehicle.
1. Turn OFF vehicle ignition and all accessories (radio, A/C, lights, connected cell phone chargers,
etc.). Place vehicle in “park” and set the emergency brake.
2. Make sure the Jump-Starter Power Switch is turned to OFF.
3. Remove jumper clamps from clamp tabs. Connect the red clamp first, then the black clamp.
4. Procedure for jump-starting a NEGATIVE GROUNDED SYSTEM (negative battery terminal is
connected to chassis) (MOST COMMON)
4a. Connect positive (+) red clamp to vehicle battery’s positive terminal.
4b. Connect negative (–) black clamp to chassis or a solid, non-moving, metal vehicle component
or body part. Never clamp directly to negative battery terminal or moving part. Refer to the
automobile owner’s manual.
5. Procedure for jump-starting POSITIVE GROUND SYSTEMS
Note:
In the rare event that the vehicle to be started has a Positive Grounded System (positive battery terminal is connected to
chassis), replace steps 4a and 4b above with steps 5a and 5b, then proceed to step 6.
5a. Connect negative (–) black clamp to vehicle battery’s negative terminal.
5b. Connect positive (+) red clamp to vehicle chassis or a solid, non-moving, metal vehicle
component or body part. Never clamp directly to Positive battery terminal or moving part.
Refer to the automobile owner’s manual.
6. When clamps are connected properly, turn the Jump-Starter Power Switch to ON.
7. Turn ON the ignition and crank the engine in 5-6 second bursts until engine starts.
8. Turn the Jump-Starter Power Switch back to the OFF position.
9. Disconnect the negative (–) engine or chassis clamp first, then disconnect the positive (+) battery
clamp.
FOLLOW ALL SAFETY INSTRUCTIONS FOUND IN THIS MANUAL.
CAUTIONS: RISK OF PROPERTY DAMAGE
• If the connections to the battery’s positive and negative terminals are incorrect, the Reverse Polarity
Indicator will light (red) and the unit will sound a beep. Disconnect clamps and reconnect to battery
with correct polarity.
• If vehicle fails to start, turn OFF the ignition, turn OFF the Jump-Starter Power Switch, disconnect
the jump-start system’s leads and contact a qualified technician to investigate why the engine did not
start.
• Recharge this unit fully after each use.
INTRODUCTION
Thank you for choosing the
375 Amp Jump-Starter with Compressor
. This compact jump-starter is
unique in the amount of energy it can supply for its size. The internal battery is a high density sealed,
lead-acid battery that stores and delivers energy comparable to full sized ordinary jump-starters.
Please read this guide carefully before use to ensure optimum performance and avoid damage to the
unit or items that you are using it with.
The
375 Amp Jump-Starter
is a compact, durable, portable jump-start system for vehicles that have
a standard 12 volt battery system. This self-contained, rechargeable system will start most vehicles
without the need for a host vehicle or 12 volt DC power supply.
FEATURES
• Keyless ON/OFF Power Switch
• Cordless/rechargeable
• Built-in non-spillable, maintenance-free, heavy duty, sealed, lead-acid battery
• Requires no maintenance (other than recharging) for optimum operation
• Heavy duty cables and clamps
• 5 Volt DC USB Charging Port
• 12 Volt DC accessory outlet
• Built-in 120 Volt AC Charger (uses a standard extension cord, not included)
• Easy-to read LED battery charge status indicators
• Built-in LED Area Light
• Built-in portable compressor for vehicle tires and recreational inflatables
• Reverse polarity connection warning indicator
• Exclusive cable storage channels for jumper cables
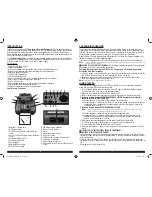
Controls and Functions
1. Negative (–) Black Clamp
2. Air Pressure Gauge
3. 12VDC Accessory Outlet (under protective
cover)
4. Built-in 120 Volt AC Charger (under protective
cover)
5. Compressor Power Switch
6. Positive (+) Red Clamp
7. Nozzle adapters
8. Area Light Power Switch
9. Built-in LED Area Light
10. LED Battery Status Indicators
11. Reverse Polarity Indicator
12. Buzzer
13. Jump-Starter Power Switch
14. USB On/Off Switch
15. USB Power Port (under protective cover)
16. USB Power On Indicator
17. Battery Charge Level Button
18. Air Hose and SureFit™ nozzle connector (back
of unit)
2
1
5
3
4
6
7
8
9
11 12
13
14
15 16 17
18
10
JUS375IBCA_ManualENFR_072915.indd 6-7
8/25/2015 2:53:58 PM


