BDS
Graphical
User
Interface
Operation
13
Setting the Minimum Configuration
Note:
The
minimum
configuration
is
one
fundamental
frequency
and
no
harmonics
or
IMD.
1.
At
the
Main
menu,
select
“Mode
‐
>Options…”
or
click
the
red
reticule
icon
in
the
“Options”
toolbar.
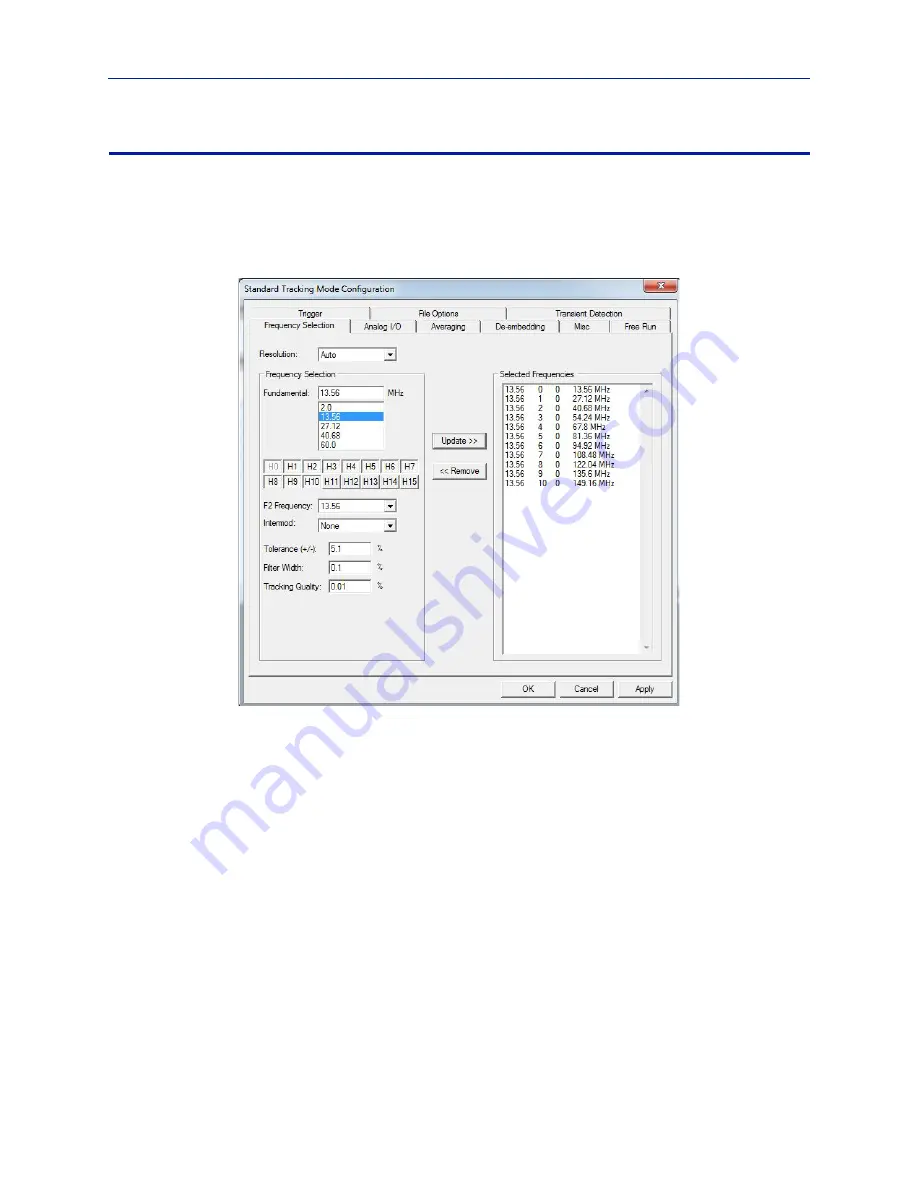
The
Standard
Tracking
Mode
Configuration
dialog
box
opens.
2.
Click
on
the
“Frequency
Selection”
tab.
Figure 5 Frequency Selection
3.
Enter
a
frequency
of
choice
(custom
frequency)
into
the
“Fundamental”
field
or
select
a
frequency
from
the
list
of
fundamental
frequencies
then
click
the
“Add>>”
button
to
add
your
selection
to
the
Selected
Frequencies
list
at
the
right.
Note:
If
harmonics
are
desired
for
this
fundamental
frequency,
click
on
each
“H”
button
that
rep
‐
resents
the
harmonics
you
desire
(e.g.
H1,
H2,
H3,
H7,
H10).
Note:
To
remove
a
frequency
or
harmonic
from
the
Selected
Frequency
list,
select
it
then
click
the
“<<Remove”
button.
4.
Add
more
fundamental
frequencies
and
harmonics
as
desired.
When
you
are
finished
adding
frequencies
and
harmonics,
click
the
“Apply”
button.
5.
Click
the
“Free
Run”
tab.
6.
In
the
“No.
Datasets”
field,
enter
the
number
of
datasets
to
capture.
7.
Do
one
of
the
following:
Select
the
“Continuous
Scan”
check
box
for
the
data
acquisition
to
continue
uninterrupted.
Note:
In
Continuous
Scan,
when
the
specified
number
of
data
sets
has
been
captured,
the
system
will
discard
the
oldest
data
set
and
store
the
newest
data
set
(first
‐
in
‐
first
‐
out
method)
so
that
you
will
always
have
the
specified
number
of
data
sets.
Do
not
select
Continuous
Scan
for
the
data
acquisition
to
stop
only
after
the
specified
number
of
data
sets
or
after
the
specified
Run
Time
expires.


