4
START-UP
Main Control Breakers
Should the equipment fail to run on initial connection, please
check that all Main Control Breakers (MCBs) are in the “ON”
position at the back of cabinet.
Note:
The “ON” position is
confirmed by red indicators on the MCBs.
Thermometer
The controller is marked in Fahrenheit (°F) or Centigrade (°C)
for the thermometer display. The thermometer should be
checked daily to ensure that the equipment is maintaining the
correct temperature.
If the cabinet is operating at the wrong temperature due to a
default, the cabinet will alarm.
PRINCIPLES OF OPERATION
Williams blast chillers have been designed to quickly reduce
the temperature of food in accordance with Department of
Health guidelines on the chilling of cooked foods.
All
operators should be conversant with Department of Health
publication, Chilled and Frozen Guidelines on Cook-Chill and
Cook-Freeze Catering Systems.
Fast temperature reduction is not brought about by placing
the food in a very cold cabinet like a deep freeze. This would
only dry the food badly and take a very long time to reduce
its temperature to the required level. The secret of fast
temperature reduction is in delivering the correct blast of air
and ensuring correct and unobstructed horizontal air flow
inside the cabinet. This is why the equipment has the option
of soft and hard facility on blast chill.
Exceptions: depending on the density types and sizes
of the portions the chiller might not be capable of
achieving the required guidelines, therefore, the load
and/or depth of the food layers should be reduced. You
may find it necessary to experiment with different
amounts of food and loading methods in order to
achieve the optimum performance with your blast chiller.
LOADING AND PACKING
Regulations state that product should be placed in the Blast
Chiller within 30 minutes from completion of cooking. The
packaging of food and the way in which it is loaded or placed
within the apparatus can have a significant effect on the time
within which the temperature can be reduced to the required
level and the amount of food which can be processed in each
chilling batch.
When blast chilling always use metal or foil containers which
are good conductors. Plastic or polyurethane containers
insulate the food from the cold air. When chilling unportioned
food we recommend the use of the appropriate pan that is at
least 2
1
/
2
” (63.5mm) in depth. Likewise, placing lids or
covers on food will also increase the chilling time but may be
of some use when processing some delicate foods to avoid
dehydration.
Always load your machine in such a way that it is possible
for the cold air to contact all sides of the containers. Avoid
stacking containers directly on top of one another as this will
drastically extend the chilling time and take special care not
to block the air ducts.
Always load the machine before selecting the blast cycle.
Unless it is unavoidable do not open the door of the machine
while the blast cycle is engaged.
In the case of roll-in rack models, bumper bars are fitted to
the walls inside the machine. This assists in the correct
positioning of the rack(s) so as to avoid blocking the air flow.
FOOD STORAGE TIME
Chilled foods can be stored for up to 5 days at between 32°F
(0°C) and 38°F (3°C).
OPERATION OF BLAST CHILLERS
The cabinet is delivered ready to run. Plug (or connect) to the
main power supply and the cabinet is ready for use. Initially
the cabinet will be in standby mode, shown by 3 dashes
( - - -) in both display windows. The cabinet needs to be
pre-chilled (or ran) for at least 30 minutes before being used.
Note:
The control systems employed contain no user
serviceable components. Instructions on setting up the con-
trol panel thermostats are available from the manufacturer.
These should only be reset by a qualified service technician.
3 BASIC MODES
Timed Cycle Blast
This is the storage temperature at which food can be held
and the blast chiller automatically switches into this mode at
the end of each cycle. Normal storage temperature range is
34°C (1°C) to 37°F (3°C).
Storage Mode
During store mode (with no alarm condition or defrost cycle
running) the left hand window will display the previous blast
cycle duration and the right hand window will display the
store temperature. Some chillers have more than 1 fan
installed; these may not all operate during the storage mode,
Содержание Williams WBC110
Страница 12: ...12 by OPERATING ENGINEERS MANUAL for WILLIAMS DATA LOGGER W D L with PRINTER MODULE...
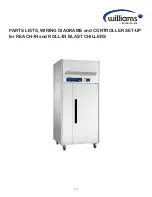
Страница 19: ...19 by PARTS LISTS WIRING DIAGRAMS and CONTROLLER SET UP for REACH IN and ROLL IN BLAST CHILLERS...
Страница 20: ...20 PARTS LIST FOR A WBC35...
Страница 21: ...21 PARTS LIST FOR A WBC60...
Страница 22: ...22 PARTS LIST FOR A WBC75...
Страница 23: ...23 PARTS LIST FOR A WBC110...
Страница 24: ...24 PARTS LIST FOR A WMBC175 220 350 CONTROLLER WITH POD PRINTER...
Страница 25: ...25 PARTS LIST FOR A WMBC175 220 350 PANEL LAYOUT...
Страница 26: ...26 PARTS LIST FOR A WMBC175 220 350 EQUIPMENT...
Страница 27: ...27 PARTS LIST FOR A WMBC175 220 350 POD EQUIPMENT...
Страница 28: ...28 PARTS LIST FOR A WMBC175 220 350 PANEL LAYOUT...
Страница 29: ...29 PARTS LIST FOR A WMBC350 EQUIPMENT...
Страница 30: ...30 PARTS LIST FOR A WMBC480 660 PANEL LAYOUT...
Страница 31: ...31 PARTS LIST FOR A WMBC480 660 CONTROL PANEL WITH PRINTER POD...
Страница 32: ...32 PARTS LIST FOR A WMBC480 EQUIPMENT LAYOUT...
Страница 33: ...33 PARTS LIST FOR A WMBC660 EQUIPMENT LAYOUT...
Страница 34: ...34 PARTS LIST FOR A WMBC480 660 POD EQUIPMENT...
Страница 35: ...35 PARTS LIST FOR A WMBC480 660 PANEL LAYOUT...
Страница 49: ...49...
Страница 50: ...50...
Страница 51: ...51...


