


OptiPac 2652MD User's Manual
9
3
2652MD
Controls
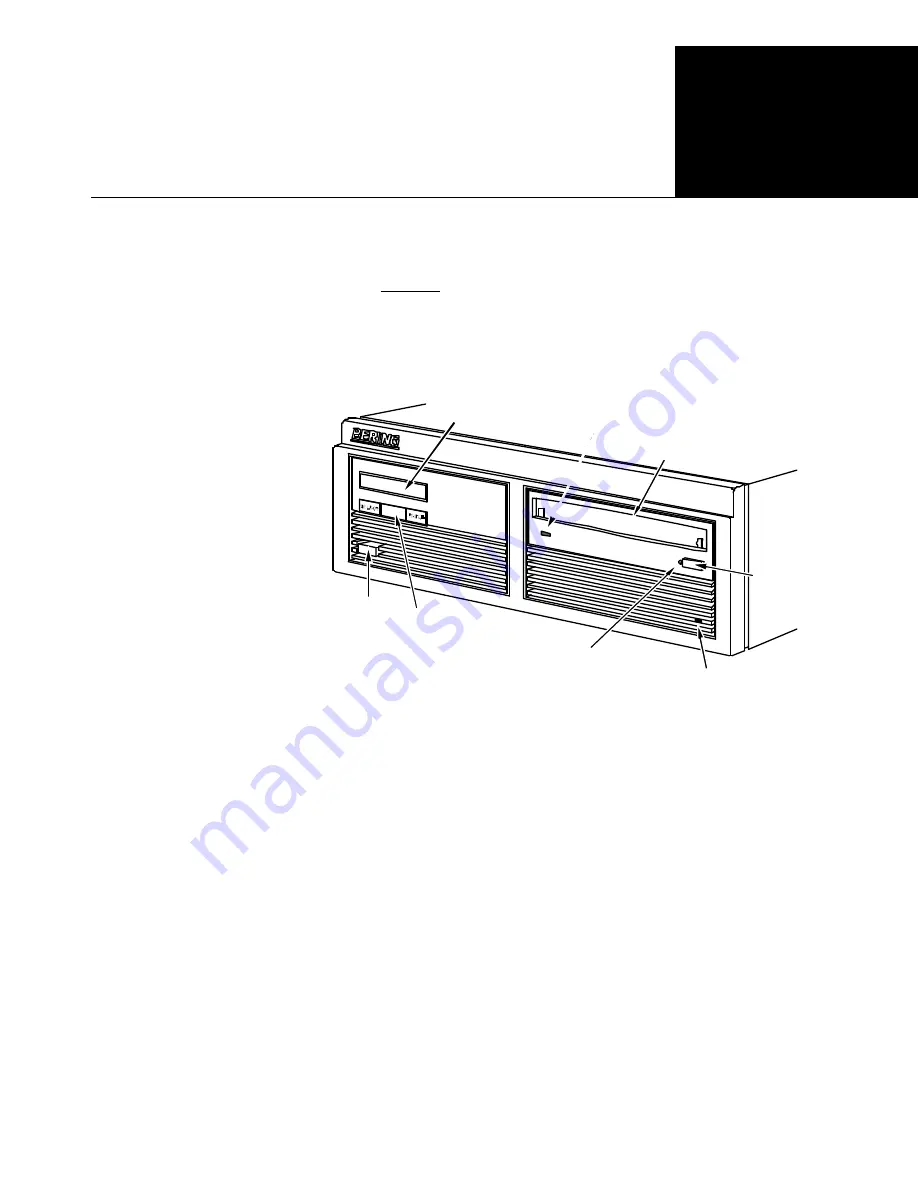
Figure 3-1 illustrates all controls and indicators required for operating
the OptiPac 2652MD.
1. Press the
POWER
button on the front panel of the OptiPac.
The LCD will display a self-test message and the disk drive model
number. This operation should take less than a minute. If a cartridge is
loaded, a read test will be performed. After the self-test is successfully
completed, the time, date and current ring will be displayed on the LCD.
Figure 3-1: OptiPac 2652MD front panel
Activity Indicator
The activity LED lights amber when a cartridge is loaded or unloaded,
during the power-up self-test sequence, and when the drive is being
accessed. It also is amber for approximately two seconds when the
cartridge is being ejected. At all other times while a cartridge is inserted
in the drive, the Activity indicator will remain green.
Drive Button
The drive button is always locked out. The cartridge will not eject when
this button is depressed because the OptiPac controller has issued a
lock command to the cartridge drive. The cartridge must be ejected
using the
Unload cartridge
function in the LCD main menu.
Emergency Eject Hole
In an emergency, such as a power outage, the cartridge can be manually
ejected by inserting a tool into this opening. Read the complete
instructions in the section titled “Manual Cartridge Removal.”
Fixed Disk Access
Indicator
The fixed disk access indicator is on the lower right side of the front
bezel. Whenever the fixed disk is accessed the LED will flash on.
Power
switch Control
buttons
LCD display
Fixed disk
access LED
Activity LED
Cartridge insertion Slot
Emergency
eject hole
Drive button
OPERATING THE DISK DRIVE & CARTRIDGE
3


