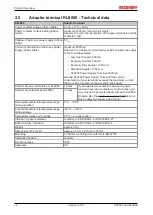
Mounting and wiring
KL8001 and KL9060
18
Version: 2.0.0
3.2
Mounting the KL8001
Preparation for mounting
1. Undo all 5 screw terminals (1L1, 3L2, 5L3, 13NO, A1+) on the mains connection side of the Siemens
contactor.
2. Suspend the power terminal by inserting the two lugs into the two rectangular openings at the foot of
the Siemens contactor.
3. Push the power terminal's 5 contact pins into the 5 opened screw terminals on the mains connection
side of the Siemens contactor until the power terminal is located flush with the Siemens contactor. The
power terminal's two lugs must not be allowed to slip out of the rectangular holes at the foot of the
Siemens contactor!
4. Firmly tighten all 5 screw terminals on the mains side of the Siemens contactor. The power terminal
must sit tightly, flush with the Siemens contactor!
Attention
Intended use
Only use the KL8001 Power Terminal in combination with Siemens contactors of the SIR-
IUS 3RT10 series, size S00, as listed in the
!
Installing a Bus Terminal block with power terminals
When mounting, observe the information in the chapter entitled
.
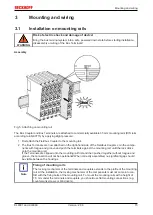
1. Ensure that the system is powered down and in a safe state.
2. Install the Bus Terminal block, consisting of the fieldbus coupler and any Bus Terminals that may be
desired, on a mounting rail.
Fit a KL9060 Adapter Terminal as the last Bus Terminal at the end of the Bus Terminal block instead
of a standard end terminal (KL9010).
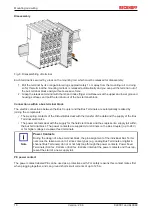
3. Clip the Siemens contactor, with the power terminal mounted on it, about 3 cm away on the mounting
rail next to the KL9060 Adapter Terminal.
4. Use the ribbon cable, about 10 cm long, included with the KL9060 Adapter Terminal, to join the power
terminal to the KL9060.
5. Connect the power terminal to the next power terminal, using the ribbon cable (approx. 3 cm long)
supplied with the power terminal.
or
connect the terminal connector supplied with the KL9060 Adapter Terminal to the continuation plug
connector of the last power terminal.
Up to 10 type KL8001 Power Terminals can be operated from one Bus Terminal block.
Содержание KL8001
Страница 2: ......
Страница 4: ...Table of contents KL8001 and KL9060 4 Version 2 0 0...


