background image


User’s Manual


51/73


Ver. [E.1.1] 


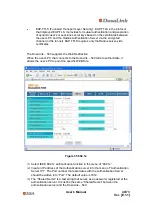
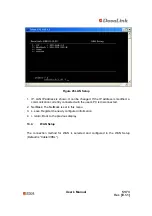
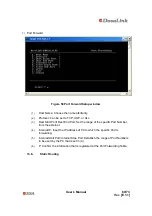
Figure 45 LAN Setup 


1.  IP: LAN IP address is shown. It can be changed. If the IP address is modified, a 

communication currently connected with the user’s PC is disconnected. 

2.  NetMask: The NetMask is set in this menu. 

3.  s. save: Register the newly configured information. 

4.  r. return: Back to the previous display. 


13.4. WAN 

Setup 


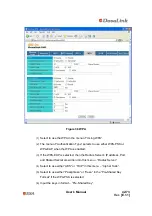
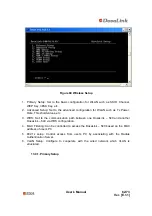
The connection method for WAN is selected and configured in the WAN Setup 
(Default is “Cable/VDSL”). 

Содержание DosaLink 540

Страница 1: ...Point User s Manual Version E 1 1 Copyright statement No part of this publication may be reproduced stored in a retrieval system or transmitted in any form or by any means whether electronic mechanica...

Страница 2: ...e DosaLink 540 15 8 Connect the Internet via the configuration window of DosaLink 540 16 9 Configuration the DosaLink 540 21 9 1 ADSL PPPoE users 21 9 2 Cable and VDSL Users 22 9 3 Static IP Users 23...

Страница 3: ...50 13 4 WAN Setup 51 13 5 Server 55 13 6 Access Control 57 13 7 Port Forwarding 58 13 8 Static Routing 60 13 9 Wireless Setup 61 13 9 1 Primary Setup 62 13 9 2 Advanced Setup 65 13 9 3 WDS 66 13 9 4 M...

Страница 4: ...ority to operate this equipment This device complies with Part 15 of the FCC Rules Operation is subject to the following two conditions 1 This device may not cause harmful interference and 2 this devi...

Страница 5: ...be able to share the network simultaneously Strong phased security functions The Firewall functioning of NAT is able to block an intrusion from any untrusted external networks By utilizing the Demilit...

Страница 6: ...5 5 6 9 11 12 18 24 36 54Mbps Auto Manual Selectable Reset Factory Default Value LED Indicator PWR WAN LAN1 LAN2 LAN3 DIAG WLAN Operation Environment Ambient Operation Temperature 0 C to 40 C Storage...

Страница 7: ...1 2 Wireless Ethernet MIB HTTPS SSL WEB Base Configuration Console Base Configuration Table 1 DosaLink 540 Specifications 4 Exterior view Figure 1 DosaLink 540 Top Views PWR Indicates the status of th...

Страница 8: ...n status of WLAN Off Malfunction On Normal operation Blinking The packets are sending and receiving with normal connection Table 2 Indications of the Front side LED Figure 2 DosaLink 540 Back View 5 I...

Страница 9: ...ve built in AUTO MDI MDIX function either a direct cable or cross cable can be used Figure 3 Example of connecting cables 5 3 Configuration Information The following information is required for config...

Страница 10: ...he Dosalink 540 assigned IP address Second the IP address can be assigned by the user However a static IP address should be assigned for operating servers such as Web FTP etc Configuring the user s PC...

Страница 11: ...User s Manual 11 73 Ver E 1 1 Figure 4 Local Area Connection Properties Window Figure 5 Internet Protocol TCP IP Properties Window...

Страница 12: ...w Figure 6 Run Window 2 The IP address Subnet Mask and Gateway that are assigned automatically should be confirmed with inputting the command ipconfig on the DOS window If it is normal then the IP add...

Страница 13: ...on explains how to assign the static IP address to the user s PC when the DosaLink 540 cannot assign an IP address to the user s PC or a server is operating on the network 1 Control Panel Network Conn...

Страница 14: ...Area Connection Properties window 3 If several user s PCs need to be assigned IP addresses then the information for Subnet Mask Gateway and DNS server should be the same and the IP address should be s...

Страница 15: ...fore configuring the PC by utilizing the configuration window of the DosaLink 540 For this purpose the ping command can be used Start Run input cmd and press OK The DOS window will be open Once perfor...

Страница 16: ...eb browser to connect to the Internet However it is not connected to the Internet because the DosaLink 540 is not configured yet On the web browser s menu select tools Internet options Figure 12 Inter...

Страница 17: ...User s Manual 17 73 Ver E 1 1 Figure 13 Delete Cookies Delete Files 3 At Dial up and Virtual Private Network settings menu select Never dial a connection then click LAN Settings as shown in Figure 14...

Страница 18: ...ual 18 73 Ver E 1 1 Figure 14 Dial up and Virtual Private Network settings 4 In the Local Area Network LAN Settings window remove the check marks V as shown in Figure 15 and select OK to save the conf...

Страница 19: ...ndow 5 After configuration enter https 192 168 1 1 into the Address window of web browser as shown in Figure 16 Figure 16 https 192 168 1 1 6 Since the SSL is implemented to enhance the security if th...

Страница 20: ...sage 7 The Default ID and Password to connect to this web page shown in Figure 18 are root and admin respectively Figure 18 Default User ID and Password 8 If it connects as shown in Figure 19 the init...

Страница 21: ...atically it may be necessary to configure only once from any user s PC 9 1 ADSL PPPoE users In the case of the Automatic connection MODEM users among ADSL subscribers Cable VDSL is selected for Intern...

Страница 22: ...Cable and VDSL Users 1 The same as above the Automatic connection MODEM users should select Cable VDSL for Internet Service Type in the WAN Setup menu as shown in Figure 21 2 Since most ISPs confirm t...

Страница 23: ...he menu will be confirmed Figure 21 Configuration Windows for Cable VDSL Users 9 3 Static IP Users 1 From the WAN Setup menu select Static IP 2 Input the IP address Subnet Mask Gateway and DNS from yo...

Страница 24: ...figuring Dosalink 540 as simple Access Point like HUB device select None 10 Network Connection Status After configuration of WAN Setup LAN Setup and Wireless Setup theIP address can be confirmed at th...

Страница 25: ...N Setup Status Status of WAN Port and the Status for IP Address Subnet mask and Gateway of WAN Port 4 Wireless Setup Status Wireless Setup Status 5 DNS IP of DNS Server for WAN 11 DosaLink 540 Menu De...

Страница 26: ...rvers the static IP address should be used 1 In the menu of DHCP Server select Enable or Disable If Disable is selected then the DHCP Relay Agent should be selected as Enable so that the client adapte...

Страница 27: ...user should choose Disable for DHCP function In the case of selecting Enable the IP address for the DHCP should be written into the menu as shown in Figure 25 Figure 25 Configuration Window for Server...

Страница 28: ...he Chain such as Input Output or Forward 3 Protocol To restrict the specific protocols such as TCP and UDP If it is configured to All then all protocols are blocked 4 Set the range for Source IP s reg...

Страница 29: ...e DosaLink 540 and impossible to access to the specific Programs of PC that connects to the DosaLink 540 In case that it is necessary for the external to forward to the specific program at the specifi...

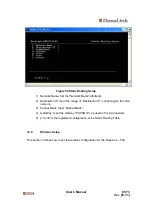
Страница 30: ...c PC and the Gateway Figure 28 Static Routing 1 To set the Network Name arbitrarily 2 To input the range of Destination IP connecting to the intra network 3 To input Subnetmask 4 To input the Gateway...

Страница 31: ...the current configured values to the initial values When Submit is pressed it is applied The system should be Reboot 4 The System Rebooting is to reboot the DosaLink 540 5 The Log Messages shows the...

Страница 32: ...related the nESA the enhanced wireless security function is offered by the DosaLink 540 The uploaded EDATA supporting the nESA may not be deleted even if Factory Default is applied The file name of t...

Страница 33: ...or the number In case of the alphabet it should be distinguished between the lower and upper case 5 IEEE 802 11 Standards are selected in this menu Wireless Mode Selection For instance if 802 11g only...

Страница 34: ...N communicating over a wireless medium is vulnerable in nature For that the IEEE802 11 Task Group TG has generated the various security solutions such as WEP WPA WPA2 802 1x and etc However it has bee...

Страница 35: ...he program resides on the client adapter generates a Master Key by using the unique users keys that the Key Generator generates and the user inherent information so that the client adapter can be conn...

Страница 36: ...rogram Please refer to the LinkAuthentica User s Manual for more information 4 The menu Passphrase generates the key automatically with inputting a user specific word or phrase If the user wants to ge...

Страница 37: ...fined in this menu DTIM Interval It can be set between 1 and 255 11 10 Wireless Distribution System WDS The WDS function is established in this menu The WDS is the function that the DosaLink 540 is co...

Страница 38: ...s menu MAC Filtering Disable Do not use the MAC Filtering Accept Only the user s PC with a MAC address that is listed in the MAC Filtering Table are able to access the DosaLink 540 Deny The user s PC...

Страница 39: ...uthentication the Dynamic Unicast Session Key or Static Broadcast Key which the IEEE 802 1x EAP packets contain is transferred to the authenticated user s PC The Session Key can be different for each...

Страница 40: ...b Redirection When the user s PC that connects to the DosaLink 540 fails to authenticate it allows the user s PC to point the specific WEB Site Figure 35 802 1x 1 Select IEEE 802 1x authentication fun...

Страница 41: ...is set in this menu of ACCT_INTERIM_INTERVAL 9 WEB_REDIRECTION Select to use the Web Redirection function in this menu 10 WEB_REDIRECTION_IP Input the IP address of Web site that is to be connected a...

Страница 42: ...PA EAP when the WPA is enabled 3 If the WPA EAP is selected then the Radius Server s IP address Port and Shared Secret are written into this menu Radius Server 4 Select to use either AES or TKIP in th...

Страница 43: ...works within a physical network Several VLANs can co exist within such a network This helps to reduce the broadcast domain A VLAN consists of network computers and devices that exist on the same domai...

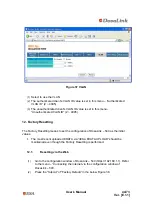
Страница 44: ...ry Resetting The Factory Resetting means to set the configuration of DosaLink 540 as the initial values The most recent uploaded EDATA via nESA EDATA UPLOAD should be maintained even though the Factor...

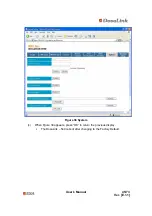
Страница 45: ...User s Manual 45 73 Ver E 1 1 Figure 38 System 3 When Fgure 39 appears press OK to return the previous display The DosaLink 540 reboot after changing to the Factory Default...

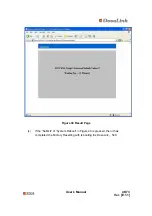
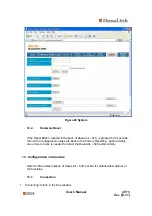
Страница 46: ...User s Manual 46 73 Ver E 1 1 Figure 39 Result Page 4 If the Submit of System Reboot in Figure 40 is pressed then it has completed the Factory Resetting with rebooting the DosaLink 540...

Страница 47: ...5 seconds then all the configuration values are back to the Factory Resetting Approximately one or two minutes is needed to reboot the DosaLink 540 automatically 13 Configuration via Console Refer to...

Страница 48: ...User s Manual 48 73 Ver E 1 1 Figure 41 connecting telnet 2 Input login ID and Password the defaults are root and admin respectively Figure 42 Login...

Страница 49: ...WAN Setup Select the method to connect to WAN and configure it 4 Sever Select and set the DHCP Server and DHCP RELAY AGENT 5 Access Control Set the firewall functions by using the IP addresses 6 Port...

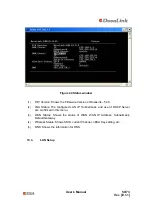
Страница 50: ...aLink 540 2 LNA Status The configured LAN IP Subnetmask and use of DHCP Server are confirmed in this menu 3 WAN Status Shows the status of WAN WAN IP Address Subnetmask Default Gateway 4 Wireless Stat...

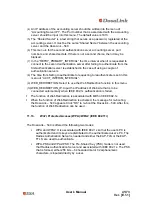
Страница 51: ...ified a communication currently connected with the user s PC is disconnected 2 NetMask The NetMask is set in this menu 3 s save Register the newly configured information 4 r return Back to the previou...

Страница 52: ...r s Manual 52 73 Ver E 1 1 Figure 46 WAN Setup If PPPoE ADSL is used then select 1 PPPoE Setup in Figure 47 Figure 47 PPPoE Setup 1 Select 1 which is User Name and input ID User Name is registered at...

Страница 53: ...n figure 48 above 4 Save the configured values If Cable or VDSL is used then select 2 Cable VDSL Setup from the WAN Setup If the DHCP server is operated it is also established via Cable VDSL Setup An...

Страница 54: ...s Manual 54 73 Ver E 1 1 Figure 49 Cable VDSL Setup 1 Select MAC Address and change the Mac address Figure 50 MAC Address 2 If the previous MAC Address needs to be restored then select Restore MAC Add...

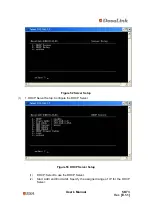
Страница 55: ...etup 1 Input IP Address NetMask GateWay Address and DNS Server IP which are assigned to the DosaLink 540 13 5 Server This is for setting the DHCP Server The basic settings in this menu are the DHCP Se...

Страница 56: ...r E 1 1 Figure 52 Server Setup 1 1 DHCP Server Setup Configure the DHCP Server Figure 53 DHCP Server Setup 1 DHCP Select to use the DHCP Server 2 Start Addr and End Addr Specify the assigned range of...

Страница 57: ...DHCP Client Table The registered information of DHCP Client Table may be confirmed 2 2 DHCP Relay Setup Configure DHCP Relay Agent Figure 54 DHCP Relay Setup 1 DHCP Relay Select either enable or disab...

Страница 58: ...et Mask Port of Input Output and Forward in the Policy Source IP 0 0 0 0 for every available IPs Src NetMask 0 0 0 0 Src Start Port and Src End Port The specified ranges for Port can be assigned If no...

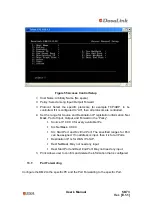
Страница 59: ...User s Manual 59 73 Ver E 1 1 Figure 56 Port Forwarding Setup 1 DMZ Setup Figure 57 DMZ Setup 1 DMZ Select either enable or disable 2 IP Address Input the IP address of the user s PC to be configured...

Страница 60: ...Port Dest End Port Set the range of the specific Port Number from the external 4 Internal IP Input the IP address of PC to which the specific Port is forwarding 5 Internal Start Port Internal Stop Po...

Страница 61: ...t the range of Destination IP connecting to the intra network 3 Subnet Mask Input Subnet Mask 4 GateWay Input the Gatway IP WAN IP as used in the intra network 5 p Confirm the registered configuration...

Страница 62: ...e Threshold values etc 3 WDS Set to the communication path between one DosaLink 540 and another DosaLink 540 via WDS configuration 4 MAC Filtering Can be controlled to access the DosaLink 540 based on...

Страница 63: ...Thus the client adapters can not connected to the DosaLink 540 that is set to Wireless Bridge 3 Country Code This can not be modified from what is set in the DosaLink 540 Each country s frequency is d...

Страница 64: ...able when the Channel Select is set to Manual The Channel 6 is the Factory Default value 8 WEP Key Setup If the WEP an encryption to protect the data over the wireless area is selected Enable then the...

Страница 65: ...Control The transmitting power of the system can be controlled in this menu Tx Power Control There are 4 different settings AUTO 100 70 and 50 2 Tx Rate Control The transmitting data rate can be cont...

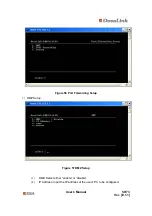
Страница 66: ...fault value of 100 is recommended 6 DTIM Interval The number of Beacon Interval in the DTIM is defined It can be set to between 1 and 255 13 9 3 WDS Figure 64 WDS Setup 1 WDS Use Select for use of the...

Страница 67: ...g Accept The user s PCs whose MAC addresses are listed in the MAC Filtering Table are able to access the DosaLink 540 Deny The user s PCs whose MAC addresses are listed in the MAC Filtering Table are...

Страница 68: ...is associated with the accounting server should be input The default value is 1813 7 Account Share The Shared Secret is a text string that serves as a password registered at the accounting server It...

Страница 69: ...nESA The Key consists of 256 bits and uses a Hexadecimal number Disable The nESA is not used Default Key It means the Factory Default It is not necessary for the user to input the key User Key The use...

Страница 70: ...he WPA EAP is selected then the Radius Server s IP address is input 4 WPA RADIUS PORT If the WPA EAP is selected then the Radius Server Port is assigned 5 WPA RADIUS SECRET If the WPA EAP is selected...

Страница 71: ...IUS PORT If the WPA EAP is selected then the Radius Server s Port is input f RSN RADIUS SECRET If the WPA EAP is selected then the Radius Server s Shared Secret is input g RSN CIPHER SUITE Select to u...

Страница 72: ...sage Digest algorithm 5 MDIX Medium Dependent Interface Crossover NAT Network Address Translation nESATM nDosa Enhanced Security Algorithm OS Operating System PMP Point to MultiPoint PPPoE Point to Po...

Страница 73: ...User s Manual 73 73 Ver E 1 1 WDS Wireless Distribution System WEP Wired Equivalent Privacy WLAN Wireless Local Area Network WPA Wi Fi Protected Access...

Отзывы: