CDR Series
Installation Instructions
18
Product
Scroll Up
Scroll Down
Previous
Next
Select
ZTX3
Up key
Down key
Left key
Right key
any Zoom key
ZTX4
Up key
Down key
Left key
Right key
any Zoom key
ZTX5
Up key
Down key
Left key
Right key
any Zoom key
ZTX6
Up key/joystick
Down key/joystick
Left key/joystick
Right key/joystick
any Zoom key
ZMX-IT
Up key
Down key
Left key
Right key
any Zoom key
ZMX Storm
Up key
Down key
Left key
Right key
any Zoom key
ZMX
Plus
Up key
Down key
Left key
Right key
any Zoom key
Vista Ultra MPX
Up key
Down key
Left key
Right key
any Zoom key
Vista GEM 3 MPX
Up key
Down key
Left key
Right key
any Zoom key
Vista Columbus
Up key
Down key
Left key
Right key
any Zoom key
Using keyboard ZKX2 or similar. Telemetry must be enabled (see the keyboard manual
for details).
Telemetry must be enabled for correct operation (see the product manual for details).
NAVIGATING THE MENU SYSTEM
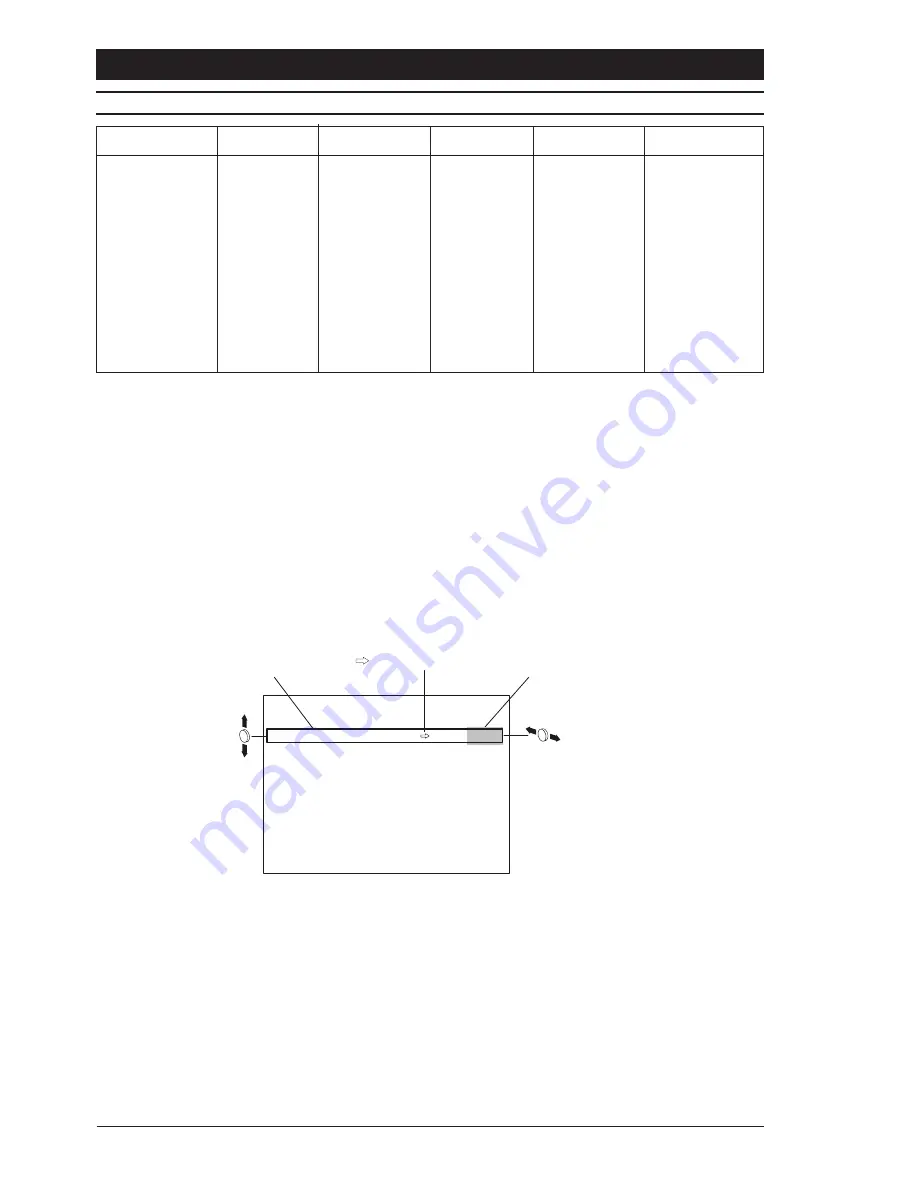
A typical menu screen is shown below. The cursor shows the currently selected menu
item and is represented by a box which is moved up or down with the up/down joystick or
arrow keys. The left/right joystick or arrow keys are then used to change the selected
parameter for that menu item. A menu item with an arrow (
ð
), indicates that a sub-menu
exists. Pressing the select key, (either the built-in joystick or any of the zoom keys for a
remote telemetry controller), will reveal the submenu. Highlighting EXIT and pressing select
will return to the previous menu level.
Currently selected
menu item
Currently selected
parameter
Indicates submenu
Change selected parameter
Move up or down
BASIC SETTINGS
WHITE BALANCE
USER
GAMMA
0.45
AGC
OFF
SHUTTER (EI)
EI ON
BLC
OFF
LENS MENU
PK WHITE MENU
CAMERA ID
EXIT
Saving changes
Any changes made whilst within the menu system must be saved before the menu system
is exited. This is achieved from the Menu Selection Screen by highlighting the SAVE &
EXIT option. You are then asked to choose a group to save the settings. If you do not wish
to save your changes, select the EXIT option.


