5-8
BE1-79A Installation and Configuration
9310200990 Rev G
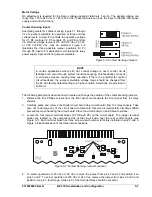
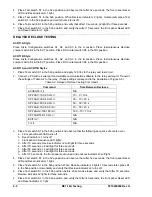
5. When all of the jumpers are positioned for operation in the desired sensing voltage range, prepare to
place the circuit board back in the relay chassis.
6. Align the circuit board edges with the white guide markings on the relay chassis. Once aligned, slide
the circuit board back into the chassis until the circuit board is seated in its connector. The front of the
circuit board should be flush with the front of the relay chassis. (The LEDs and serial port connector
will protrude past the front of the chassis.)
7. Place the front panel on the front of the relay chassis and align the four screw holes. Secure the front
panel to the relay chassis with the four Phillips screws removed in step 1.
Timing Cams
Double-ended cams on ACR reclosers provide a 10 second reset after a reclosure. Single-ended cams
can be adjusted for any reclose or reset time desired. The single- and double-ended cams of the ACR
reclosers are simulated with the reclose and reset timer settings of the BE1-79A relay. Since the reclose
and reset times for each of the four recloses is independently programmable, the function of the ACR
reclosers can be duplicated.
Fault Clearing
The BE1-79A allows the first reclose to be delayed slightly so that faults may de-ionize before a reclosure
is initiated. Faults typically are allowed to de-ionize for approximately 217 milliseconds (13 cycles) for
distribution voltages and 300 milliseconds (18 cycles) for transmission voltages (including breaker-
operating time). The inherent delay of the BE1-79A relay is 22 to 48 milliseconds when set at a time delay
of zero. The reclose timers may be adjusted in increments of 0.1 seconds, which is 6 cycles on a 60-hertz
system.
It is possible to set an ACR recloser for an instantaneous reclose with no voltage applied at terminals 5
and 6. If this unusual application is employed, the user must confirm that voltage is applied to BE1-79A
terminals 5 and 6 when a reclose is desired. Terminals 5 and 6 must be energized for a reclose to be
initiated.
The power holdup circuit of part number 9310200101 relays maintains relay function for a minimum of 40
cycles (667 milliseconds) after nominal operating power is removed. This prevents the relay output
contacts from dropping out too quickly in applications where output C10 is used as an instantaneous trip
enable contact.
RS Contact
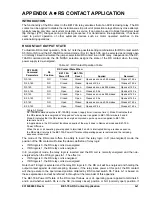
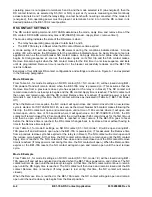
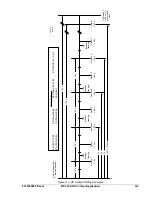
A jumper is used in ACR reclosers to configure the RS contact for normally open or normally closed
operation. In the BE1-79A, the RS contact is configured by switch S5. The SP-79RS command allows the
RS contact operate and reset time to be programmed. Refer to Section 4,
Communication Commands,
Command Descriptions
for a detailed description of the SP-79RS command.
Alarm Output
The SP-ALM command is used to program the alarm output to function as a relay fail output or a
combination relay fail/lockout output. As a relay fail output, the alarm output will close if relay operating
power is lost. The alarm output will also close if the microprocessor detects an abnormal condition such
as:
•
The BE1-79A is configured for ACR11A operation but recognizes inputs that indicate the relay is
operating in an ACR11B system.
•
The microprocessor is unsuccessful at storing settings in EEPROM.
If the microprocessor closes the alarm output due to a failure, all three front panel LED indicators will be
lit. The failure indication can be cleared by cycling operating power to the relay.
NOTE
A reclose time delay must be set for a duration that is longer than the preceding
reset time delay. Setting the reset time delay longer than the next reclose time
delay in the reclose sequence will give undesired results.
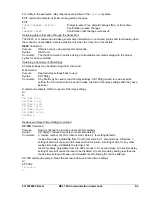
Example: Incorrect Correct
SP-79A1=0,15
SP-79A1=0,7
SP-79A2=10,15
SP-79A2=10,15
Содержание BE1-79A
Страница 1: ...INSTRUCTION MANUAL FOR RECLOSING RELAY BE1 79A Publication 9310200990 Revision G 02 08...
Страница 2: ......
Страница 8: ...vi BE1 79A Introduction 9310200990 Rev G This page intentionally left blank...
Страница 10: ...ii BE1 79A General Information 9310200990 Rev G This page intentionally left blank...
Страница 16: ...ii BE1 79A Controls and Indicators 9310200990 Rev G This page intentionally left blank...
Страница 20: ...2 4 BE1 79A Controls and Indicators 9310200990 Rev G This page intentionally left blank...
Страница 22: ...ii BE1 79A Functional Description 9310200990 Rev G This page intentionally left blank...
Страница 34: ...ii BE1 79A Communication Commands 9310200990 Rev G This page intentionally left blank...
Страница 40: ...ii BE1 79A Installation and Configuration 9310200990 Rev G This page intentionally left blank...
Страница 43: ...9310200990 Rev G BE1 79A Installation and Configuration 5 3 Figure 5 2 Panel Cutout Dimensions S1 Case...
Страница 52: ...ii BE1 79A Testing 9310200990 Rev G This page intentionally left blank...
Страница 58: ...6 6 BE1 79A Testing 9310200990 Rev G This page intentionally left blank...
Страница 60: ...ii BE1 79A RS Contact Application 9310200990 Rev G This page intentionally left blank...
Страница 66: ...ii BE1 79A Terminal Communication 9310200990 Rev G This page intentionally left blank...


