4-2
BE1-79A Communication Commands
9310200990 Rev G
items. For example, the SP-79A1 command could be used to read the first reclose setting or the
command S could be used to read all reclose settings.
COMMAND DESCRIPTIONS
BE1-79A command descriptions and examples are provided in the following paragraphs.
Changing Settings through the Serial Port
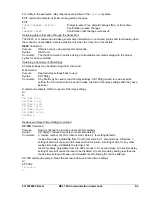
The ACCESS command is used to access write privileges while changing relay settings. Relay control
functions are disabled when access is granted. Changing the settings through the serial port requires that
the operator use the ACCESS command to obtain programming access. The operator enters ACCESS=
and the relay responds with an acknowledgement of ACCESS GRANTED if the command was received
and executed. Any time an invalid command is received, the relay will respond with a question mark (?).
The EXIT command is used to release write privileges while changing relay settings. After the changes
are made, the new data will be copied to the working settings and saved to nonvolatile memory when
EXIT is entered. The operator must confirm that the programming is completed and accepted before the
changes are actually made. It is important to make all changes to relay settings before executing the
EXIT command. This ensures that all intended settings are executed. The relay will go to the lockout state
after the EXIT command is entered. If voltage is sensed at V1, the relay will return to the reset state after
the lockout timer expires.
Changing settings through the serial port consists of the following sequence:
1. Enter ACCESS=<CR> or A=<CR>.
2. Enter the necessary commands to change the current settings.
3. Enter EXIT<CR> or E<CR> to clear access and save settings.
4. Enter Y (yes)<CR> to confirm save. Enter N (no) to continue using the old settings.
The <CR> characters placed after commands represent a carriage return or pressing the Enter key. For
simplicity, they will no longer be shown. However, each line entered by the operator must be terminated
with a carriage return <CR> or a carriage return–line feed <CR–LF>.
Access Command
ACCESS
Command
Purpose
:
Read/set programming access in order to change user settings.
Syntax
:
ACCESS[=] or A[=]
Access must be changed by entering ACCESS= before any changes to the settings can be made. Relay
protection functions are disabled when access is granted. The ACCESS command is valid for a period of
five minutes if no new characters are entered. ACCESS by itself may be used to check if programming
access is active or disabled. The relay will respond with ACCESS GRANTED or ACCESS: NO. The
available access privilege is Privilege S: Setting Access. When exiting programming access, the relay will
go to the lockout state after the EXIT command is entered. If voltage is sensed at V1, the relay will return
to the reset state after the lockout timer expires.
Exit Command
EXIT
Command
Purpose
:
Exit programming mode
Syntax
:
EXIT or E
Comments
:
Exits the programming mode and resets the programming access privilege to 0.
Changes are made to a scratchpad copy of the settings. After the changes are made, the new data will be
saved to nonvolatile memory and the new, working settings will be initialized when control to make
changes is released by entering the EXIT command. After entering EXIT, the user is prompted to confirm
that the new data should be saved. The user has three options (Y or N or C). If Y is entered, the data will
be saved. If N is entered, the changes will be cleared and the old settings will be restored. If C is entered,
the EXIT command will be aborted and programming may continue. It is important to make all changes to
relay parameters before executing the EXIT command. This ensures that all intended settings are
executed.
Содержание BE1-79A
Страница 1: ...INSTRUCTION MANUAL FOR RECLOSING RELAY BE1 79A Publication 9310200990 Revision G 02 08...
Страница 2: ......
Страница 8: ...vi BE1 79A Introduction 9310200990 Rev G This page intentionally left blank...
Страница 10: ...ii BE1 79A General Information 9310200990 Rev G This page intentionally left blank...
Страница 16: ...ii BE1 79A Controls and Indicators 9310200990 Rev G This page intentionally left blank...
Страница 20: ...2 4 BE1 79A Controls and Indicators 9310200990 Rev G This page intentionally left blank...
Страница 22: ...ii BE1 79A Functional Description 9310200990 Rev G This page intentionally left blank...
Страница 34: ...ii BE1 79A Communication Commands 9310200990 Rev G This page intentionally left blank...
Страница 40: ...ii BE1 79A Installation and Configuration 9310200990 Rev G This page intentionally left blank...
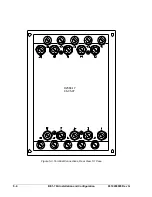
Страница 43: ...9310200990 Rev G BE1 79A Installation and Configuration 5 3 Figure 5 2 Panel Cutout Dimensions S1 Case...
Страница 52: ...ii BE1 79A Testing 9310200990 Rev G This page intentionally left blank...
Страница 58: ...6 6 BE1 79A Testing 9310200990 Rev G This page intentionally left blank...
Страница 60: ...ii BE1 79A RS Contact Application 9310200990 Rev G This page intentionally left blank...
Страница 66: ...ii BE1 79A Terminal Communication 9310200990 Rev G This page intentionally left blank...


