
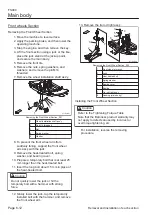
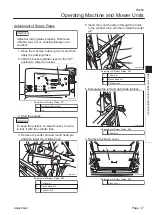
Front wheels Section
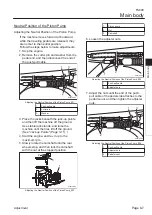
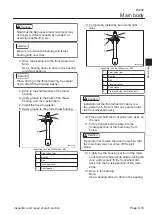
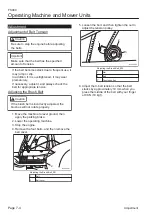
Removing the Front Wheel Section
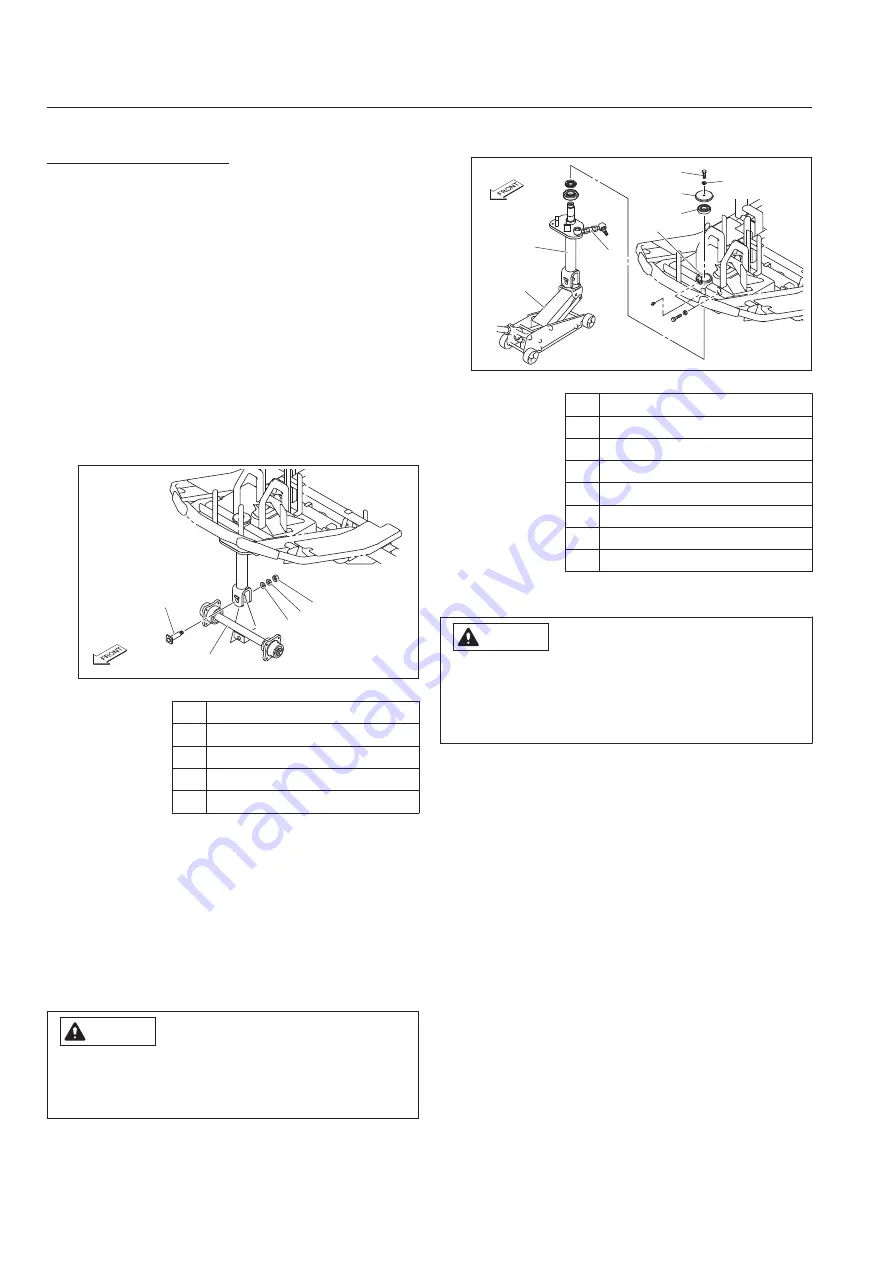
Move the machine to level surface.
Apply the parking brake, and then lower the
operating machine.
Stop the engine, and then remove the key.
Lift the front section using a jack or the like,
place the jack stand at the jackup point,
and secure the main body.
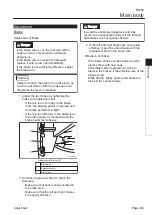
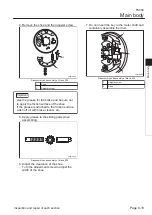
Remove the front tire.
Remove the nuts, spring washers, and
washers, and remove the pin M14
threaded.
Remove the wheel installation shaft ass'y.
3
5
4
1
2
6717fe-001
Removing the Front Wheel Section_001
1
Wheel installation shaft ass'y
2
Pin M14 threaded
3
Nut
4
Spring washer
5
Washer
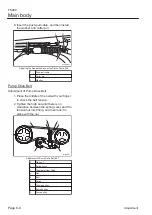
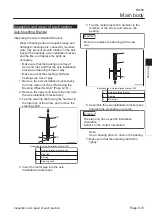
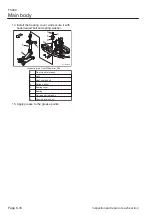
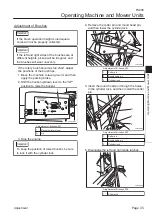
To prevent the front wheel arm from
suddenly falling, support the front wheel
arm ass'y with the jack.
Remove the heat-treated bolt, spring
washer, and bearing cover.
Prepare a temporary bolt that is at least 25
mm longer than the heat-treated bolt.
Insert the long bolt about 15 mm in place of
the heat-treated bolt.
Caution
Do not quickly lower the jack or hit the
temporary bolt with a hammer with strong
force.
Slowly lower the jack, tap the temporarily
installed bolt with the hammer, and remove
the front wheel arm.
1.
2.
3.
4.
5.
6.
7.
8.
9.
10.
11.
12.
Remove the tie rod right ass'y.
3
5
4
7
1
2
6
8
6717fe-002
Removing the Front Wheel Section_002
1
Front wheel arm ass'y
2
Jack
3
Heat-treated bolt
4
Spring washer
5
Bearing cover
6
Bearing
7
Tie rod right ass'y
8
Housing (main body)
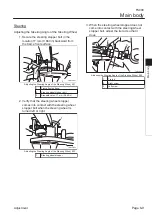
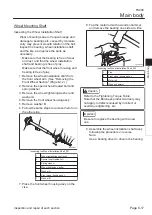
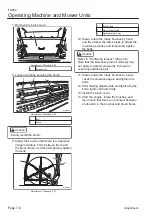
Installing the Front Wheel Section
Caution
Refer to the Tightening Torque Table.
Note that the Baroness product warranty may
not apply to defects caused by incorrect or
overtorque tightening, etc.
For installation, reverse the removing
procedure.
13.
FS900
Main body
Page 6-12
Removal and installation of each section
Содержание FS900
Страница 1: ...Riding Sweeper Service Manual Serial No FS900 10001 Ver 1 0...
Страница 4: ...FS900 Contents...
Страница 10: ...FS900 Safety Page 1 6 Safety Signs and Instruction Signs...
Страница 11: ...Waste Disposal Page 2 2 About the Waste disposal Page 2 2 Disposal FS900 Disposal Page 2 1...
Страница 28: ...FS900 Maintenance standards and maintenance Page 3 16 Greasing...
Страница 74: ...FS900 Hydraulic system Page 4 46 Inspection and repair of each section...
Страница 98: ...FS900 Electrical system Page 5 24 General inspection and repair...
Страница 118: ...FS900 Main body Page 6 20 Inspection and repair of each section...
Страница 163: ...Head Office 1 26 Miyuki cho Toyokawa Aichi Pref 442 8530 Japan Tel 0533 84 1390 Fax 0533 89 3623 FS900 SM 00Z 17A 00 S K...


