2. Installation Guidelines
How to install the batteries
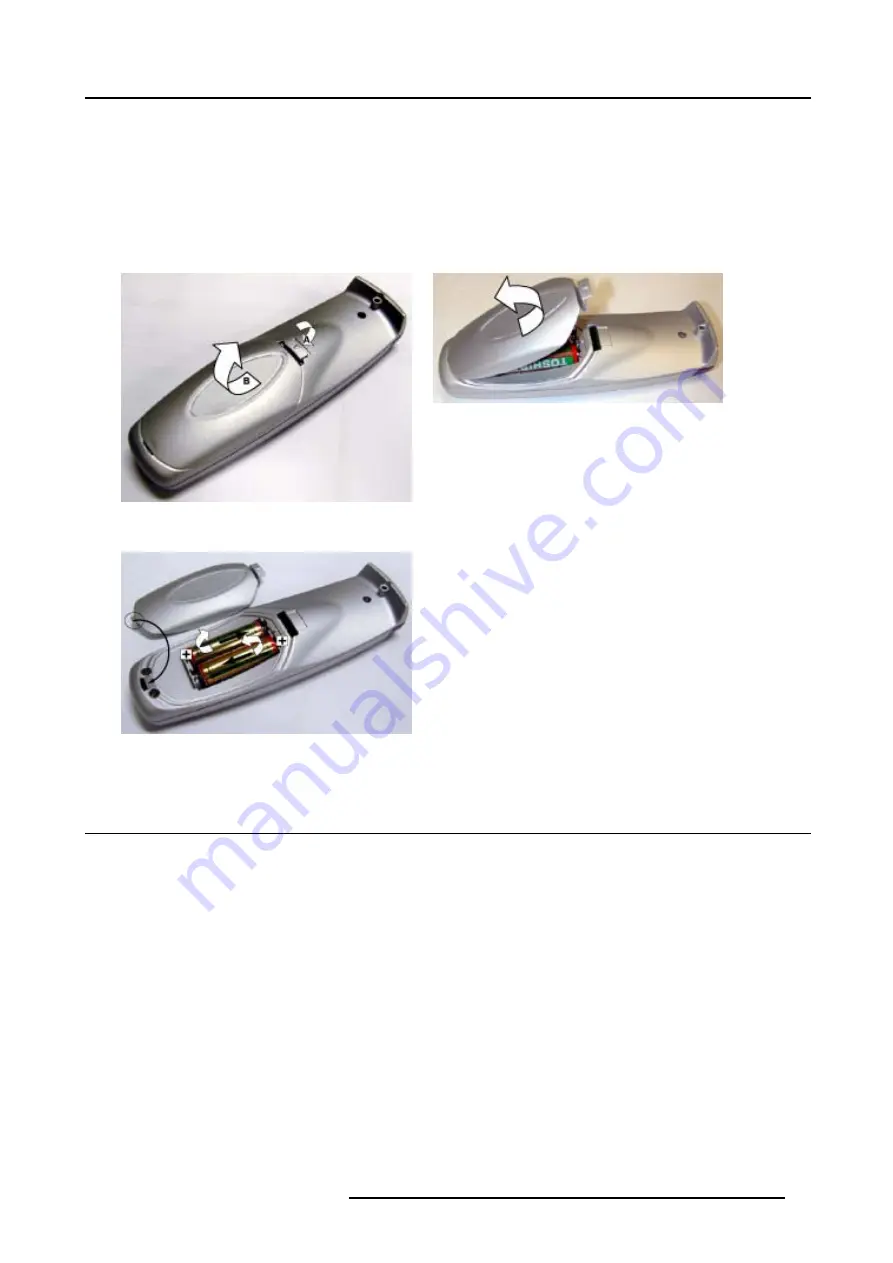
1. Push the cover tab (A) with the fingernail a little backwards and pull upwards the cover top (B). (image 2-5)
2. Slide the cover forwards to remove. (image 2-6)
3. Push the battery body towards the spring and lift it up to remove. (image 2-7)
4. Insert two AA size batteries, making sure the polarities match the + and – marks inside the battery compartment (image 2-7).
5. Insert the lower tab of the battery cover in the gap at the bottom of the remote control, and press the cover until it clicks in place
Image 2-5
Battery cover unlock
Image 2-6
Battery cover removal
Image 2-7
Battery removal
2.7
Stacking projectors
What is possible?
Up to 2 projectors can be stacked on each other without using extra tools or accessories.
How to stack?
Handle as follow:
1. Put the second projector on the first one so that base plate of the second projector matches with the rigging socket of the first
projector. (image 2-8)
2. Turn the rigging sockets of the second projector counter clockwise until they are free to move up and down. (image 2-9)
3. Secure the projectors on each other by bringing the free part of the second projector into the socket of the first projector and turn
a quarter clockwise while pushing downwards until it clicks in.
4. For ceiling mounted configurations, mount a security cable between the lowest projector and the upper projector. (image 2-10)
Warning:
Be sure the safe working loud of the used security cables and connectors are enough to support one projector. Refer
to the supplier of the security cable for safety details.
R5976815 RLM G5I PERFORMER 02/06/2006
13
Содержание RLM G5i Performer R9010320
Страница 1: ...RLM G5i Performer Owner s manual R9010320 R5976815 02 02 06 2006 ...
Страница 8: ...1 Packaging and Dimensions 6 R5976815 RLM G5I PERFORMER 02 06 2006 ...
Страница 46: ...4 Getting Started 44 R5976815 RLM G5I PERFORMER 02 06 2006 ...
Страница 50: ...5 Getting used with the menu structure 48 R5976815 RLM G5I PERFORMER 02 06 2006 ...
Страница 56: ...6 Source Selection 54 R5976815 RLM G5I PERFORMER 02 06 2006 ...
Страница 60: ...7 General Menu Image 7 7 58 R5976815 RLM G5I PERFORMER 02 06 2006 ...
Страница 86: ...8 Image Menu Image 8 46 Image 8 47 84 R5976815 RLM G5I PERFORMER 02 06 2006 ...
Страница 96: ...9 Tools Menu 94 R5976815 RLM G5I PERFORMER 02 06 2006 ...
Страница 135: ...14 Installation menu Image 14 21 R5976815 RLM G5I PERFORMER 02 06 2006 133 ...
Страница 136: ...14 Installation menu 134 R5976815 RLM G5I PERFORMER 02 06 2006 ...


