3. Installation Guidelines
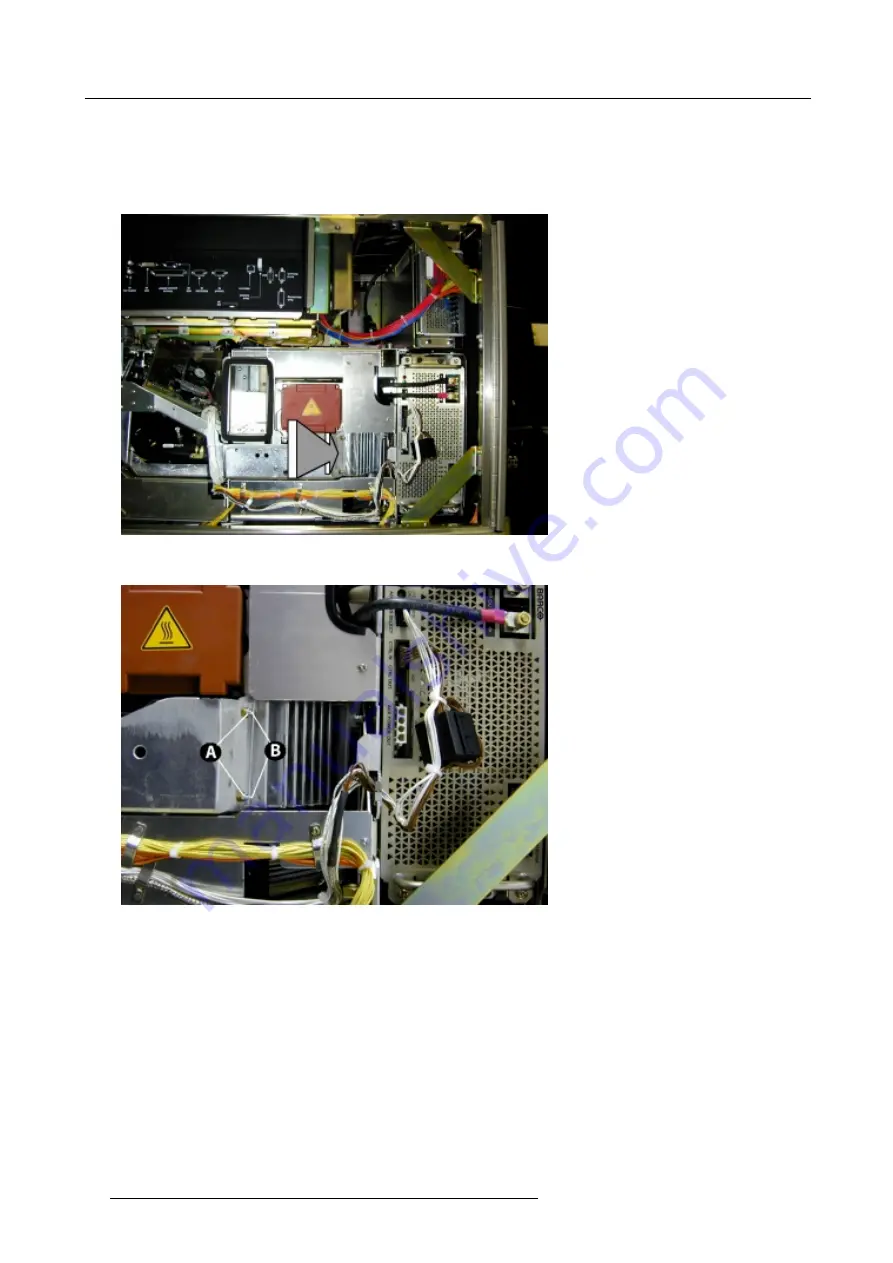
4. Loosen both securing nuts (A). (image 3-34, image 3-35)
5. Adjust both screws (B) with an Allen key (turn only a few turns) until maximum light fall on the screen.
6. Secure this position by fastening both securing nuts (A).
7. Reinstall the side cover.
Image 3-34
Location of cold mirror
Image 3-35
Cold mirror adjustment
30
R5976572 DCINE PREMIERE DP30 17032003
Содержание DCINE PREMIERE DP30
Страница 1: ...DIGITAL CINEMA DCINE PREMIERE DP30 R9006100 INSTALLATION GUIDELINES 17032003 R5976572 00...
Страница 4: ......
Страница 6: ...Table of contents 2 R5976572 DCINE PREMIERE DP30 17032003...
Страница 14: ...2 Packaging and Dimensions Image 2 7 Side view Image 2 8 Top view 10 R5976572 DCINE PREMIERE DP30 17032003...
Страница 15: ...2 Packaging and Dimensions Image 2 9 Front view R5976572 DCINE PREMIERE DP30 17032003 11...
Страница 16: ...2 Packaging and Dimensions 12 R5976572 DCINE PREMIERE DP30 17032003...
Страница 36: ...4 AC Power Requirements 32 R5976572 DCINE PREMIERE DP30 17032003...
Страница 38: ...5 Maintenance of the Projector 34 R5976572 DCINE PREMIERE DP30 17032003...
Страница 44: ...A Key Panel Automation Interface 40 R5976572 DCINE PREMIERE DP30 17032003...
Страница 46: ...Index 42 R5976572 DCINE PREMIERE DP30 17032003...


