R5900103 /00
C-10, C-5
42
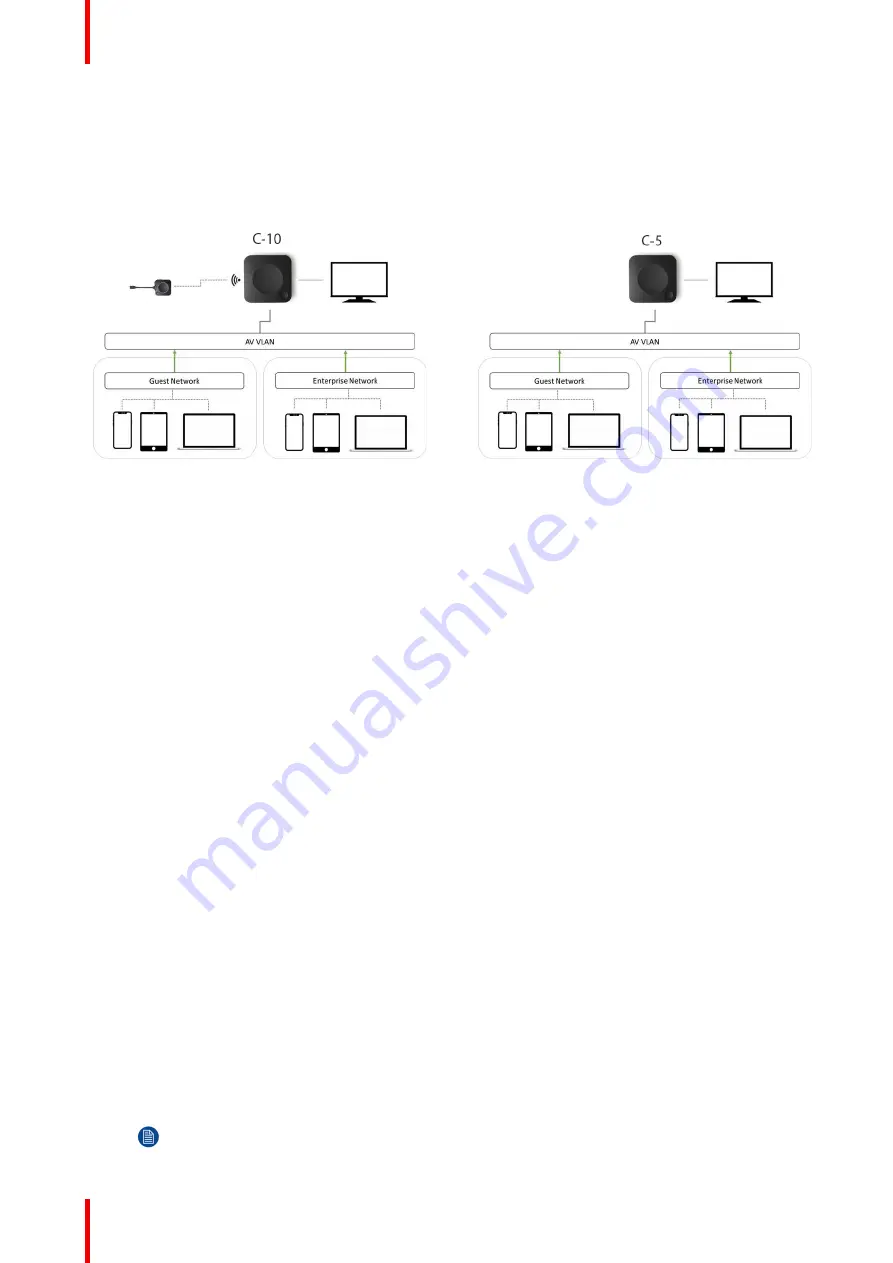
Connecting the Base Unit to the Enterprise network opens the possibility for using the eXperience
Management Suite (XMS) for central management and/or using the auto-update functionality to keep your
installed base up to date.
A Base Unit which is connected to the network, can be monitored through SNMP, can be controlled and
monitored by other 3rd party systems such as Overture or Crestron or can be interfaced through the
ClickShare REST API.
Image 4
–
8
Image 4
–
9
How to setup via the Configurator
1.
Connect the Base Unit and browse to the
ClickShare Configurator
and log in.
2.
Select
Button
in the
System
menu and click
Edit settings
.
Select
External Access Point
from the drop down menu and select the preferred authentication mode and
fill out the details.
Click
Save Changes
. For more information, see
“
”
, page 96
3.
Pair the Button again with the Base Unit.
4.
Optionally the Base Unit
’
s WiFi can be set to Access Point or can be set to Off. For more info, see
“
”
, page 79
Setup via XMS
1.
Log in to XMS and go to the
Base Units
tab.
2.
In the device list select the Unit(s) for deploying network integration mode.
3.
Open the
Configure
dropdown list and choose
Network integration
.
4.
Select one of the authentication modes for network integration mode and fill out the details.
5.
Re-pair the ClickShare Button with the updated Base Unit(s) to apply the new configuration
For more detailed information on how to use XMS, consult the XMS user guide.
4.7 Video signal connections to the Base Unit
About Video signal connection
A single screen can be connected to the Base Unit.
To connect a display, an HDMI connection should be made between the Base Unit and the display.
To connect
1.
Connect the Base Unit to the display using a display cable.
Note:
No display cables are included in the ClickShare box at purchase.
Содержание ClickShare Present C Series
Страница 1: ...ENABLING BRIGHT OUTCOMES Installation manual C 10 C 5...
Страница 25: ...25 R5900103 00 C 10 C 5 1 1 Documentation 26 1 2 Symbols and fonts 26 Introduction to the Installation Guide 1...
Страница 27: ...27 R5900103 00 C 10 C 5 C 10 C 5 Specifications 2...
Страница 35: ...35 R5900103 00 C 10 C 5 3 1 Environmental Condition Check 36 3 2 Basic Workflow 36 Getting started 3...
Страница 54: ...R5900103 00 C 10 C 5 54 C 10 C 5 Installation...
Страница 60: ...R5900103 00 C 10 C 5 60 Preparing the Buttons...
Страница 108: ...R5900103 00 C 10 C 5 108 C 10 C 5 Configurator...
Страница 109: ...109 R5900103 00 C 10 C 5 Firmware updates 7...
Страница 111: ...111 R5900103 00 C 10 C 5 Troubleshooting 8...
Страница 117: ...117 R5900103 00 C 10 C 5 Windows Certified driver 58 X XMS Cloud 102 Index...
Страница 118: ...R5900103 00 C 10 C 5 118 Index...
Страница 119: ......
Страница 120: ...www barco com R5900103 00 2020 05 27 Wi Fi...


