


5. Random Access
Setting up the Shape for Projector 1
1. Use the combination of
ENTER
and the cursor key
←
or
→
to select
right all
2. Push the cursor key
↑
or
↓
to select % of image. (menu 5-123)
3. Push the cursor key
←
or
→
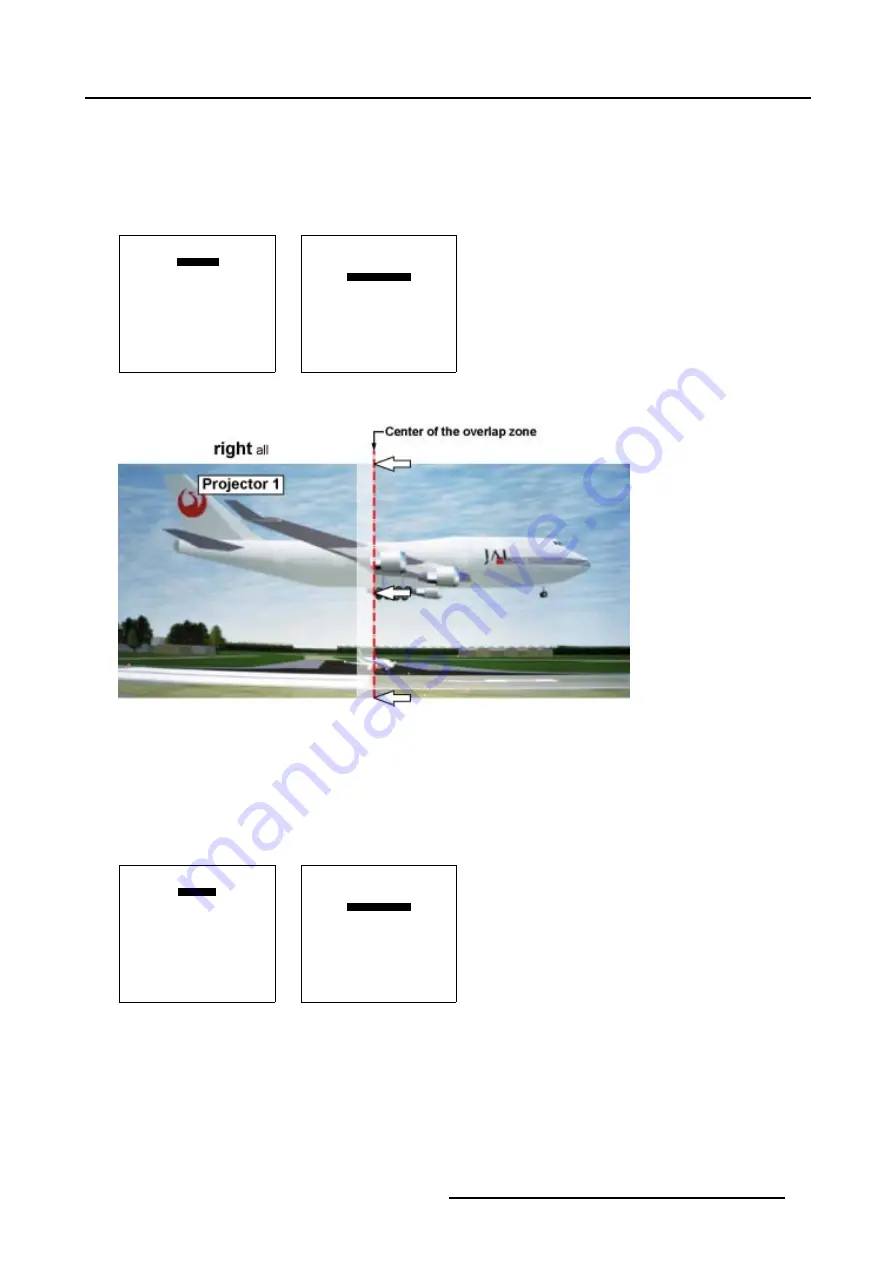
to coincide the right side of the image of Projector 1 with the center of the overlap area. (image 5-47)
4. Use the subpixel selections for fine adjustments.
SHAPE
right all
% of image = 0
%% of image = 0
Menu 5-122
SHAPE
right all
% of image = 0
%% of image = 0
Menu 5-123
Image 5-47
Basic Shape set up for Projector 1
Setting up the Shape for Projector 2
1. Use the combination of
ENTER
and the cursor key
←
or
→
to select
left all
2. Push the cursor key
↑
or
↓
to select % of image. (menu 5-125)
3. Push the cursor key
←
or
→
to coincide the left side of the image of Projector 2 with the center of the overlap area. (image 5-48)
4. Use the subpixel selections for fine adjustments.
SHAPE
left all
% of image = 0
%% of image = 0
Menu 5-124
SHAPE
left all
% of image = 0
%% of image = 0
Menu 5-125
R5976496 BARCOREALITY SIM 6 MK II + WARP 6
TM
15052003
97
Содержание BARCOREALITY SIM 6 MK II + WARP 6
Страница 4: ......
Страница 8: ...Table of contents 4 R5976496 BARCOREALITY SIM 6 MK II WARP 6 TM 15052003 ...
Страница 28: ...3 Connections 24 R5976496 BARCOREALITY SIM 6 MK II WARP 6 TM 15052003 ...
Страница 152: ...C Cleaning the Dustfilter 148 R5976496 BARCOREALITY SIM 6 MK II WARP 6 TM 15052003 ...
Страница 156: ...Index 152 R5976496 BARCOREALITY SIM 6 MK II WARP 6 TM 15052003 ...


