28
SECTION 5 - INSTRUCTIONS FOR A SAFE USE
5 - SAFE USE
5.13 USE OF Compass Servo Drive (Optional)
The machine is equipped with a driver assistant, which makes the work much easier:
- increases the safety of the operator considerably, who is not forced to be near the
machine and to work with it precisely.
- enables a minimal overlap of the passages, maximizes the effective cutting width and
thus the productivity of the machine
- enables precise work even over large distances
The basic functions are explained below. Please refer to the Compass Servo Drive
manual for advanced functions.
How to start the servo drive
To be able to work with the ServoDrive please follows these steps:
a) Define a valid path (see next section). When the route is defined, the yellow light on
the radio control lights up and the message “AUTO” appears on the display
b) Move the machine inside the defined path.
c) Press the “SHIFT” button (Fig.10) for 2 seconds. The machine begins to follow the
defined path
d) If the remote control joystick is touched, the ServoDrive disengages automatically
and the operator regains control of the machine.
e) By moving the machine back in the defined path (the LED and the word “AUTO”
reappear) and pressing the SHIFT key for 2 seconds, the machine resumes the work
it had previously interrupted.
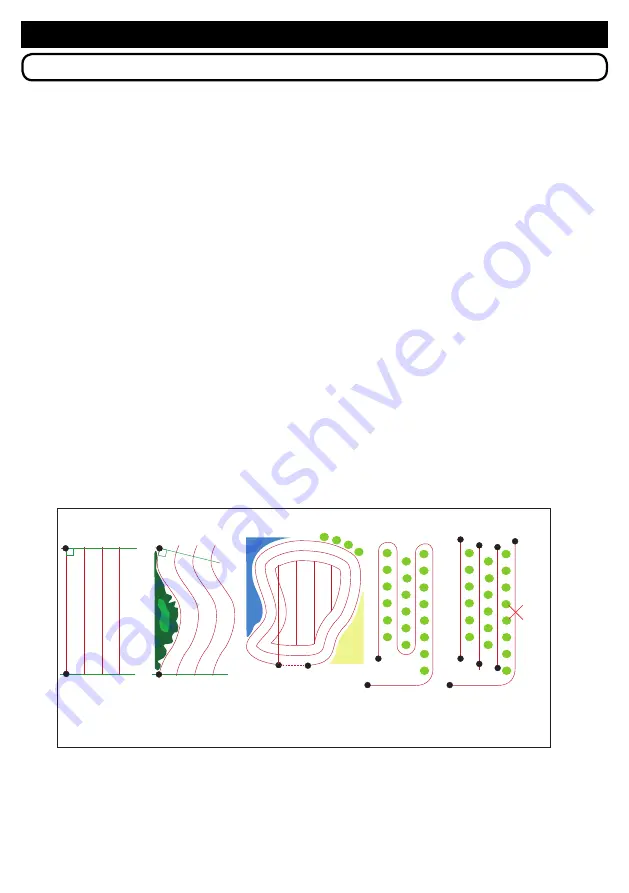
How to define a valid path
(Fig. 10)
It is necessary to determine the appropriate mode for the work to be performed and to
press the buttons in the order shown. The Shift, A, B and C keys are those shown in
Figure 10.
Example
For a rectangular field I choose mode 1.
I place the mower in the first left corner of the field. I press SHIFT + A. The yellow LED
flashes to indicate that learning has started. I move the machine to the end left corner of
the field and press
SHIFT + B.
The LED stops flashing and shows that we have defined a
VALID ROUTE.
A
B
A
C
A
A
MODE 1
MODE 2
MODE 3
S-MODE 4
A’
ShiftA, ShiftB
ShiftA, ShiftC
ShiftA (ring to close)
Save mode 4
(ShiftA, ShiftB)
A
S-MODE 5
Save mode 5
(ShiftA, ShiftB,
ShiftB...,ShiftB)
B
B
B
B
B
B
B
B
ShiftC Delete
last B-B
Содержание TracMow 95 EVO
Страница 6: ...5 NOTES...


