


40
97654 v.7
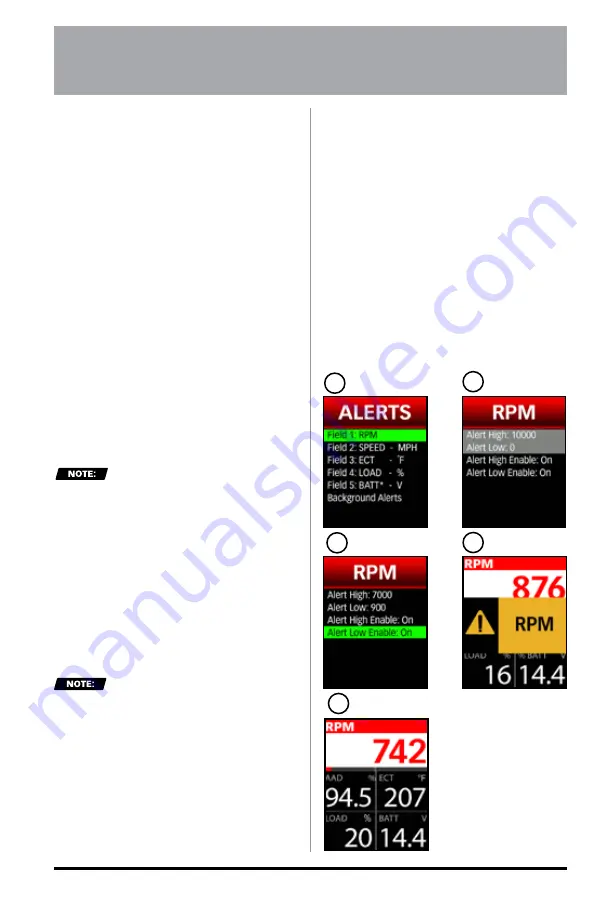
The iDash 1.8 allows users to configure
alerts notifying the operator that a
parameter has exceeded its set limit.
All alerts can be disabled/enabled and
can be set to go off for a maximum or
a minimum value. See
Figure 9-1, C.
After an alert limit is tripped, a banner
will appear, displaying a large banner
with the parameter alert name for 3
seconds. See
Figure 9-1, D.
If the alert limit continues to be
exceeded for displayed parameters,
the gauge will blink red (see
Figure
9-1, E
). If the alert limit continues to
be exceeded for background alerts,
a small banner in the top left corner
will appear and it will cycle through
each alert for ~1 second (if there is
more than one background alert limit
exceeded).
All alerts must be configured
for each individual iDash 1.8.
9.1 Displayed Gauge
Alerts
In the Displayed "
Alerts
" menu, the
parameter list will be the same as the
Gauge Selection
menu. To change the
parameters of the Displayed "
Alerts
,"
the parameters must be changed from
the
Gauge Selection
menu. See
"Parameter Selection" on page
30
for directions.
If a parameter is already
enabled and set up as a background
alert, its settings will transfer to a
displayed gauge alert.
To enable and configure gauge
alerts:
1.
Select "
Alerts
" from the main
"
MENU
." See
Figure 9-1, A.
2.
Select a "
Field #
" with the
parameter of interest.
See
Figure 9-1, A.
3.
Select "
Alert High Enable
" and/or
"
Alert Low Enable
" to turn "
On
" or
"
Off
" the alert. See
Figure 9-1, B
&
C.
4.
Select
"Alert High"
and/or
"Alert
Low"
to adjust the alert activation
point value. See
Figure 9-1, C.
5.
Scroll
UP
or
DOWN
to adjust the
activation point.
6.
Hold
SELECT
to save the value and
return to the
Gauge Screen
or return
to the Displayed "
Alerts
" menu to
configure other alerts.
SECTION: 9
ALERTS
A
B
C
D
E
Figure 9-1


