


Once connected to BeoMaster 5, it takes the
system up to 20 seconds to start up and be
ready for use.*
1
Make basic settings
Follow the onscreen
instructions
Activate a BeoSound 5
source
Connect BeoMaster 5 to the
mains supply
Set up your music system
Settings
You can change all settings by following the instructions in the section
‘Advanced use’.
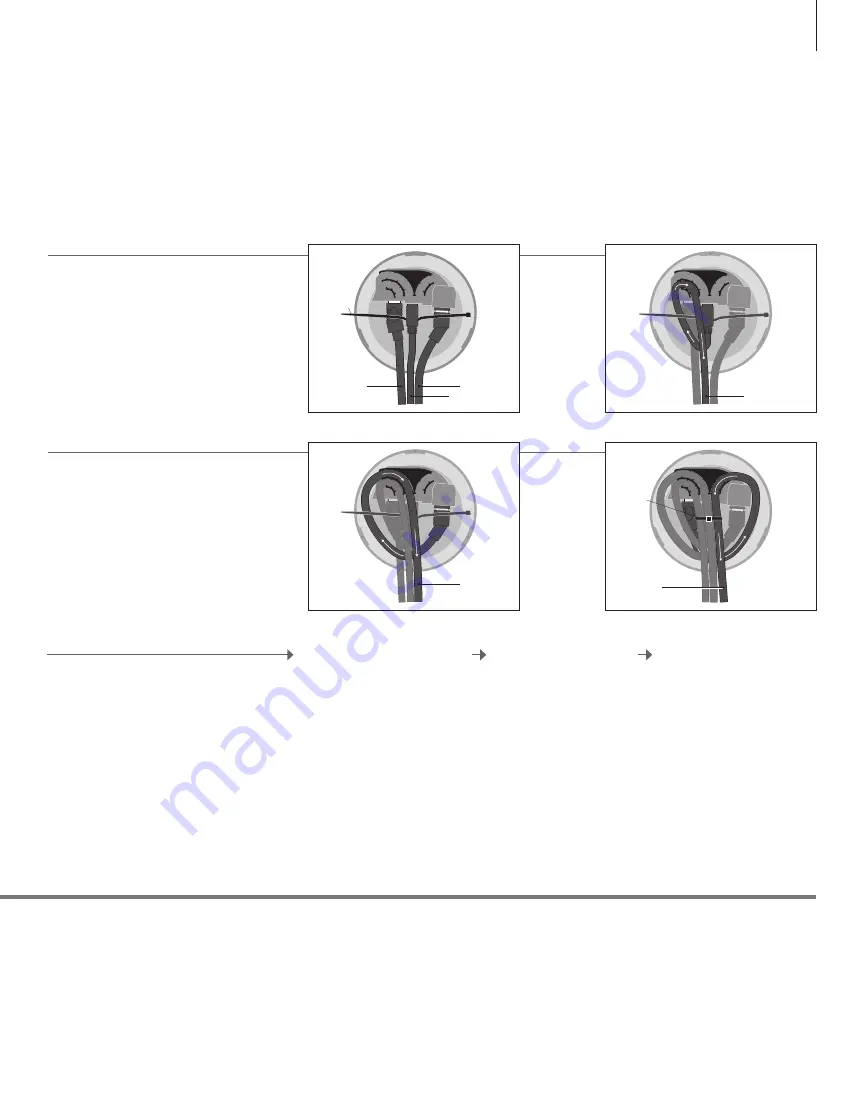
Secure the cables …
1.
Insert the cables (VIDEO, USB and POWER) into
the corresponding sockets in the base of the music
system. Note: Place a cable binder behind the USB
plug
(A)
.
2.
Run the USB cable through the cable holder.
3.
Run the POWER cable under the USB cable and
over the VIDEO cable, and then through the cable
holder.
4.
Run the VIDEO cable under the USB and POWER
cables, and then through the cable holder. Finally,
to secure the cables, tighten the cable binder
(A)
.
…
*
1
NOTE! See the BeoMaster Guide for information
about the connections.
The music system can only be switched off
completely by disconnecting the BeoMaster from
the mains.
VIDEO
POWER
USB
A
USB
POWER
VIDEO
A
17


