


Set up your music system
Light partition walls
If you intend to hang the music system on a gypsum wall (also known as dry wall or wall board), the wall
bracket must be fastened to a vertical stud. Use one lag screw (5 mm – 0.2"), which penetrates the
gypsum, and is screwed a minimum of 25 mm (1") into a vertical stud. For stability, use two additional
screws of a type intended for gypsum walls. Mounting was evaluated for use on a drywall surface.
Information
The music system must be placed on a wall, or on one of the optional accessories.
This Guide describes how to place the music system on a wall – using the standard
wall bracket.
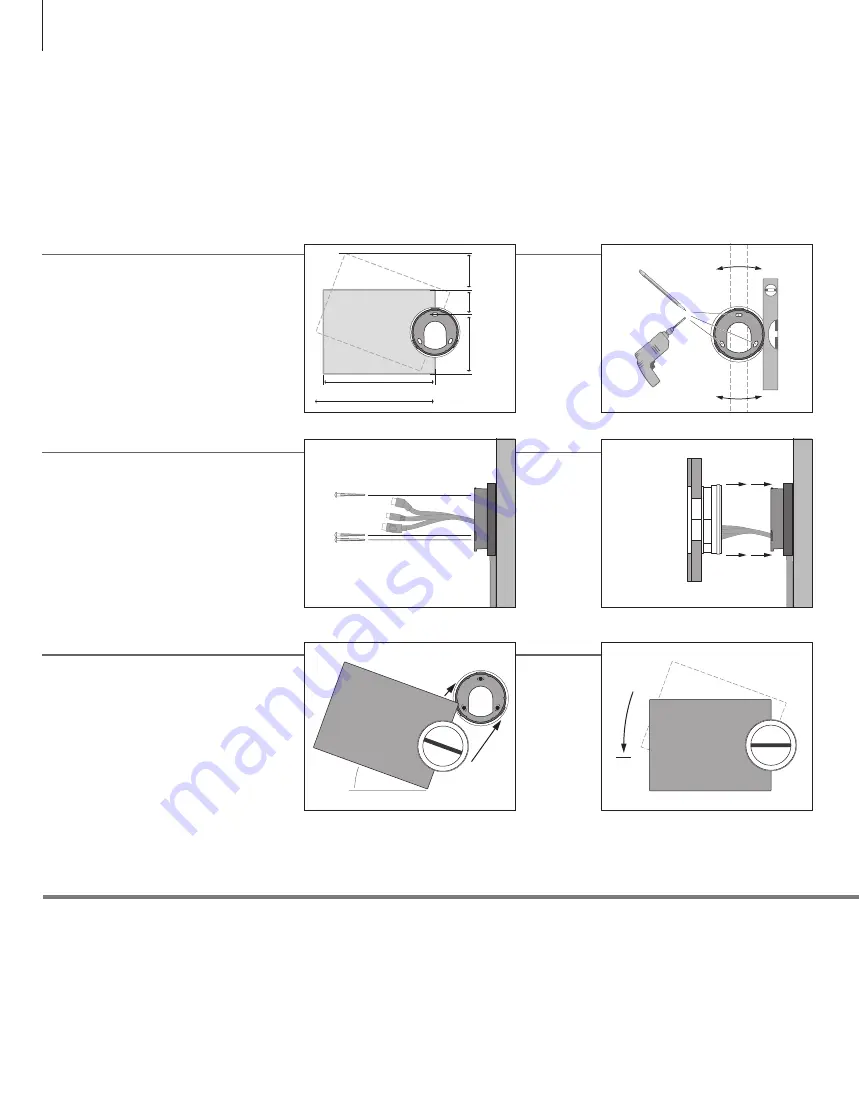
Place the wall bracket
Fasten the wall bracket
Use the correct size and type of screws and wall
plugs – taking into account the construction and
condition of the wall. Use three screws/fasteners
with a minimum load rating of 3.5 kg (8 lbs.).
Insert the cables as described on the next page,
before you fasten the music system.
Fasten the music system
Align and position the music system on the wall
bracket, and then turn the music system gently as
far as it will go.
Find the correct place for the music system, before
mounting it on the wall.
Use the wall bracket and spacer as a template to
mark up where to drill the holes.
80 mm
3.15"
100 mm
4"
140 mm
5.5"
260 mm – 10.24"
275 mm – 10.83"
1
~
20°
2
16


