24
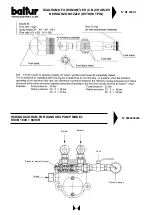
Subsequently, check the quantity of gas delivered by reading the meter. See Chapter “Reading the Meter”.
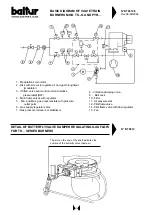
If necessary, correct the gas delivery by operating on the screws of the modulation disk which commends the gas
delivery valve. Then control combustion with the appropriate instruments. For a correct air/gas ratio, the percentage
of Carbon Dioxide (CO
2
) should increase together with the increase in delivery. As an indication, for methane gas,
the percentage should be from at least 8% at minimum burner delivery to an optimum value of 10% for maximum
delivery. We advise against exceeding the value of 10% to avoid operating with a rather limited excess of air which
could cause (variation in atmospheric pressure, presence of dust particles in fan’s air ducts) a considerable amount
of Carbon Monoxide (CO). It is indispensable to check, with the appropriate instruments, that the Carbon Monoxide
(CO) present in the smoke does not exceed the maximum level permitted of 0,1%.
13) After having regulated at “minimum”, put the modulation switches in the “MAN” (manual) and “MAX” (maximum)
positions.
14) The modulation servomotor starts up. Wait until the disk on which the regulating screws have been fitted, has
reached an angle of about 12° (this corresponds to the space taken up by three screws), and then stop modulation
and return the switch to the “O” position. Carry out a visual control of the flame and proceed, if necessary, with
regulating the gas and air delivery by operating the adjustable screws of the modulation disk.
The operation described above should be repeated progressively (by moving forward the disk about 12° at a time)
and modifying every time, if necessary, the fuel/air delivery during the whole modulation run. Make sure that the
increase in fuel delivery occurs gradually and that maximum delivery is reached at the end of the modulation run.
This is necessary in order to ensure that the modulation functions with good graduality. The position of the screws
that commend the fuel may need to be modified in order to obtain the graduality required.
15) With the burner operating at maximum delivery required for the boiler, check combustion with the appropriate
instruments and modify, if necessary, the previous regulation carried out after a visual control only (CO
2
max. = 10
% - CO max. = 0,1 %).
16) We recommend controlling the combustion with the appropriate instruments and, if necessary, modify the previous
regulation carried out, after a visual control only, also in a few intermediate points of the modulation run.
17) Check that modulation functions automatically by putting the AUT - O - MAN switch in the “AUT” position and
MIN - O - MAX switch in the “O” position. In this way, modulation is activated exclusively by the automatic commend
of the boiler’s probe. Normally it is not necessary to alter the internal regulations of the Potentiality Regulator
RWF ..., (See instructions relative).
18) The air pressure switch has the job of bringing the control box to a safety shut down if the air pressure is not at the
correct value. Therefore, the air pressure switch must be regulated in such a way as to intervene by closing the
contact (foreseen to be closed while working) when the air pressure in the burner has reached a sufficient level.
The pressure switch is self-controlled and therefore it must close the contact in the burner); if it does not, the
control box will not be inserted (the burner remains at a standstill).
It must be specified that if the contact is not closed during working (insufficient air pressure), the control box will
carry out its cycle, but the ignition transformer will not be inserted and the gas pilot valves will not open.
Consequently, the burner will go to “shut down”. Check that the air pressure switch functions properly with burner
at minimum delivery, increase the regulating value until it reaches intervention point and the burner should go to
shut down. To unblock the burner, press the special pushbutton and return the pressure switch regulator to a
sufficient value in order to measure the air pressure existing during the pre-ventilation phase.
19) The pressure switches which control the gas pressure (minimum and maximum) have the job of stopping the
burner functioning when the gas pressure is not within the values specified. From the specific functions of the
pressure switches, it is evident that the pressure switch which controls the minimum pressure must make use of
the contact, which is closed, when it measures a pressure which exceeds that at which it has been set.
The maximum pressure switch must make use of the contact, which is closed, when it measures a pressure
below that at which it has been set. The minimum and maximum gas pressure switches should be regulated
during the burner’s general inspection and should be in function with the pressure found each time. The pressure
switches have been electrically connected in series and therefore the intervention (by this we mean the opening
of the circuit) of any one of the gas pressure switches when the burner is operating (flame lit) determines the
immediate arrest of the burner. During the burner’s general inspection, check the correct functioning of the pressure
switches. By operating the respective regulating devices, it is possible to control the pressure switch’s intervention
(opening of circuit) which causes the burner’s arrest.
20) Check the efficiency of the flame detector, the UV Cell, by sliding the wire out of its seat on the burner and verify
the “shut down”.
21) Check the efficiency of the boiler thermostats and pressure switches (this should result in the burner coming to a
standstill).
Содержание TS 0 GN
Страница 2: ......
Страница 47: ......
Страница 48: ......
Страница 49: ......
Страница 50: ......
Страница 51: ......
Страница 52: ......
Страница 53: ......
Страница 54: ......
Страница 55: ......
Страница 56: ......
Страница 57: ......
Страница 58: ......
Страница 59: ......
Страница 60: ......
Страница 61: ......
Страница 62: ......
Страница 63: ......
Страница 64: ......
Страница 65: ......
Страница 66: ......
Страница 67: ......
Страница 68: ......
Страница 69: ......
Страница 70: ......
Страница 71: ......
Страница 72: ......
Страница 73: ......
Страница 74: ......
Страница 75: ......
Страница 76: ......
Страница 77: ......
Страница 78: ......
Страница 79: ......
Страница 80: ......
Страница 81: ......
Страница 82: ......
Страница 83: ......
Страница 84: ......
Страница 85: ......
Страница 86: ......
Страница 87: ......
Страница 88: ......
Страница 89: ......
Страница 90: ......
Страница 91: ......
Страница 92: ......
Страница 93: ......
Страница 94: ......
Страница 95: ......


