44
5)
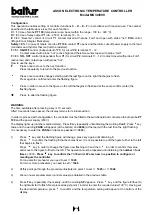
It is now necessary to set value SP.2. Press F key repeatedly until wording Par appears. Press
8
key to
confirm and the wording SP.2 will appear. Proceed as per point 1 in order to set value given in the table for
SP.2 = 110 °C.
6)
Press F key and the wording Pb will appear. Proceed as per point 1 in order to set table value = 6. Press
8
to confirm this value and the wording t.i will appear.
7)
Proceed as previously described in order to set value t.i = 4 as per table. Press
8
to confirm this value
and move to t.d.
8)
Proceed as previously described in order to set value t.d. = 0.8 as per table. Press
8
to confirm this value
and move to t.c.
9)
Proceed as previously described in order to set value t.c. = 10 as per table. Press
8
to confirm this value
and move to Yh.
10)
Proceed as previously described in order to set value Yh = 100 as per table. Confirm this value by pressing
8
and the display will return to Pb.
11)
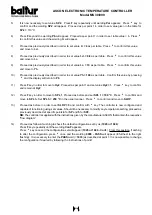
Press F key in order to move to Hy2. Proceed as per point 1 and set value Hy2 = 1. Press
8
key to confirm
and remain at Hy2.
12)
Press F key in order to move to SPL 1. Proceed as before and set SPL 1 = 100 °C. Press
8
to confirm and
move to SPL h. Set SPL h = 250 °C in the usual manner. Press
8
to confirm and move to SLOP.
13)
Proceed as before in order to set SLOP = 0 and confirm with
8
key. The controller is now configured and
capable of functioning using set values. Should it be necessary to modify any temperature setting, proceed as
previously described at specific points 4 for SP and 5 for SP2.
NB: The controller is supplied with the instructions given by the manufacturer ASCON that contain the respective
“flow diagram”.
14)
Proceed as follows if wishing to check the default configuration set by us (1045 or 1046):
Press F key repeatedly until the wording ConF appears.
Press
8
key once and the configuration set will appear (1045 or 1046 - Conf.). From this position, if wishing
to alter the configuration press
8
once and the wording 9999 - PASS will appear (9 furthest to the right
flashing). It is necessary to enter the PASSword (= 3333) as described at point 1. It is now possible to change
the configuration if desired by following the instructions of point 1.
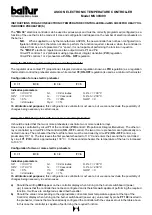
ASCON ELECTRONIC TEMPERATURE CONTROLLER
Model MS 30/099
Содержание TS 0 GN
Страница 2: ......
Страница 47: ......
Страница 48: ......
Страница 49: ......
Страница 50: ......
Страница 51: ......
Страница 52: ......
Страница 53: ......
Страница 54: ......
Страница 55: ......
Страница 56: ......
Страница 57: ......
Страница 58: ......
Страница 59: ......
Страница 60: ......
Страница 61: ......
Страница 62: ......
Страница 63: ......
Страница 64: ......
Страница 65: ......
Страница 66: ......
Страница 67: ......
Страница 68: ......
Страница 69: ......
Страница 70: ......
Страница 71: ......
Страница 72: ......
Страница 73: ......
Страница 74: ......
Страница 75: ......
Страница 76: ......
Страница 77: ......
Страница 78: ......
Страница 79: ......
Страница 80: ......
Страница 81: ......
Страница 82: ......
Страница 83: ......
Страница 84: ......
Страница 85: ......
Страница 86: ......
Страница 87: ......
Страница 88: ......
Страница 89: ......
Страница 90: ......
Страница 91: ......
Страница 92: ......
Страница 93: ......
Страница 94: ......
Страница 95: ......

