24
24
TABLE INSERT
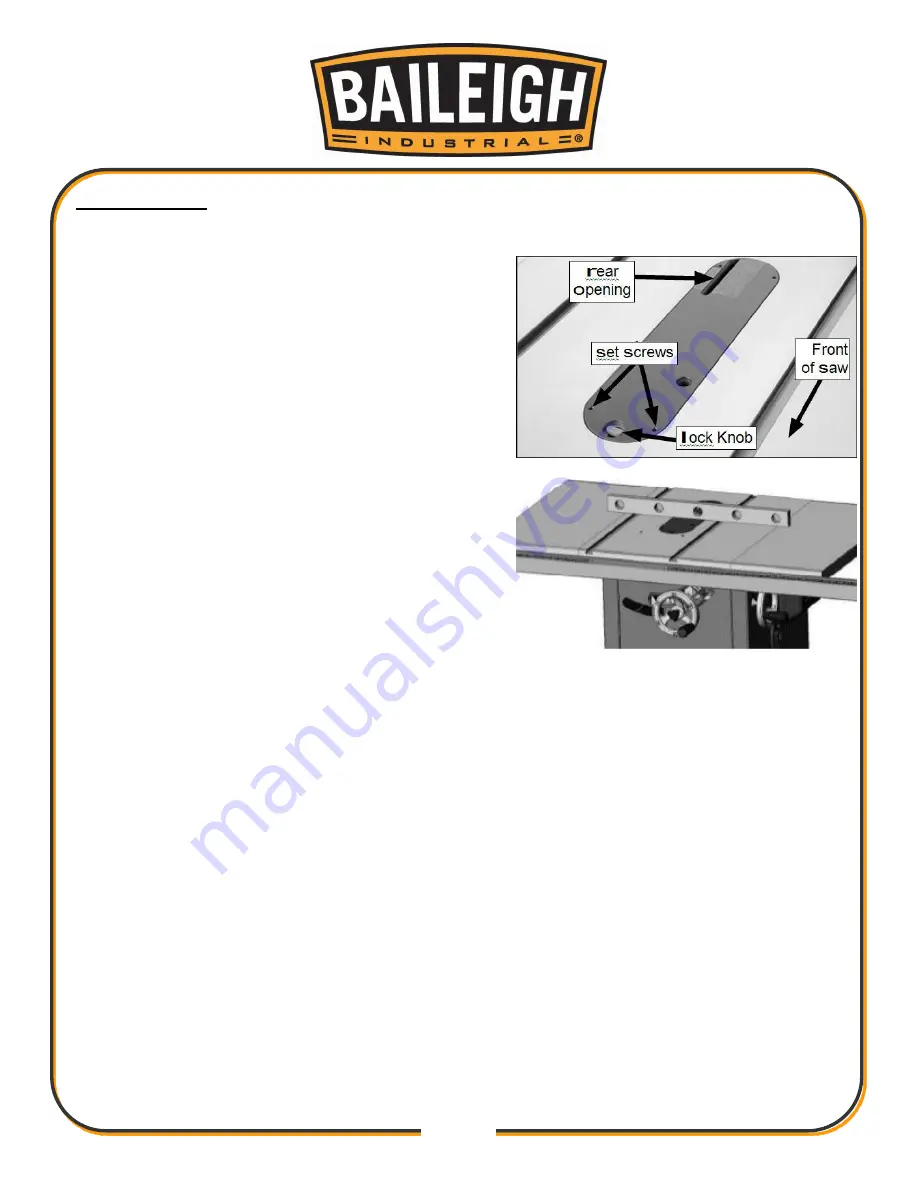
To install the zero clearance insert:
1. Disconnect and lockout power to the saw!
2. Lower the blade to the lowest position below the
table surface.
3. Verify that the blade is properly installed and
secure.
4. Install the table insert.
5. Adjust the table insert set screws with a 2.5mm
hex wrench to make sure the insert is flush with
the table then turn the lock knob to secure the
insert.
6. Connect power to the saw and turn the saw ON.
7. Set the blade angle at 90° then slowly raise the
blade to the maximum height that will be used
during normal operations.
8. Stop the saw and disconnect and lockout power
to the saw.
9. Use a straightedge to determine whether the insert is level with the table top.
10. Turn each of the 5 adjusting screws with the allen wrench until level at all positions.
Содержание TS-1044H
Страница 58: ...55 55 TABLE SAW PARTS DIAGRAMS...
Страница 59: ...56 56...
Страница 60: ...57 57...
Страница 61: ...58 58...


