21
21
INSTALL BLADE GUARD
The blade guard assembly that consists of the clear shield, the spreader and the anti-kickback
pawls on each side. Each has important safety functions during the operation of the saw.
1. Disconnect and lockout power to the saw!
2. Remover the table blade insert.
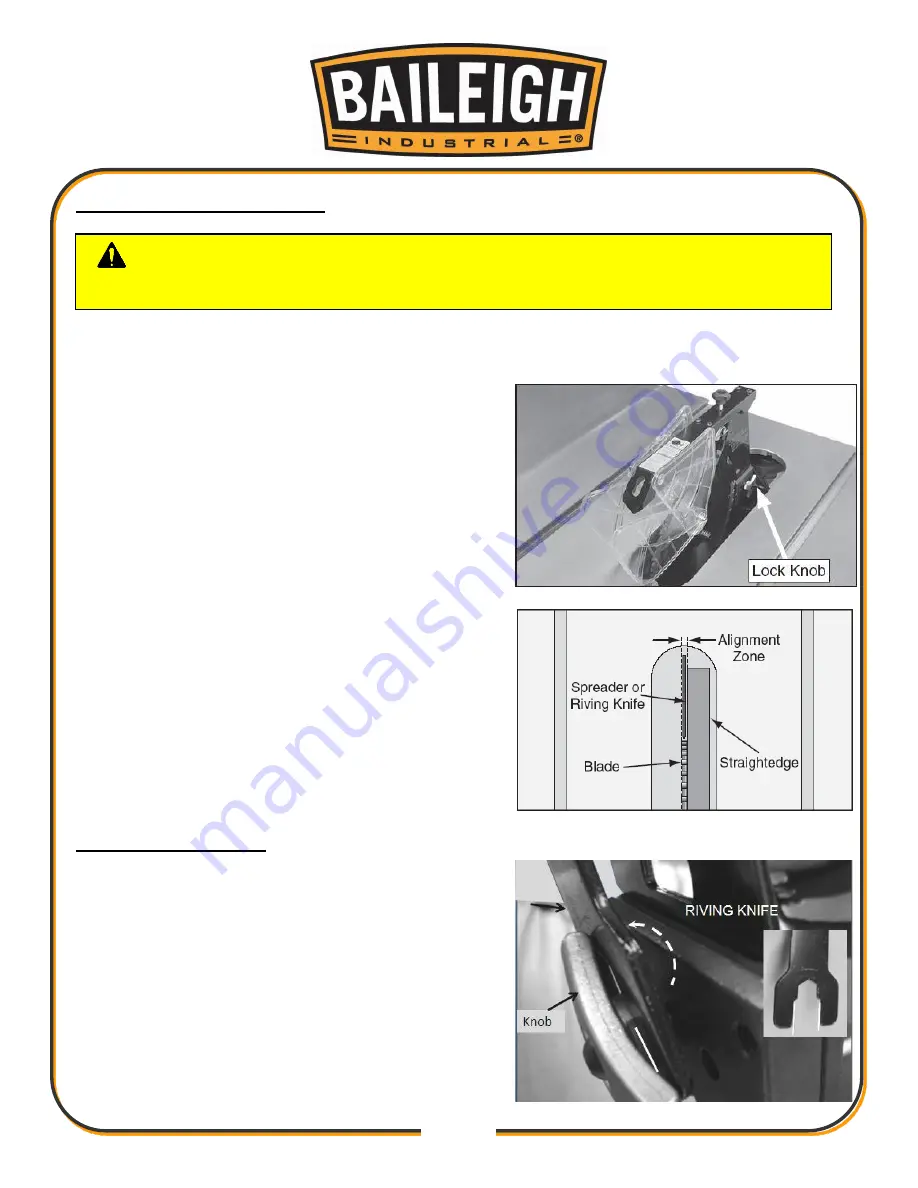
3. Insert the spreader into the bracket slot and
tighten the lock knob shown to secure the
spreader.
4. Tug the spreader up to verify it is locked.
5. Lift the blade guard cover just enough to slide the
table insert into the table slot over the blade, and
then secure the insert with the knob on the front
of the insert. It should swing up high enough to
accommodate the workpiece.
6. Lifting up the right spreader pawl.
7. Place a straightedge against the blade and the
spreader. When properly aligned the
spreader/riving knife will be in the "alignment
zone," shown and will be parallel with the blade.
LOOSEN LOCK KNOB
If you could not loosen the knob by hand, used the
arbor wrench on the knob inside then turn the arbor
wrench counter-clockwise to loosen the knob.
CAUTION:
After changing a saw blade, always check that the Riving
knife or Blade Guard is correctly set!
Содержание TS-1044H
Страница 58: ...55 55 TABLE SAW PARTS DIAGRAMS...
Страница 59: ...56 56...
Страница 60: ...57 57...
Страница 61: ...58 58...


